1. 打开VBOX(Oracle VM VirtualBox),启动Ubuntu
2. 点击"设备>安装增强功能"
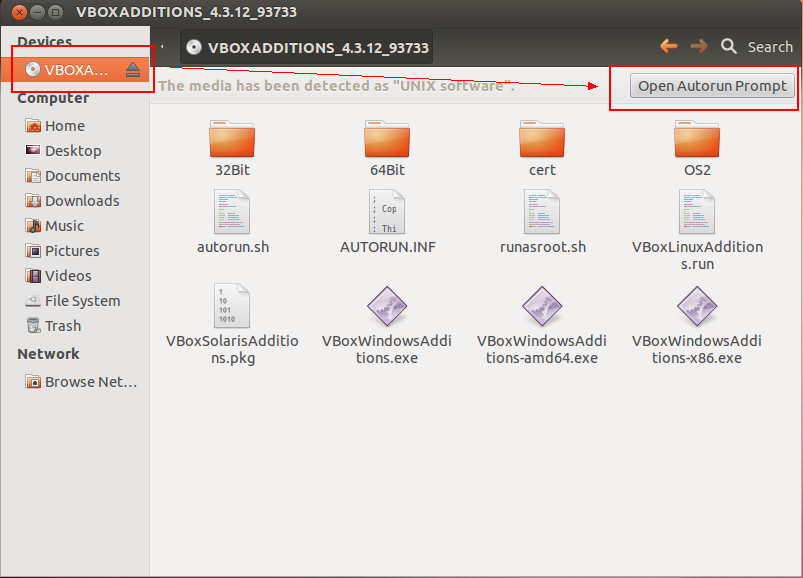
3. 进入Ubuntu打开文件管理器,如下图

4. 输入root用户的密码,等待安装完毕后(出现什么Press Return to close this window),按ENTER完成安装
5. 重启Ubuntu,现在你可以看到可以设置高于1024:768的分辨率了,但都是4:3的分辨率,没有1366:768(16:9)的分辨率
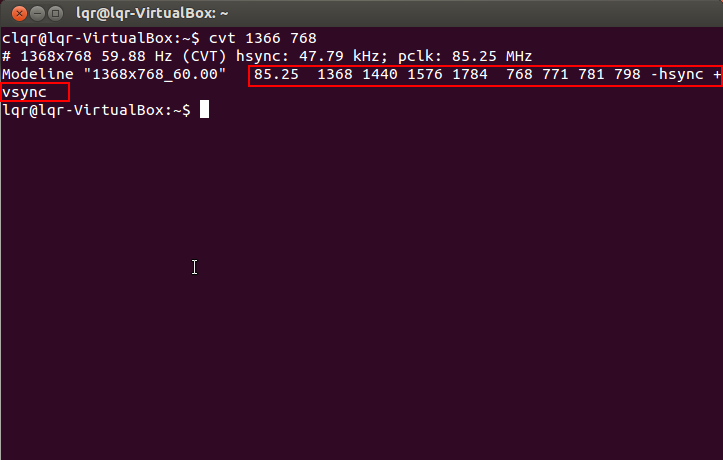
6. 打开Terminal,输入cvt 1366 768,将红框中的参数拷贝下来保存好,如图

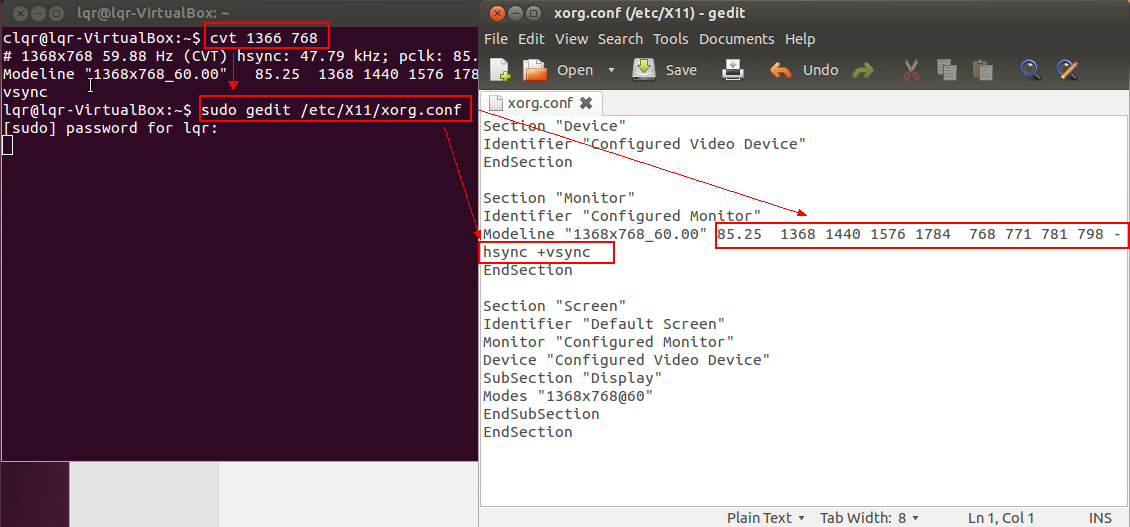
7. 输入sudo gedit /etc/X11/xorg.conf,键入如下内容,如图,注意其中gedit里红框划出来的内容就是刚才我们保存的参数,不同的显示器/显卡这些参数不一定全一样,所以一定要自己用命令读取,不能直接照抄这里的

文件内容:
Section "Device"
Identifier "Configured Video Device"
EndSection

Section "Monitor"
Identifier "Configured Monitor"
Modeline "1368x768_60.00" 85.25  1368 1440 1576 1784  768 771 781 798 -hsync +vsync
EndSection

Section "Screen"
Identifier "Default Screen"
Monitor "Configured Monitor"
Device "Configured Video Device"
SubSection "Display"
Modes "1368x768@60"
EndSubSection
EndSection
8. 保存该文件,重启Ubuntu,好,大功告成,有1366x768的分辨率了,注意上述文件的开头一定不能有空格回车之类的white space characters
参考资料:
http://jingyan.baidu.com/article/e9fb46e19605187520f76677.html
http://www.blogjava.net/shenh062326/archive/2012/05/24/379026.html