https://developer.mozilla.org/zh-CN/docs/Web/API/Canvas_API/Tutorial
canvas 代码提示 /** @type {HTMLCanvasElement} */ 在获取dom之前加此注释 可提示ctx的方法
1.绘制圆(圆弧)https://www.bilibili.com/video/BV1g7411P7ps?p=9
<canvas id="tutorial" width="600" height="400"></canvas> //canvas的宽和高 必须设置标签属性 不用css样式设置
 1  /** @type {HTMLCanvasElement} */
 2       var canvas = document.getElementById("tutorial");
 3       var ctx = canvas.getContext("2d"); //获得画笔
 4       //绘制圆形
 5       ctx.beginPath();//开始路径
 6       ctx.arc(250, 150, 100, Math.PI * 2, false);
 7       /*
 8         (x,y,r,start,deg,boolean)
 9         x:圆心横坐标
10         y:圆心纵坐标
11         r:半径
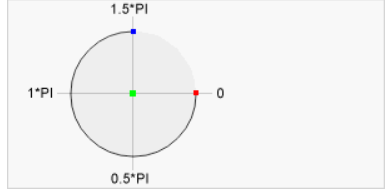
12         start:开始的角度位置  默认为0  表示水平向右
13         deg:技术角度的位置  π
14         boolean:是否逆时针   false顺时针  true逆时针
15
16       */
17       ctx.closePath();//闭合路径
18       ctx.fillStyle = 'blue'//设置填充色为蓝色
19       ctx.fill();//填充颜色  默认黑色
写固定方法:
    pie(x, y, r, deg, boolean, bgc, scolor) {
      var canvas = document.getElementById("tutorial");
      var ctx = canvas.getContext("2d"); //获得画笔
      ctx.beginPath(); //开始路径
      ctx.arc(x, y, r, Math.PI * 2, boolean);
      ctx.fillStyle = bgc; //设置填充色为蓝色
      ctx.fill();
      ctx.strokeStyle = scolor; //设置描边色
      ctx.lineWidth = 6;
      ctx.stroke();
      ctx.closePath(); //闭合路径
    },
调用:
this.pie(250, 150, 100, Math.PI * 2, false, "#222", "blue");
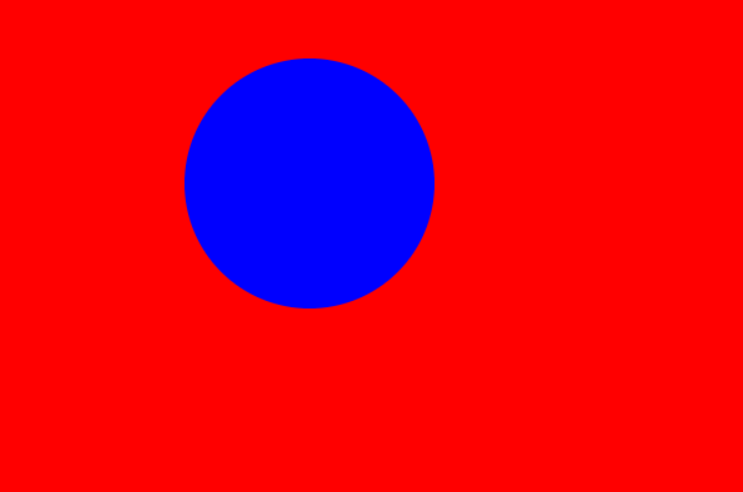
角度如图所示。 代码效果图:

2.绘制线 https://www.bilibili.com/video/BV1g7411P7ps?p=10
 1       /** @type {HTMLCanvasElement} */
 2       var canvas = document.getElementById("tutorial");
 3       var ctx = canvas.getContext("2d"); //获得画笔
 4       // 画线  lineTo
 5       // 移动到某个位置 moveTo
 6       //描边 stroke   颜色strokeStyle
 7       //填充文本 fillText 字体属性 font
 8
 9       ctx.beginPath(); //开始路径
10
11       ctx.moveTo(0, 0); //移动到(0,0)
12       /*
13         moveTo(x,y)
14         x:要移动到坐标的x坐标值
15         y:要移动到坐标的y坐标值
16       */
17       ctx.lineTo(600, 400); //画线  初始(0,0)结束(600,400)
18       ctx.strokeStyle = "blue"; //设置描边色
19       ctx.stroke(); //描边
20       ctx.closePath(); //闭合路径
21       /*
22         fillText(content,x,y)  填充文本
23         content:内容
24         x:第一个字左下角X坐标
25         y:第一个字左下角y坐标
26
27       */
28       ctx.fillText('一纸辛酸泪',50,50)
29       ctx.font = '30px 宋体'
绘制线方法封装
      //sx,sy 起始位置横纵坐标
      //ex,ey 结束位置横纵坐标
      function line(sx, sy, ex, ey) {
        ctx.beginPath(); //开始路径

        //  移动到某点
        ctx.moveTo(sx, sy);
        // 画线
        ctx.lineTo(ex, ey);
        //描边
        ctx.stroke();
        ctx.closePath(); //闭合路径
      }

