ElasticSearch有一个叫做river的插件式模块,可以将外部数据源中的数据导入elasticsearch并在上面建立索引。River在集群上是单例模式的,它被自动分配到一个节点上,当这个节点挂掉后,river会被自动分配到另外的一个节点上。目前支持的数据源包括:Wikipedia, MongoDB, CouchDB, RabbitMQ, RSS, Sofa, JDBC, FileSystem,Dropbox等。River有一些指定的规范,依照这些规范可以开发适合于自己的应用数据的插件。
1、安装MongoDB的River:https://github.com/richardwilly98/elasticsearch-river-mongodb、http://blog.csdn.net/huwei2003/article/details/40407555
git clone https://github.com/richardwilly98/elasticsearch-river-mongodb.git
cd elasticsearch-river-mongodb

git tag
git checkout elasticsearch-river-mongodb-2.0.5

mvn clean
mvn compile
mvn package

vim install-local.sh    --把plugin --remove 改成 plugin remove;注释掉最后一行sudo命令,因为没有plugin命令的url参数了。
./install-local.sh
cd target/releases/


cd /usr/share/elasticsearch/plugins/

mkdir mongodb

cd mongodb

mv /data/elasticsearch-river-mongodb/target/releases/elasticsearch-river-mongodb-2.0.5.zip ./

cd ../head/

cp plugin-descriptor.properties ../mongodb/

cd -

vim plugin-descriptor.properties     --修改description,name的信息为mongo

mkdir _site

cp -r /data/elasticsearch-river-mongodb/src/site/* /usr/share/elasticsearch/plugins/mongodb/_site/   --复制mongo网站目录到plugins/mongodb/_site

cd _site

service elasticsearch restart


2、浏览器输入:http://192.168.7.131:9200/_plugin/mongodb/

3、配置Mongo&ElasticSearch数据互通:https://github.com/richardwilly98/elasticsearch-river-mongodb/wiki、http://blog.csdn.net/huwei2003/article/details/40407555
创建river并索引的标准模版如下:
$ curl -XPUT "localhost:9200/_river/${es.river.name}/_meta" -d '
{
  "type": "mongodb",
  "mongodb": {
    "servers":
    [
      { "host": ${mongo.instance1.host}, "port": ${mongo.instance1.port} },
      { "host": ${mongo.instance2.host}, "port": ${mongo.instance2.port} }
    ],
    "options": {
      "secondary_read_preference" : true,
      "drop_collection": ${mongo.drop.collection},
      "exclude_fields": ${mongo.exclude.fields},
      "include_fields": ${mongo.include.fields},
      "include_collection": ${mongo.include.collection},
      "import_all_collections": ${mongo.import.all.collections},
      "initial_timestamp": {
        "script_type": ${mongo.initial.timestamp.script.type},
        "script": ${mongo.initial.timestamp.script}
      },
      "skip_initial_import" : ${mongo.skip.initial.import},
      "store_statistics" : ${mongo.store.statistics},
    },
    "credentials":
    [
      { "db": "local", "user": ${mongo.local.user}, "password": ${mongo.local.password} },
      { "db": "admin", "user": ${mongo.db.user}, "password": ${mongo.db.password} }
    ],
    "db": ${mongo.db.name},
    "collection": ${mongo.collection.name},
    "gridfs": ${mongo.is.gridfs.collection},
    "filter": ${mongo.filter}
  },
  "index": {
    "name": ${es.index.name},
    "throttle_size": ${es.throttle.size},
    "bulk_size": ${es.bulk.size},
    "type": ${es.type.name}
    "bulk": {
      "actions": ${es.bulk.actions},
      "size": ${es.bulk.size},
      "concurrent_requests": ${es.bulk.concurrent.requests},
      "flush_interval": ${es.bulk.flush.interval}
    }
  }
}'
一些配置项的解释如下,具体可以查看github的wiki:
- db为同步的数据库名,
- host mongodb的ip地址(默认为localhost)
- port mongodb的端口
- collection 要同步的表名
- fields 要同步的字段名(用逗号隔开,默认全部)
- gridfs 是否是gridfs文件(如果collection是gridfs的话就设置成true)
- local_db_user local数据库的用户名(没有的话不用写)
- local_db_password local数据库的密码(没有的话不用写)
- db_user 要同步的数据库的密码(没有的话不用写)
- db_password 要同步的数据库的密码(没有的话不用写)
- index.name 要建立的索引名,最好是小写(应该是必须小写,并且索引名称必须唯一,之前不能存在,建议使用“数据库名+集合名+index”方式命名)
- index:type collection名,即该索引对应的数据集合名
- type 类型 后面是 mongodb 因为用的是 mongodb 数据库
- bulk_size 批量添加的最大数
- bulk_timeout 批量添加的超时时间
例如添加mongodb数据到elasticsearch里面:
curl -XPUT "http://ip地址:端口号/river_dbname/collectionname/_meta" -d'
{
    "type":"mongodb",
    "mongodb":{
        "servers":[
            {"host":"mongodb的ip地址","port":mongodb的访问端口},
            {"host":"mongodb的ip地址","port":mongodb的访问端口},
            {"host":"mongodb的ip地址","port":mongodb的访问端口}
        ],
        "db":"dbname",   (实际数据库名称)
        "collection":"collectionname",   (实际集合名称)
        "gridfs":false,
        "credentials":[
          { "db": "admin", "user": "user", "password": "user" }
        ],
        "options":{
            "secondary_read_preference":true   (使用副本集)
        }
    },
    "index":{
        "name":"collectionname_index",  (全部小写字母)
        "type":"collectionname"   (实际集合名称)
    }
}'
添加成功,如下图:

使用head插件观察结果:


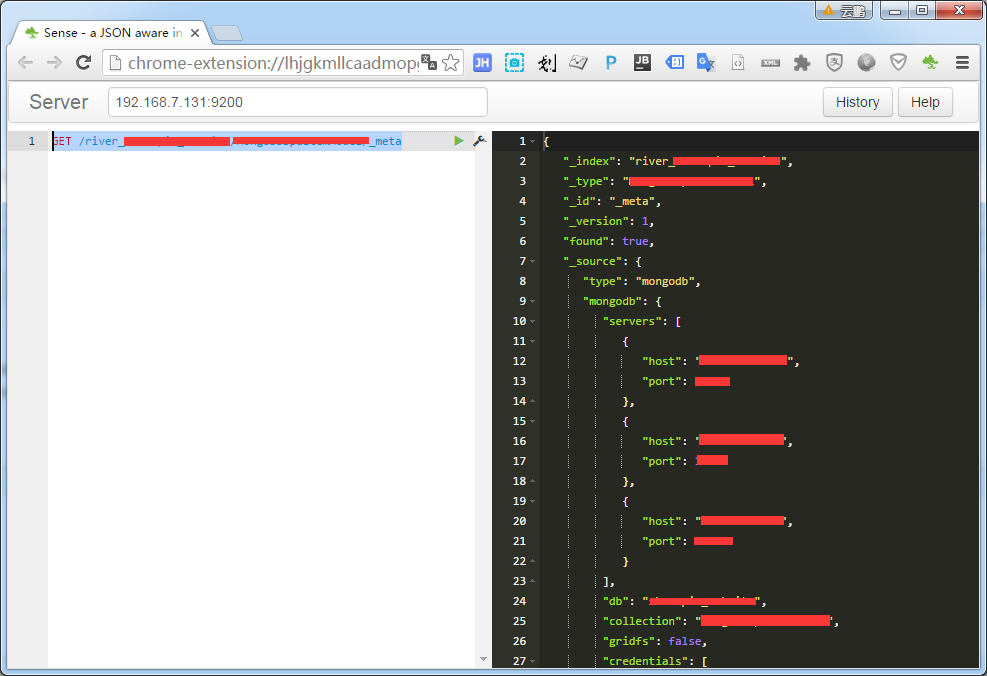
也可以通过get方式获取
GET /river_dbname/collectionname/_meta

转: