gin和gorilla结合创建websocket简单实用,引入gorilla库:
go get -u github.com/gorilla/websocket
使用了mod则更新下依赖关系:
go mod tidy
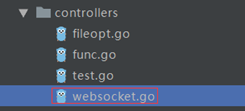
1.在controller下面新建一个websocket.go,作为实现服务端业务逻辑部分:

package controllers

import (
    "fmt"
    "github.com/gin-gonic/gin"
    "github.com/gorilla/websocket"
    "net/http"
    "time"
)

var upGrader = websocket.Upgrader{
    CheckOrigin: func(r *http.Request) bool {
        return true
    },
}

func WsHandle(c *gin.Context) {
    //升级get请求为webSocket协议
    ws, err := upGrader.Upgrade(c.Writer, c.Request, nil)
    if err != nil {
        c.Writer.Write([]byte(err.Error()))
        return
    }
    defer ws.Close()
    for {
        //读取ws中的数据
        mt, message, err := ws.ReadMessage()
        if err != nil {
            c.Writer.Write([]byte(err.Error()))
            break
        }
        fmt.Println("client message " + string(message))
        //写入ws数据
        err = ws.WriteMessage(mt, []byte(time.Now().String()))
        if err != nil {
            break
        }
        fmt.Println("system message " + time.Now().String())
    }
}
2.在router.go路由器中添加websocket连接请求操作的路由:

//websocket测试
router.GET("/wx", controllers.WsHandle)
3.在static下面创建websocket.html文件操作请求信息:

<!DOCTYPE html>
<html>
<head>
    <meta charset="utf-8">
</head>
<body>
<table>
    <tr><td valign="top" width="50%">
            <p>点击启动按钮创建websocket连接<br/>
               点击发送按钮可以发送任意消息给服务器<br/>
               点击关闭按钮断开websocket连接
            </p>
            <form>
                <button id="open">启动</button>
                <button id="close">关闭</button>
                <input id="input" type="text" value="Hello golang!">
                <button id="send">发送</button>
            </form>
        </td><td valign="top" width="50%">
            <div id="output"></div>
        </td></tr></table>
</body>
</html>
<script>
        window.addEventListener("load", function(evt) {
            var output = document.getElementById("output");
            var input = document.getElementById("input");
            var ws;
            var print = function(message) {
                var d = document.createElement("div");
                d.innerHTML = message;
                output.appendChild(d);
            };
            document.getElementById("open").onclick = function(evt) {
                if (ws) {
                    return false;
                }
                ws = new WebSocket("ws://localhost:8888/ws");
                ws.onopen = function(evt) {
                    print("连接websocket");
                }
                ws.onclose = function(evt) {
                    print("CLOSE");
                    ws = null;
                }
                ws.onmessage = function(evt) {
                    print("收到消息: " + evt.data);
                }
                ws.onerror = function(evt) {
                    print("ERROR: " + evt.data);
                }
                return false;
            };
            document.getElementById("send").onclick = function(evt) {
                if (!ws) {
                    return false;
                }
                print("发送消息: " + input.value);
                ws.send(input.value);
                return false;
            };
            document.getElementById("close").onclick = function(evt) {
                if (!ws) {
                    return false;
                }
                ws.close();
                return false;
            };
        });
</script>
4.请求操作测试:

