前言:最近公司部署的IIS项目应用池间断性停止,导致程序死掉,如下图
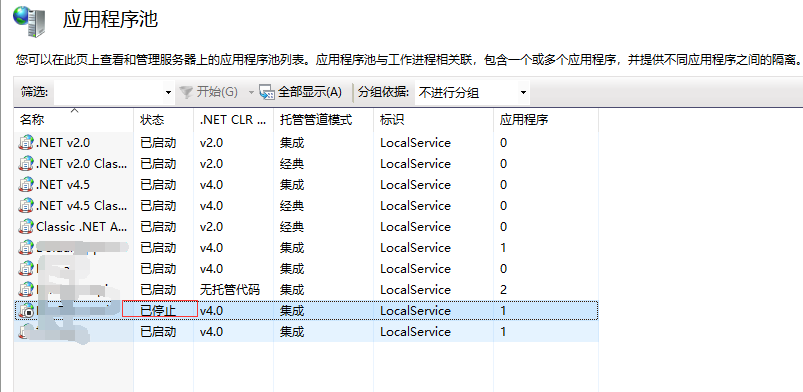
如果不能及时重启,会导致很严重的后果。所以我耗时5分钟开发了这个服务,用于监听应用程序池的应用状态并重启。
一、windows 服务
1、打开vs,新建windows服务程序(本实例使用vs 2019)。
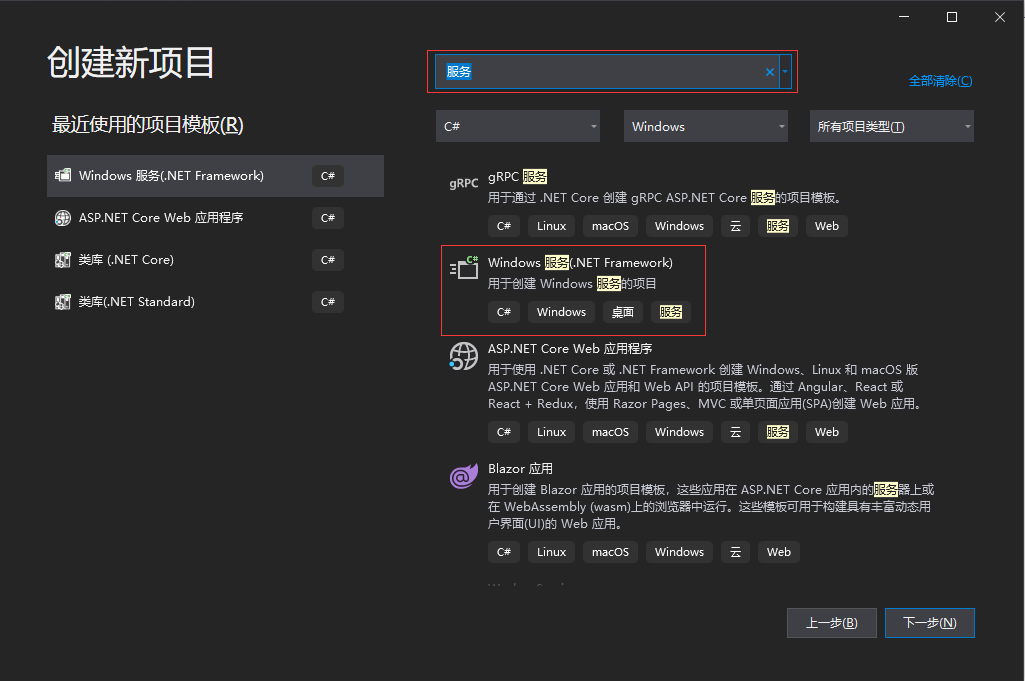
2、点击MyServices.cs[设计]界面的切换到代码视图
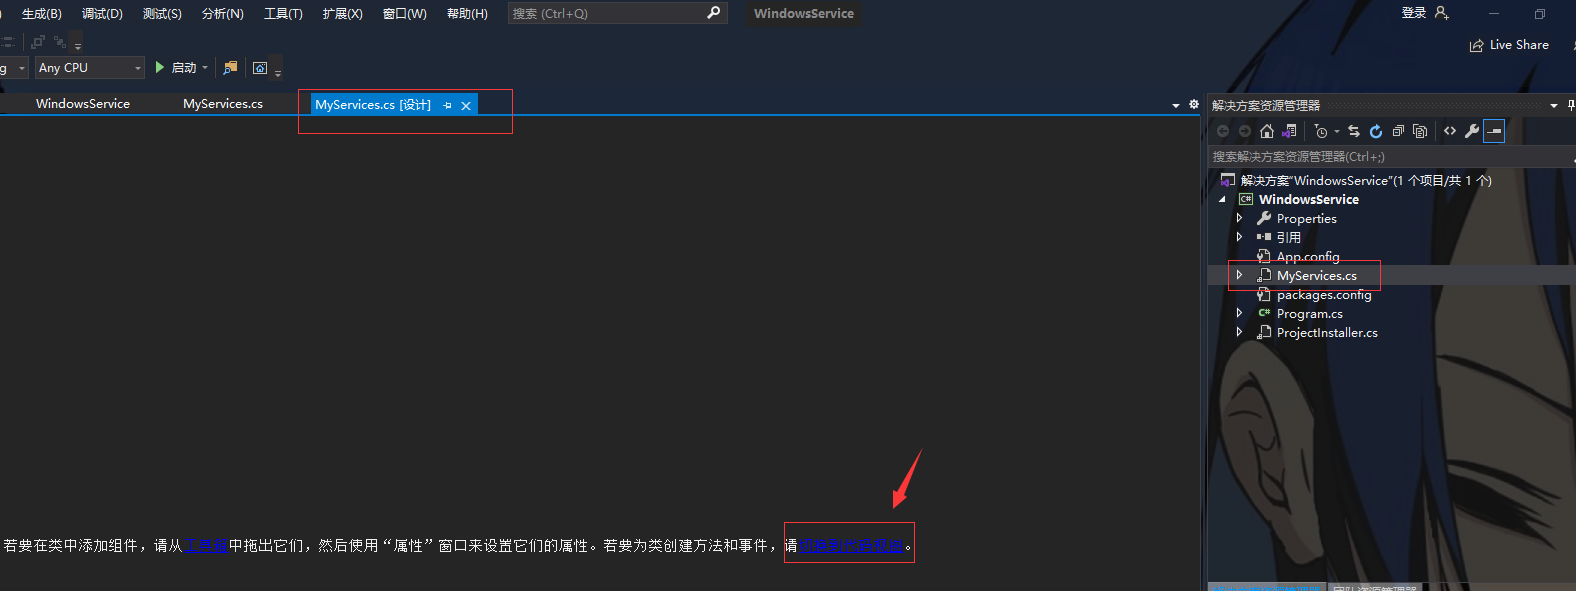
两个默认的方法OnStart和OnStop,顾名思义就是服务启动和停止的事件(自行按需写业务,其他方法请查阅官方文档)
public partial class IISRestart : ServiceBase
    {
        public IISRestart()
        {
            InitializeComponent();
        }

        protected override void OnStart(string[] args)
        {
            // TODO:  在此处添加代码以启动服务。
            var timer = new Timer(1000 * 60) { AutoReset = true, Enabled = true }; //间隔1分钟
            timer.Elapsed += timer_Elapsed;
            timer.Start();
        }

        protected override void OnStop()
        {
        }
        // 遍历应用程序池的应用,如果停止就重启
        private void timer_Elapsed(object sender, ElapsedEventArgs e)
        {
            var manager = new Microsoft.Web.Administration.ServerManager();
            System.Threading.ThreadPool.QueueUserWorkItem((state) =>
            {
                while (true)
                {
                    var pools = manager.ApplicationPools;
                    foreach (var pool in pools)
                    {
                        if (pool.State == Microsoft.Web.Administration.ObjectState.Stopped)
                            pool.Start();
                    }
                }
            });
        }
    }
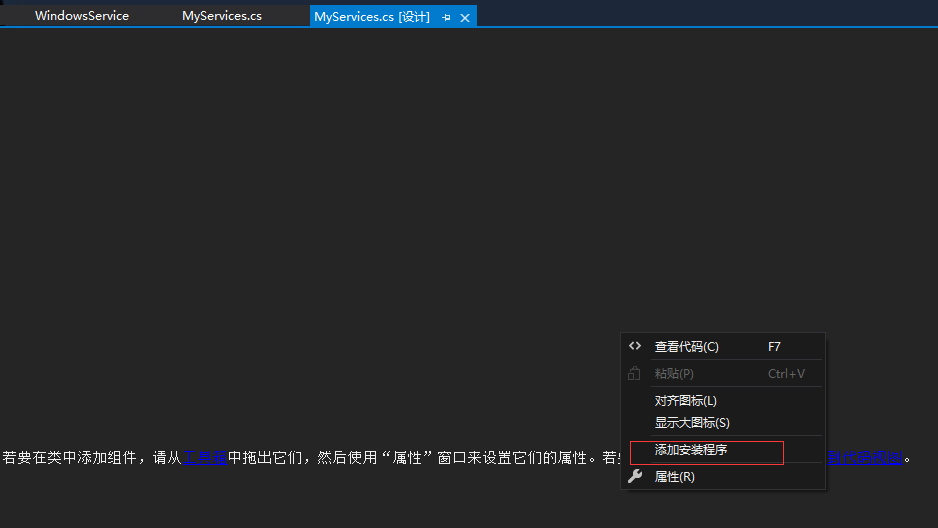
3、在MyServices.cs[设计]界面右击,选择“添加安装程序”
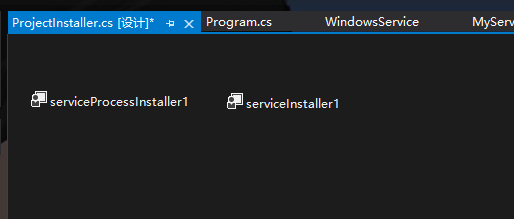
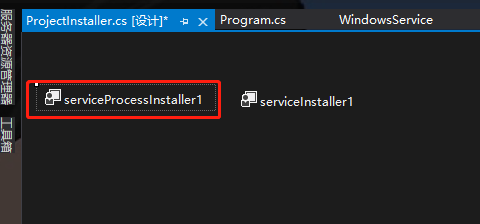
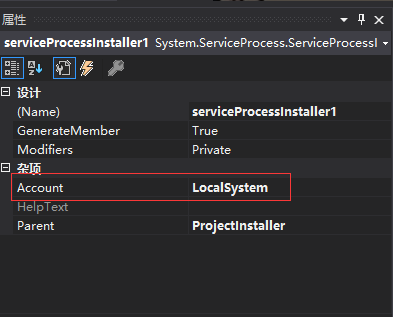
4、单击ProjiectInstall.cs文件,然后单击serviceProcessInstaller1,属性栏的"Account"按需修改,我选择的"LocalSystem",
单击serviceInstall1(如上图),属性栏的SartType按需设置,我选择的"Automatic"
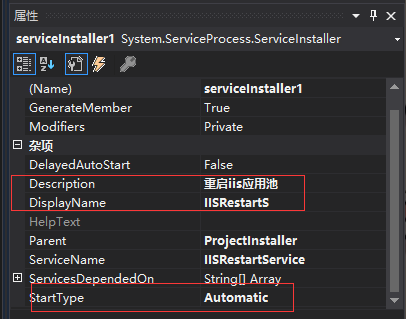
然后"Description"和"DisplayName"就是服务的名字和显示内容了

5、生成解决方案,右击项目,选择属性,在"应用程序"选项卡中把"启动对象"改为"WindowsService.Program"
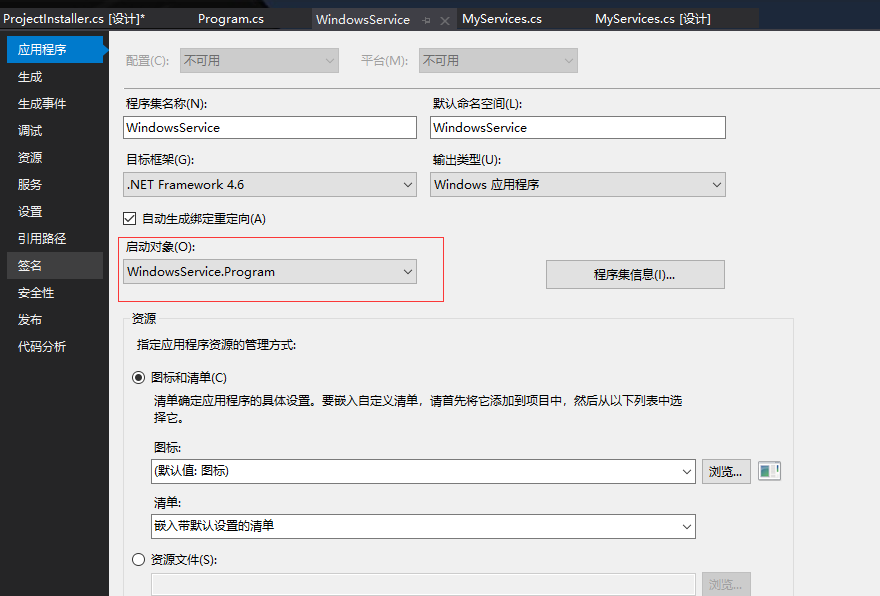
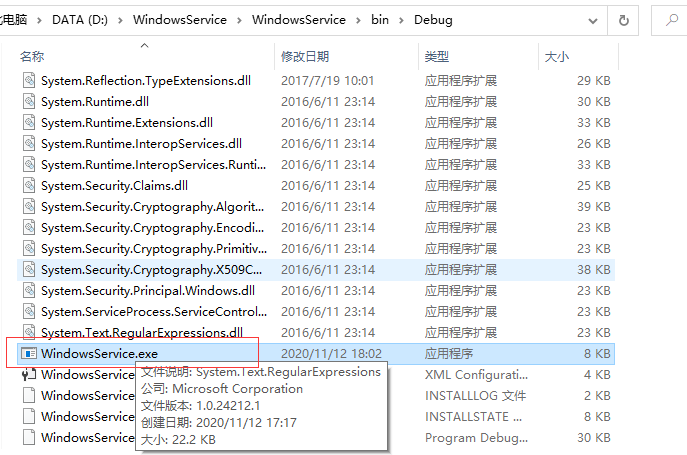
6、①安装服务,找到项目的"bindebug"路径
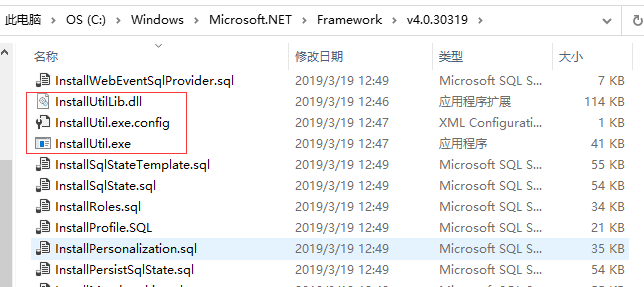
把"InstallUtil.exe"复制到debug下(框选的文件)。InstallUtil默认在"C:WindowsMicrosoft.NETFramework版本号"下
以管理员身份打开cmd。路径为debug文件夹,输入"InstallUtil 应用程序名称.exe"即可安装服务
卸载应用程序为"InstallUtil /u 应用程序名称.exe"
②程序安装
1、新建winfoirm程序,拖动4个按钮,如下图:

配置服务路径以及名称
string serviceFilePath = $"{Application.StartupPath}\服务项目.exe";
string serviceName = "服务名称";
2、按钮事件
 1        //事件:安装服务
 2         private void btn_install_Click(object sender, EventArgs e)
 3         {
 4             if (this.IsServiceExisted(serviceName)) this.UninstallService(serviceFilePath);
 5             this.InstallService(serviceFilePath);
 6         }
 7
 8         //事件:卸载服务
 9         private void btn_uninstall_Click(object sender, EventArgs e)
10         {
11             if (this.IsServiceExisted(serviceName))
12             {
13                 this.ServiceStop(serviceName);
14                 this.UninstallService(serviceFilePath);
15             }
16         }
17         //事件:启动服务
18         private void btn_start_Click(object sender, EventArgs e)
19         {
20             if (this.IsServiceExisted(serviceName)) this.ServiceStart(serviceName);
21         }
22         //事件:停止服务
23         private void btn_stop_Click(object sender, EventArgs e)
24         {
25             if (this.IsServiceExisted(serviceName)) this.ServiceStop(serviceName);
26         }
按钮业务

        //安装服务
        private void InstallService(string serviceFilePath)
        {
            using (AssemblyInstaller installer = new AssemblyInstaller())
            {
                installer.UseNewContext = true;
                installer.Path = serviceFilePath;
                IDictionary savedState = new Hashtable();
                installer.Install(savedState);
                installer.Commit(savedState);
                MessageBox.Show("安装成功");
            }
        }

        //卸载服务
        private void UninstallService(string serviceFilePath)
        {
            using (AssemblyInstaller installer = new AssemblyInstaller())
            {
                installer.UseNewContext = true;
                installer.Path = serviceFilePath;
                installer.Uninstall(null);
                MessageBox.Show("卸载成功");
            }
        }
        //启动服务
        private void ServiceStart(string serviceName)
        {
            using (ServiceController control = new ServiceController(serviceName))
            {
                if (control.Status == ServiceControllerStatus.Stopped)
                {
                    control.Start();
                    MessageBox.Show("启动成功");
                }
            }
        }

        //停止服务
        private void ServiceStop(string serviceName)
        {
            using (ServiceController control = new ServiceController(serviceName))
            {
                if (control.Status == ServiceControllerStatus.Running)
                {
                    control.Stop();
                    MessageBox.Show("停止成功");
                }
            }
        }
完结!
