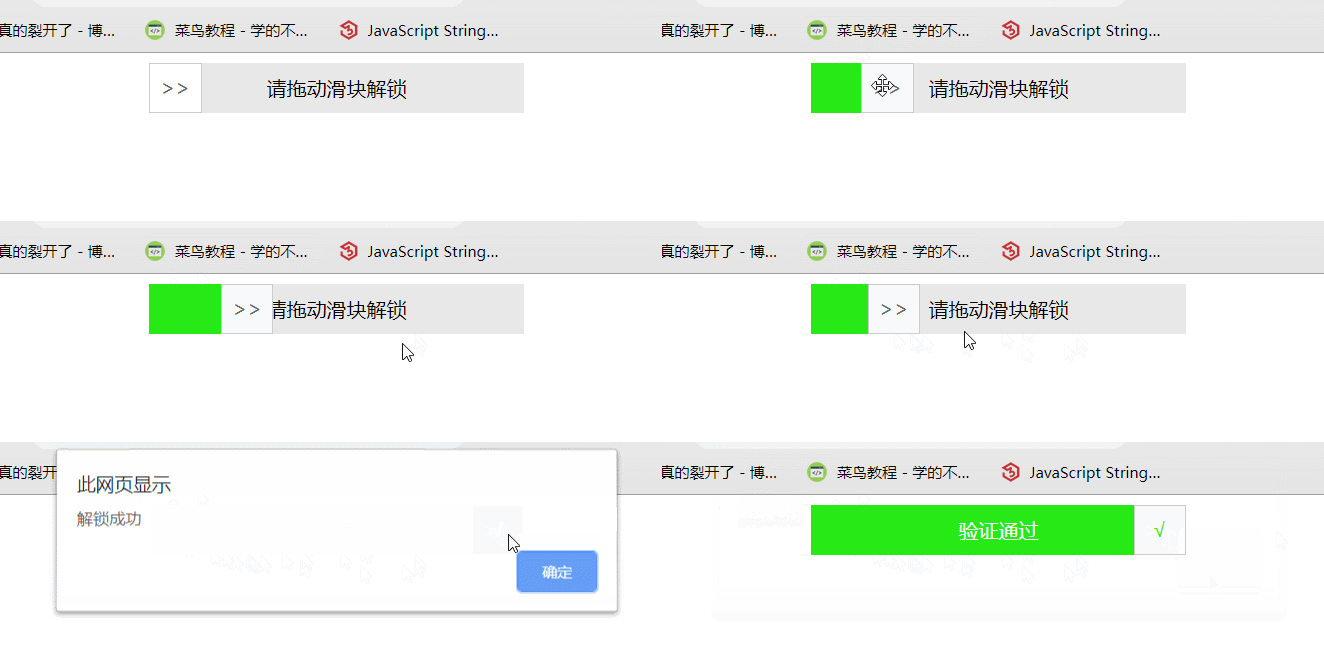
一般很多网站都有滑动验证的功能,简单滑动验证的原理如下图所示:
主要理解思想就行 图中的代码可能和实际写的有所不同 HTML和CSS也可根据仔细的喜好就行修改

完整代码:
1 <!DOCTYPE html> 2 <html lang="en"> 3 <head> 4 <meta charset="UTF-8"> 5 <meta name="viewport" content="width=device-width, initial-scale=1.0"> 6 <meta http-equiv="X-UA-Compatible" content="ie=edge"> 7 <title>Document</title> 8 <style> 9 .drag { 10 300px; 11 height: 40px; 12 position: relative; 13 background-color: #e8e8e8; 14 margin: auto auto; 15 user-select: none; 16 } 17 18 .bg { 19 height: 100%; 20 position: absolute; 21 40px; 22 background-color: rgb(39, 233, 21); 23 } 24 25 .text { 26 100%; 27 height: 100%; 28 position: absolute; 29 text-align: center; 30 line-height: 40px; 31 } 32 33 .btn { 34 40px; 35 height: 38px; 36 border: 1px solid #ccc; 37 background-color: #fff; 38 color: #666; 39 line-height: 38px; 40 text-align: center; 41 position: absolute; 42 cursor: move; 43 } 44 </style> 45 </head> 46 47 <body> 48 <div class="drag"> 49 <div class="bg"></div> 50 <div class="text" onselectstart="return false;">滑动验证</div> 51 <div class="btn">>></div> 52 </div> 53 </body> 54 <script> 55 onload = function () { 56 function $(a) { 57 return document.querySelector(a);//获取元素的函数 58 } 59 var oDarg = $(".drag"); 60 var oBg = $(".bg"); 61 var oText = $(".text"); 62 var oBtn = $(".btn"); 63 var success = false;//判断验证是否成功 64 var distance = oDarg.offsetWidth - oBtn.offsetWidth;//验证成功的距离 65 oBtn.onmousedown = function (eve) {//给物块设置鼠标按下事件 66 oBg.style.transition = "";//在点击事件按下后 必须清除后面设置的transition属性 否则会造成物块移动的bug 具体可自行测试 67 oBtn.style.transition = ""; 68 var e = eve || window.event; 69 var downX = e.clientX;//获取鼠标刚按下时的坐标 相对于浏览器页面 70 document.onmousemove = function (eve) {//这里要给document设置鼠标移动事件 而不能设置物块 如果设置了物块移动也会有小bug 自行测试 71 var e = eve || window.event; 72 var moveX = e.clientX;//获取鼠标移动时的坐标 相对于浏览器页面 73 var offsetX = moveX - downX;//物块移动的距离 74 if (offsetX > distance) {//如果移动的距离已经大于本应该移动的距离 那么就将它设置为验证成功时的距离 75 offsetX = distance; 76 } else if (offsetX < 0) {//同样 如果移动的距离小于0时 将它设置为0 保证不会超出范围 77 offsetX = 0; 78 } 79 oBtn.style.left = offsetX + "px"; 80 oBg.style.width = offsetX + "px"; 81 if (offsetX == distance) {//判断验证通过 82 oText.innerHTML = "验证通过"; 83 oBtn.innerHTML = "√"; 84 oText.style.color = "#FFF"; 85 oBtn.style.color = "rgb(39, 233, 21)"; 86 success = true;//验证通过时的条件 87 document.onmousemove = null;//验证通过后 鼠标按下事件和鼠标移动都没用了 因此需要清除 88 oBtn.onmousedown = null; 89 setTimeout(function () { 90 alert("解锁成功"); 91 }, 10) 92 } 93 } 94 } 95 document.onmouseup = function () {//这里也是给document设置鼠标抬起事件 96 if (success) {如果已经验证成功了 那么结束函数 97 return; 98 } else {//反之 验证没有通过 则物块原来的位置 99 oBtn.style.left = 0; 100 oBg.style.width = 0; 101 oBg.style.transition = "width 1s ease"; 102 oBtn.style.transition = "left 1s ease"; 103 } 104 document.onmousemove = null;//返回到原来的位置过程中 需要清除鼠标移动事件和鼠标抬起事件 105 oBtn.onmouseup = null; 106 } 107 } 108 </script> 109 </html>
完整效果:

一般的网站都有滑动验证功能,理解实现原理,利用原生JS写不难,希望能对你有所帮助!