ES6的class方式对于ES5用构造函数的方式创建类,只是一个语法糖并没有根本性的改变,以下是对static,this,以及继承做一个简单的分析
一、static关键字
1、加了static情况
 1    class Person {
 2         constructor(name, age) {
 3             this.name = name;
 4             this.age =age;
 5         }
 6
 7         static say(){
 8             console.log(this.name+","+this.age);
 9         }
10     }
11
12     let p = new Person("qbin",22);
13
14
15     console.log([Person]);
16     console.log(p);
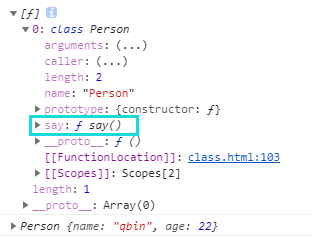
此时加了static的say方法作为类的属性,可以直接被类所调用,即Person.say()
2、不加static的情况
  class Person {
        constructor(name, age) {
            this.name = name;
            this.age =age;
        }

        say(){
            console.log(this.name+","+this.age);
        }
    }
    let p = new Person("qbin",22);

    console.log([Person]);
    console.log(p);
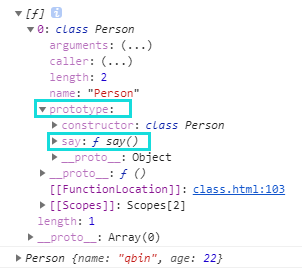
此时say加在了类的prototype属性上,通过我前一篇总结文章中讲到 "构造函数.prototype === 其实例化对象._ _proto_ _",即可了解到对象通过_ _proto_ _拿到与之对应的类上的方法
有些初学者可能会有疑问,其中对象p,没通过_ _proto_ _就成功调用了say()方法,这是为什么?,如下
   class Person {
        constructor(name, age) {
            this.name = name;
            this.age =age;
        }

        say(){
            console.log(this.name+","+this.age);
        }
    }
    let p = new Person("qbin",22);
   //此时p没通过__proto__调用say
    p.say();

    console.log([Person]);
    console.log(p);
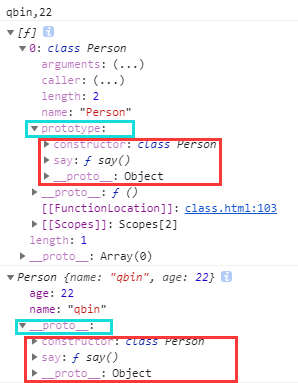
原因是_ _proto_ _默认会一层层自动向下找所需要调用方法,_ _proto_ _可以不写明
二、this关键字
 1    class Person {
 2         constructor(name,age) {
 3             this.name = name;
 4             this.age = age;
 5         }
 6
 7         say(){
 8             console.log(this);
 9         }
10     }
11     let p = new Person("qbin",22);
12     p.say();
13     console.log([Person]);
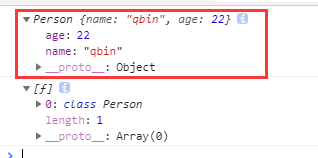
可以看出,this指向实例化对象;当对象进行实例化时,this自动指向对象,并进行赋值初始化
三、继承
1、观察子类的实例化对象z,如何拿到父类的方法
 1    class Person {
 2         constructor(name, age) {
 3             this.name = name;
 4             this.age =age;
 5         }
 6         say(){
 7             console.log(this.name+","+this.age);
 8         }
 9     }
10
11     class Zhangsan extends Person{
12         play(){
13             console.log(this);
14         }
15     }
16
17     let z = new Zhangsan("zhangsan",30);
18     z.say();
19
20     console.log(z);
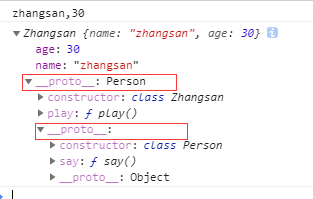
可以看出对象实例,通过一层又一层的_ _proto_ _(原型链)拿到了父类方法say,再一次验证上面所说的_ _proto_ _能自动一层层的向下找所需要调用的方法,直到原型链的顶端
2、观察子类与父类在原型上的关系
 1     class Person {
 2         constructor(name, age) {
 3             this.name = name;
 4             this.age =age;
 5         }
 6         say(){
 7             console.log(this.name+","+this.age);
 8         }
 9     }
10
11     class Zhangsan extends Person{
12         play(){
13             console.log(this);
14         }
15     }
16
17     let z = new Zhangsan("zhangsan",30);
18     z.say();
19
20     console.log([Person]);
21     console.log([Zhangsan]);
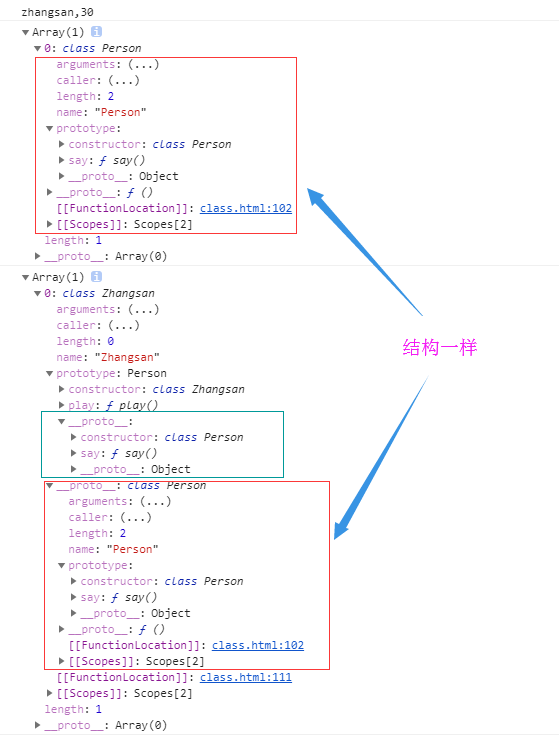
从上图的红框再结合我上一篇总结的文章,我们可以看出 “子类._ _proto_ _ === 父类”
从上图的绿框在结合我们以往在ES5中所使用的原型链继承方式(《JavaScipt高级程序设计》中提及),惊奇的发现,它本质上就是将“父类的实例赋值给了子类的prototype”,实现了继承
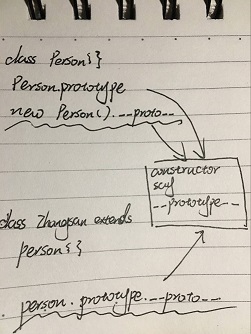 (字不好看,勿怪啊)