欢迎大家前往腾讯云技术社区,获取更多腾讯海量技术实践干货哦~
作者:付越
导语
Tensorflow在更新1.0版本之后多了很多新功能,其中放出了很多用tf框架写的深度网络结构(https://github.com/tensorflow/models ),大大降低了开发难度,利用现成的网络结构,无论fine-tuning还是重新训练方便了不少。最近笔者终于跑通TensorFlow Object Detection API的ssd_mobilenet_v1模型,这里记录下如何完整跑通数据准备到模型使用的整个过程,相信对自己和一些同学能有所帮助。
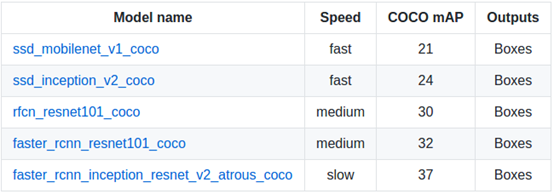
Object Detection API提供了5种网络结构的预训练的权重,全部是用COCO数据集进行训练,这五种模型分别是SSD+mobilenet、SSD+inception_v2、R-FCN+resnet101、faster RCNN+resnet101、faster RCNN+inception+resnet101。各个模型的精度和计算所需时间如下。下面及介绍下如何使用Object Detection去训练自己的模型。
这里TensorFlow的安装就不再说明了,网上的教程一大把,大家可以找到很详尽的安装TensorFlow的文档。
训练前准备:
使用protobuf来配置模型和训练参数,所以API正常使用必须先编译protobuf库,这里可以下载直接编译好的pb库(https://github.com/google/protobuf/releases ),解压压缩包后,把protoc加入到环境变量中:
$ cd tensorflow/models

$ protoc object_detection/protos/*.proto --python_out=.
(我是把protoc加到环境变量中,遇到找不到*.proto文件的报错,后来把protoc.exe放到models/object_detection目录下,重新执行才可以)
然后将models和slim(tf高级框架)加入python环境变量:
PYTHONPATH=$PYTHONPATH:/your/path/to/tensorflow/models:/your/path/to/tensorflow/models/slim
数据准备:
数据集需要转化成PASCAL VOC结构,API提供了create_pascal_tf_record.py,把VOC结构数据集转换成.record格式。不过我们发现更简单的方式,Datitran提供一种更简单生产.record格式的方法。
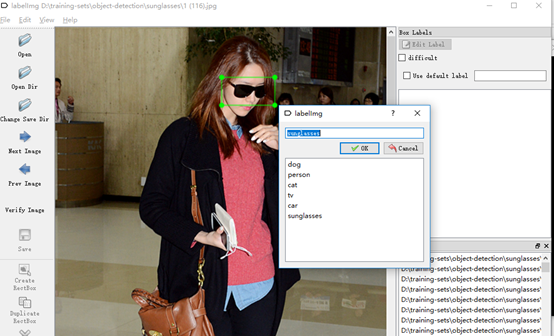
首先需要先要标注图像相应标签,这里可以使用labelImg工具。每标注一张样本,即生成一个xml的标注文件。然后,把这些标注的xml文件,按训练集与验证集分别放置到两个目录下,在Datitran提供了xml_to_csv.py脚本。这里只要指定标注的目录名即可。接下来,然后需要我们把对应的csv格式转换成.record格式。
def main():
    # image_path = os.path.join(os.getcwd(), 'annotations')
    image_path = r'D:	raining-setsobject-detectionsunglasseslabel	est'
    xml_df = xml_to_csv(image_path)
    xml_df.to_csv('sunglasses_test_labels.csv', index=None)
    print('Successfully converted xml to csv.')
调用generate_tfrecord.py,注意要指定--csv_input与--output_path这两个参数。执行下面命令:
python generate_tfrecord.py --csv_input=sunglasses_test_labels.csv --output_path=sunglass_test.record
这样就生成了训练及验证用的train.record与test.record。接下来指定标签名称,仿照models/ object_detection/data/ pet_label_map.pbtxt,重新创建一个文件,指定标签名。
item {
  id: 1
  name: 'sunglasses'
}
训练:
根据自己的需要,选择一款用coco数据集预训练的模型,把前缀model.ckpt放置在待训练的目录,这里meta文件保存了graph和metadata,ckpt保存了网络的weights,这几个文件表示预训练模型的初始状态。
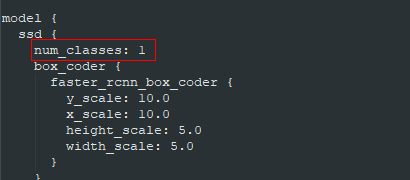
打开ssd_mobilenet_v1_pets.config文件,并做如下修改:
- num_classes:修改为自己的classes num
- 将所有PATH_TO_BE_CONFIGURED的地方修改为自己之前设置的路径(共5处)
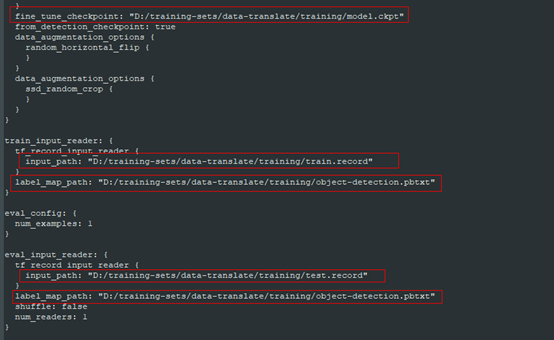
其他参数均保持默认参数。
准备好上述文件后就可以直接调用train文件进行训练。
python object_detection/train.py
--logtostderr
--pipeline_config_path= D:/training-sets /data-translate/training/ssd_mobilenet_v1_pets.config
--train_dir=D:/training-sets/data-translate/training
TensorBoard监控:
通过tensorboard工具,可以监控训练过程,输入西面指令后,在浏览器输入localhost:6006(默认)即可。
tensorboard --logdir= D:/training-sets/data-translate/training
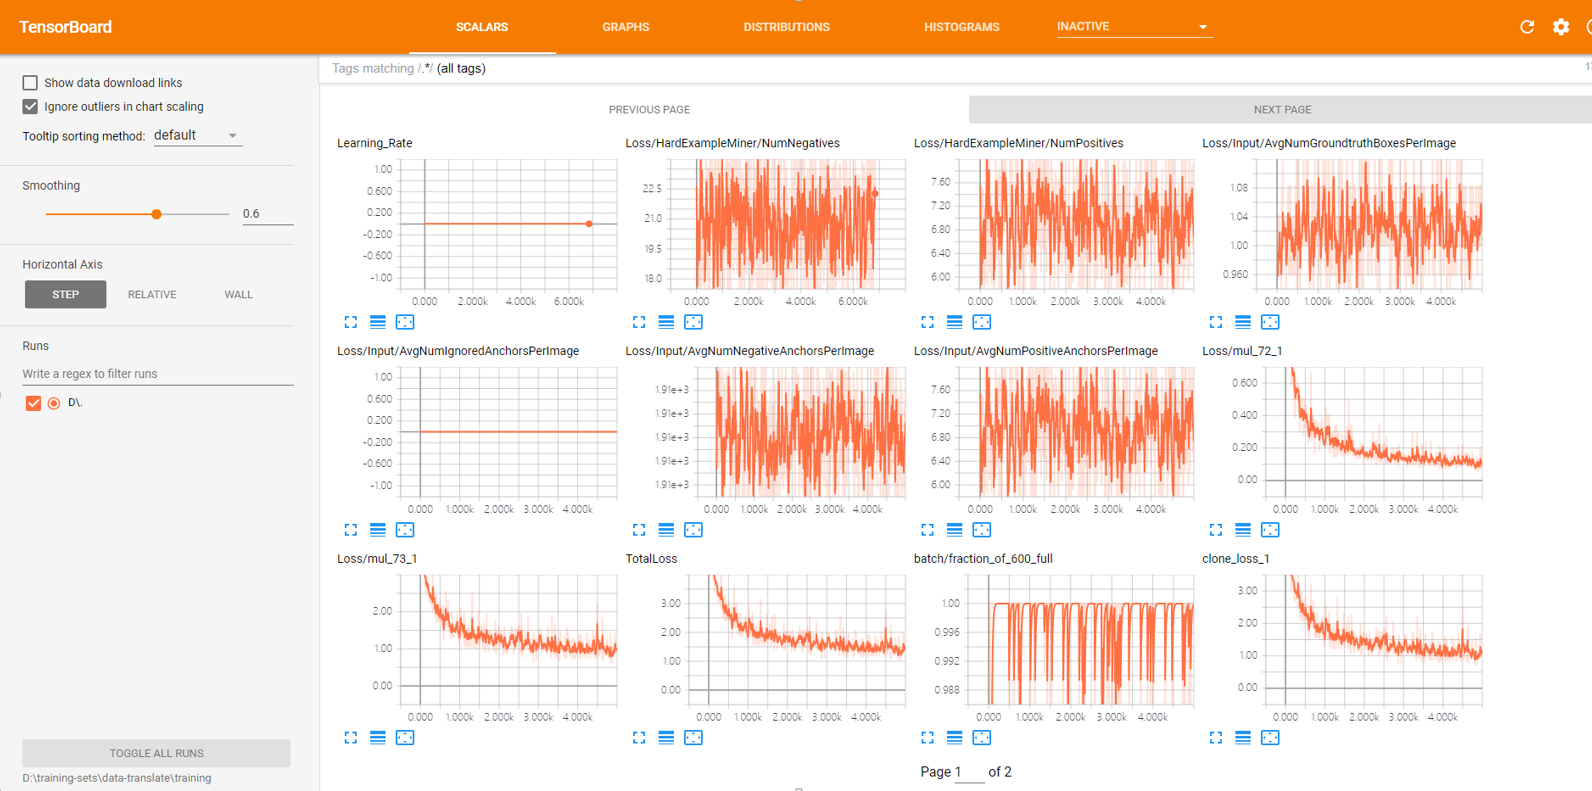
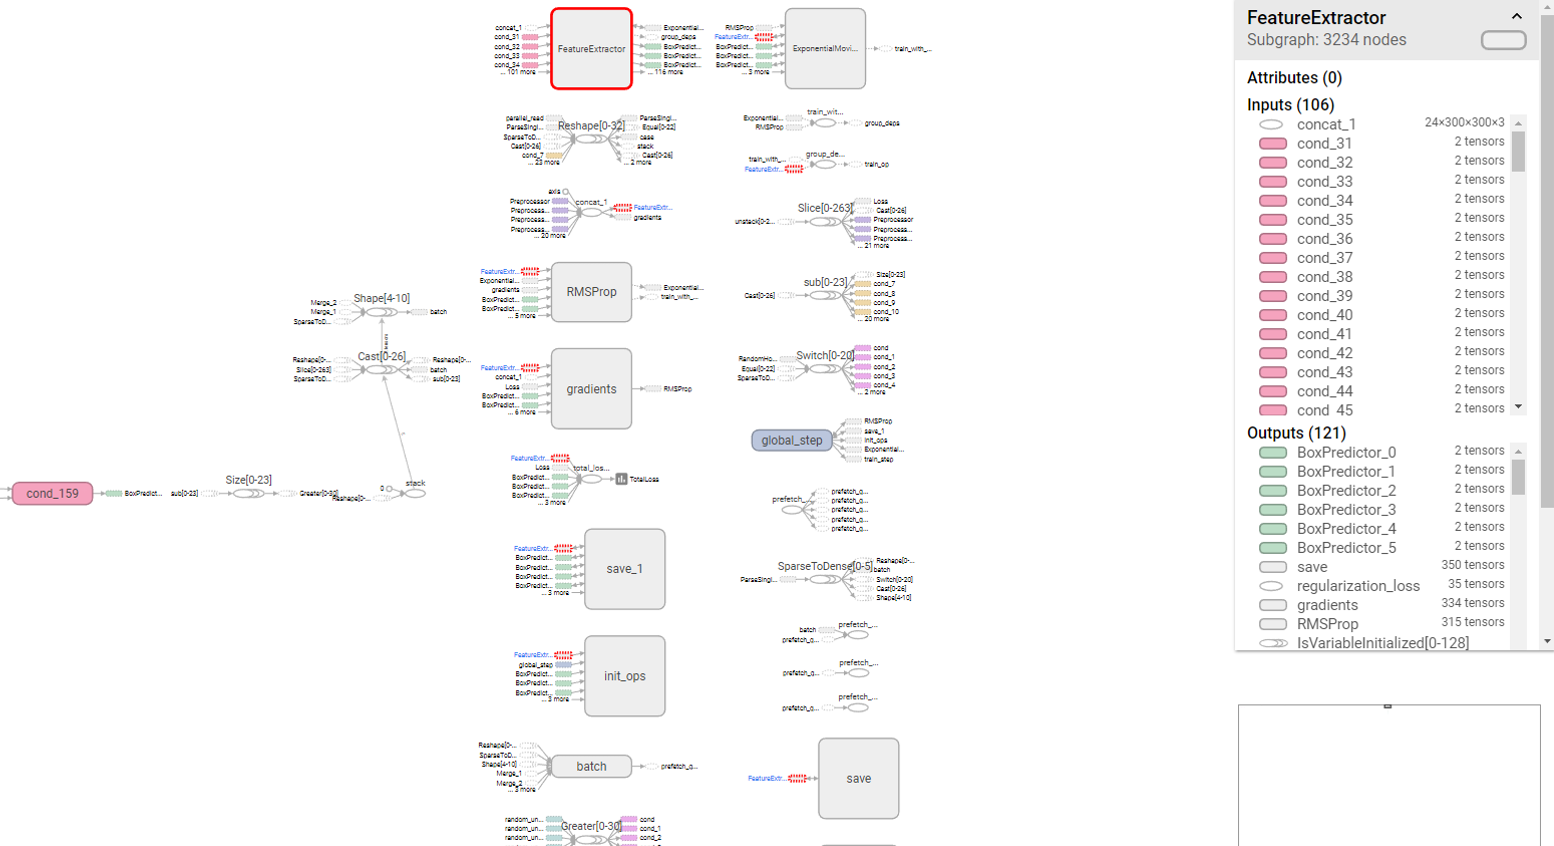
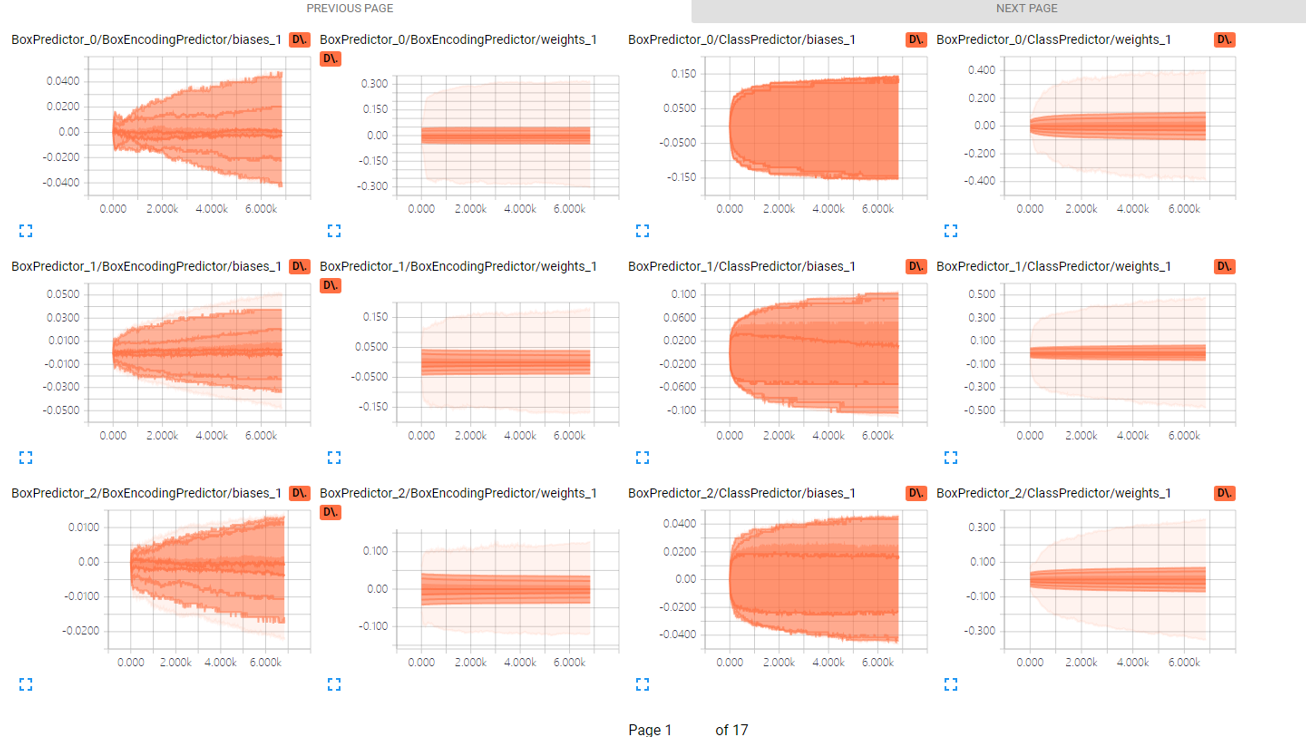
这里面有很多指标曲线,甚至有模型网络架构,笔者对于这里面很多指标含义还没有弄明白,不过感觉出TensorBoard这个工具应该是极其强大。不过我们可以通过Total_Loss来看整体训练的情况。
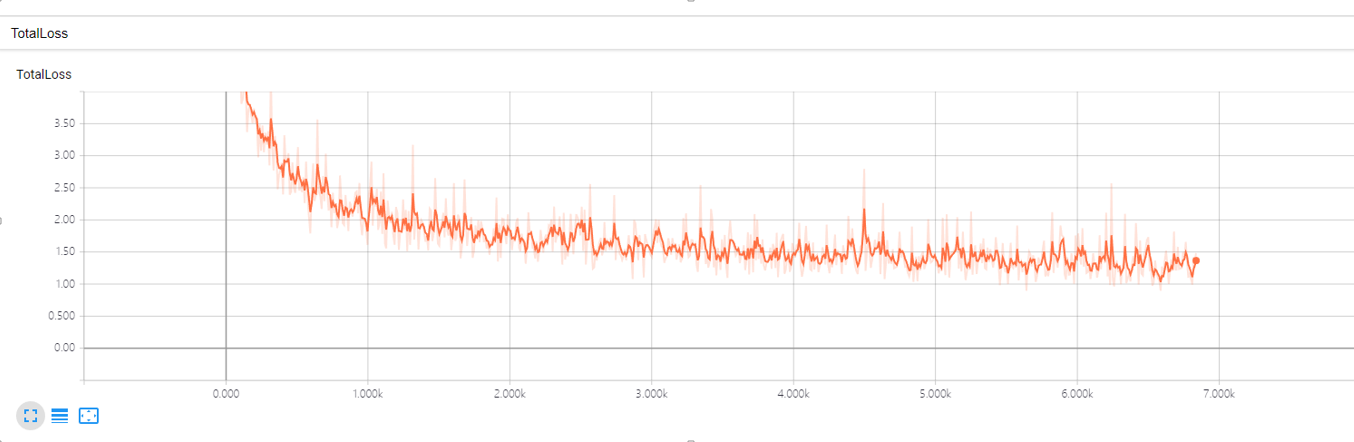
从整体上看,loss曲线确实是收敛的,整体的训练效果还是满意的。另外,TensorFlow还提供了训练过程中利用验证集验证准确性的能力,但是笔者在调用时,仍有些问题,这里暂时就不详细说明了。
Freeze Model模型导出:
查看模型实际的效果前,我们需要把训练的过程文件导出,生产.pb的模型文件。本来,tensorflow/python/tools/freeze_graph.py提供了freeze model的api,但是需要提供输出的final node names(一般是softmax之类的最后一层的激活函数命名),而object detection api提供提供了预训练好的网络,final node name并不好找,所以object_detection目录下还提供了export_inference_graph.py。
python export_inference_graph.py
--input_type image_tensor
--pipeline_config_path D:/training-sets /data-translate/training/ssd_mobilenet_v1_pets.config
--trained_checkpoint_prefix D:/training-sets /data-translate/training/ssd_mobilenet_v1_pets.config /model.ckpt-*
--output_directory D:/training-sets /data-translate/training/result
导出完成后,在output_directory下,会生成frozen_inference_graph.pb、model.ckpt.data-00000-of-00001、model.ckpt.meta、model.ckpt.data文件。
调用生成模型:
目录下本身有一个调用的例子,稍微改造如下:
import cv2
import numpy as np
import tensorflow as tf
from object_detection.utils import label_map_util
from object_detection.utils import visualization_utils as vis_util


class TOD(object):
    def __init__(self):
        self.PATH_TO_CKPT = r'D:lib	f-modelmodels-masterobject_detection	rainingfrozen_inference_graph.pb'
        self.PATH_TO_LABELS = r'D:lib	f-modelmodels-masterobject_detection	rainingsunglasses_label_map.pbtxt'
        self.NUM_CLASSES = 1
        self.detection_graph = self._load_model()
        self.category_index = self._load_label_map()

    def _load_model(self):
        detection_graph = tf.Graph()
        with detection_graph.as_default():
            od_graph_def = tf.GraphDef()
            with tf.gfile.GFile(self.PATH_TO_CKPT, 'rb') as fid:
                serialized_graph = fid.read()
                od_graph_def.ParseFromString(serialized_graph)
                tf.import_graph_def(od_graph_def, name='')
        return detection_graph

    def _load_label_map(self):
        label_map = label_map_util.load_labelmap(self.PATH_TO_LABELS)
        categories = label_map_util.convert_label_map_to_categories(label_map,
                                                                    max_num_classes=self.NUM_CLASSES,
                                                                    use_display_name=True)
        category_index = label_map_util.create_category_index(categories)
        return category_index

    def detect(self, image):
        with self.detection_graph.as_default():
            with tf.Session(graph=self.detection_graph) as sess:
                # Expand dimensions since the model expects images to have shape: [1, None, None, 3]
                image_np_expanded = np.expand_dims(image, axis=0)
                image_tensor = self.detection_graph.get_tensor_by_name('image_tensor:0')
                boxes = self.detection_graph.get_tensor_by_name('detection_boxes:0')
                scores = self.detection_graph.get_tensor_by_name('detection_scores:0')
                classes = self.detection_graph.get_tensor_by_name('detection_classes:0')
                num_detections = self.detection_graph.get_tensor_by_name('num_detections:0')
                # Actual detection.
                (boxes, scores, classes, num_detections) = sess.run(
                    [boxes, scores, classes, num_detections],
                    feed_dict={image_tensor: image_np_expanded})
                # Visualization of the results of a detection.
                vis_util.visualize_boxes_and_labels_on_image_array(
                    image,
                    np.squeeze(boxes),
                    np.squeeze(classes).astype(np.int32),
                    np.squeeze(scores),
                    self.category_index,
                    use_normalized_coordinates=True,
                    line_thickness=8)

        cv2.namedWindow("detection", cv2.WINDOW_NORMAL)
        cv2.imshow("detection", image)
        cv2.waitKey(0)

if __name__ == '__main__':
    image = cv2.imread('image.jpg')
    detecotr = TOD()
    detecotr.detect(image)
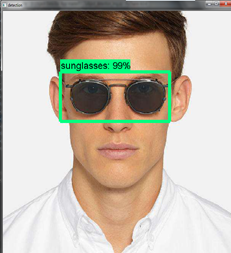
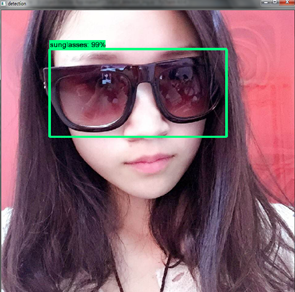
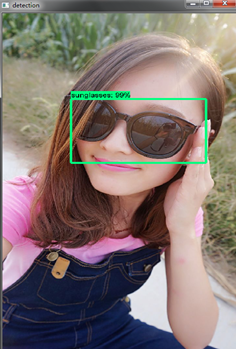
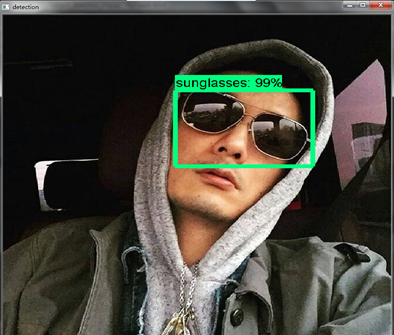
下面是一些图片的识别效果:
相关阅读
[ I am Jarvis ] :聊聊 FaceID 背后的深度学习视觉算法
此文已由作者授权腾讯云技术社区发布,转载请注明文章出处
原文链接:https://cloud.tencent.com/community/article/351424