本节讲spring boot 父子项目搭建与编写 thymeleaf模板文件 demo页访问测试.
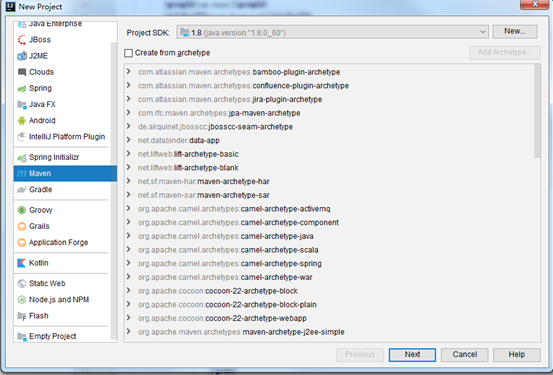
1 点菜单file->new Project 选Maven ,直接点Next
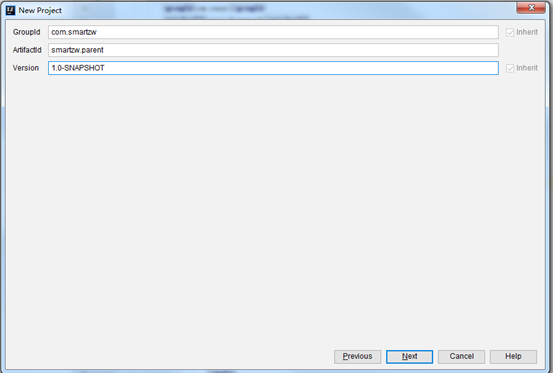
2.输入项目名称Groupid格式:com.项目名称 (这里填的是:com.smartxs) ,ArtifactId格式:项目名.parent (smartxs.parent) ,点Next
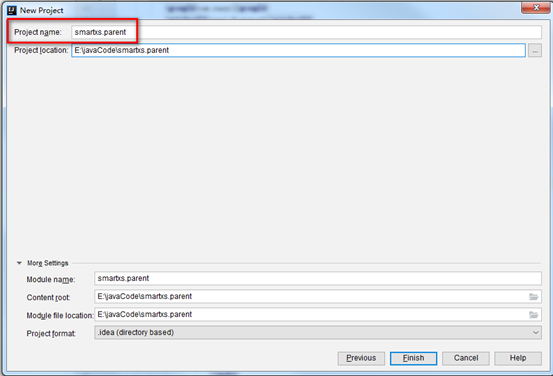
3.Project name会自动去了点,这里再重新加上,改成:smartxs.parent, 点Finish
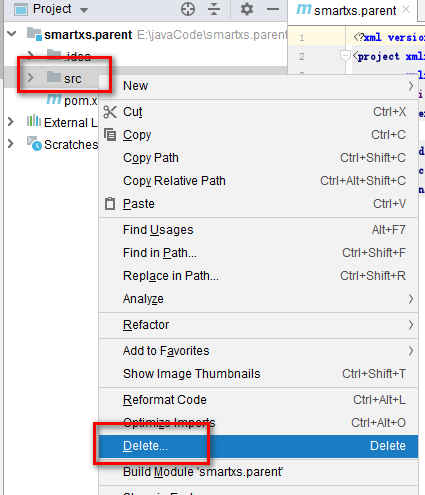
4.新建 完成以后删除src目录
5.先为存放的Model建一个Module项目,右击项目->New->Module

6.的弹出的界面选maven,直接点Next
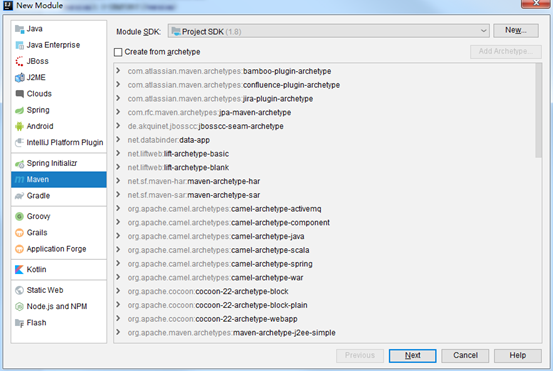
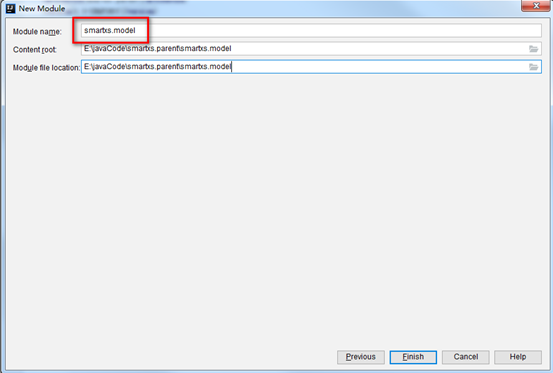
7.输入ArtifactId: smartxs.model (用来存放所有的model), 点Next

8.IDEA会自动把点过滤掉,修改Module名称smartxsmodel 中间加点变成smartxs.model 点Finish
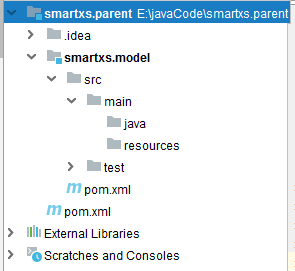
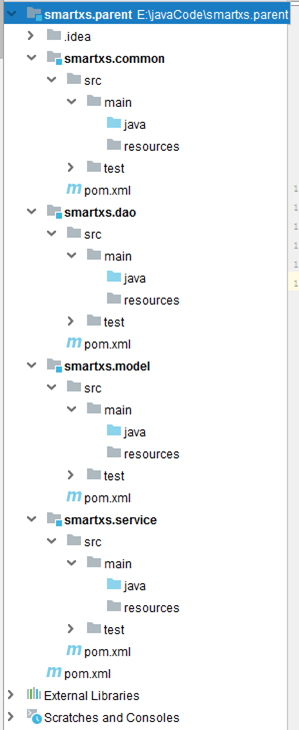
9建完成以后项目目录结构如下图
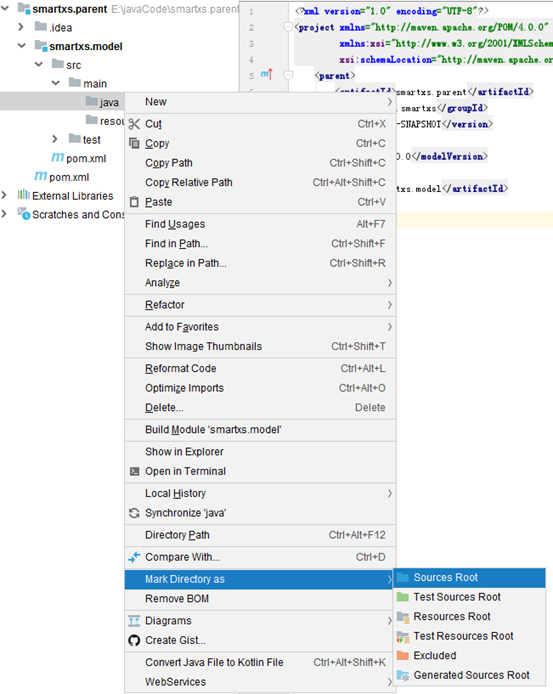
10.右击smartxs.model/src/main/java 目录,选Mark Directory as ->Sources Root
10.1.按照第5-9步,分别建以下Module (子项目)
smartxs.service Service层
smartxs.dao Dao层
smartxs.model Model层(上面已创建)
smartxs.common 公共类方法等
建完以后项目目录结构如下
11.建立SpringBoot web站点,右击父项目smartxs.parent->New->Module 选中Spring Initializr 点Next

12.输入Group:com.项目名称(com.smartxs),Artifact:站点名称(webmanage) ,(注意Artifact只能用小写英文不支持其他字符),点Next

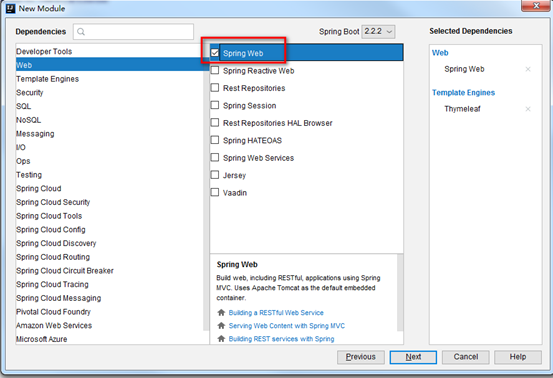
13.选中Web,勾选Spring Web,再选中Template Engines,勾选Thymeleaf ,点Next
14.输入Module Name:项目名.srpingboot站点名 (smartxs.webManage)

15.新建spring boot Module以后删除多余的目录.mvn与文件.gitignore , HELP.md , mvnw , mvnw.cmd

16.打开resources目录下的application.properties 文件内容代码如下:
#站点端口
server.port=88
#thymeleaf模板后缀
spring.thymeleaf.suffix=.html
#thymeleaf模板编码
spring.thymeleaf.encoding=UTF-8
#thymeleaf模板格式
spring.thymeleaf.mode=HTML5
#thymeleaf模板路径
spring.thymeleaf.prefix=classpath:/templates/
# 定义匹配静态资源路径
spring.mvc.static-path-pattern=/static/**
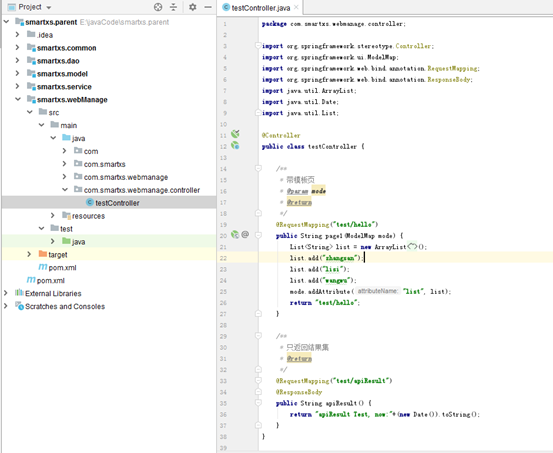
17.新建一个Hello文件预览,右击smartxs.webManage项目中的java目录->New->Java Class输入类名:com.smartxs.webmanage.controller.testController
代码内容如下:
package com.smartxs.webmanage.controller;

import org.springframework.stereotype.Controller;
import org.springframework.ui.ModelMap;
import org.springframework.web.bind.annotation.RequestMapping;
import org.springframework.web.bind.annotation.ResponseBody;
import java.util.ArrayList;
import java.util.Date;
import java.util.List;

@Controller
public class testController {

    /**
     * 带模板页
     * @param mode
     * @return
     */
    @RequestMapping("test/hello")
    public String page1(ModelMap mode) {
        List<String> list = new ArrayList<String>();
        list.add("zhangsan");
        list.add("lisi");
        list.add("wangwu");
        mode.addAttribute("list", list);
        return "test/hello";
    }

    /**
     * 只返回结果集
     * @return
     */
    @RequestMapping("test/apiResult")
    @ResponseBody
    public String apiResult() {
        return "apiResult Test, now:"+(new Date()).toString();
    }
}
如下图
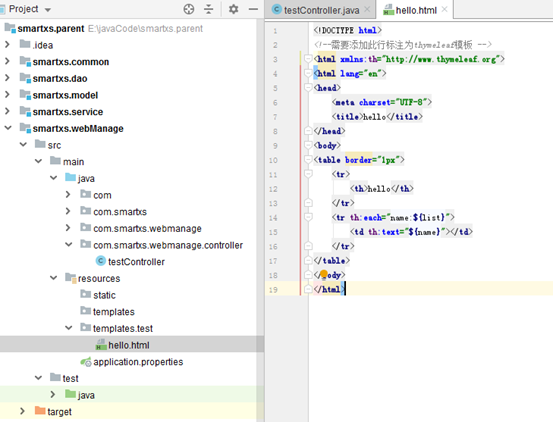
18.右击resources/templates文件夹->New->Directory 新建 test目录
右击test目录-New-HTML File 新建hello.html文件代码如下
<!DOCTYPE html>
<!--需要添加此行标注为thymeleaf模板 -->
<html xmlns:th="http://www.thymeleaf.org">
<html lang="en">
<head>
    <meta charset="UTF-8">
    <title>hello</title>
</head>
<body>
<table border="1px">
    <tr>
        <th>hello</th>
    </tr>
    <tr th:each="name:${list}">
        <td th:text="${name}"></td>
    </tr>
</table>
</body>
</html>
如下图
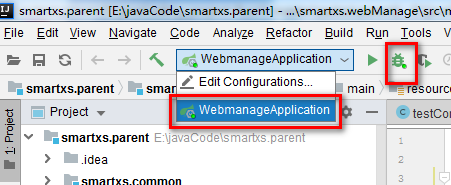
19.点击工具栏的Edit Configurations下拉选择"WebmanageApplication" 再点小虫子Debug按钮,运行spring boot项目
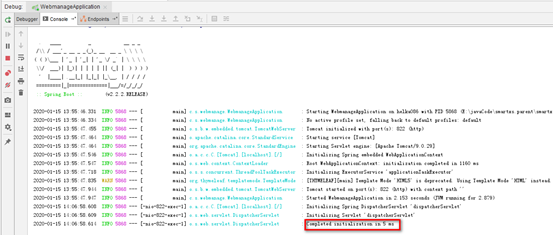
运行成功以后控制台Console里显示:Completed initialization in...表示项目运行启动成功
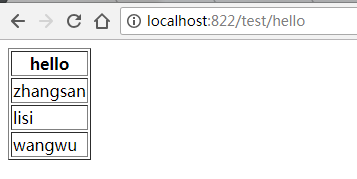
20.打开浏览器输入:http://localhost:822/test/hello 显示页面结果
打开浏览器输入:http://localhost:822/test/apiResult 显示api页面结果
