CentOS 6.5 minimal安装不再赘述
Nginx源码安装
1.安装wget下载程序
yum -y install wget
2.安装编译环境:gcc gcc-c++ automake autoconf libtool make
yum -y install gcc gcc-c++ automake autoconf libtool make
3.安装相关依赖包(目前采用的是源码安装,放置到源码目录,也可使用其他如yum方式安装):
PCRE库(用于支持http rewrite)
cd /usr/local/src
wget ftp://ftp.csx.cam.ac.uk/pub/software/programming/pcre/pcre-8.37.tar.gz
tar zxvf pcre-8.37.tar.gz
cd pcre-8.37
./configure
make
make install
zlib库(用于支持http gzip)
cd /usr/local/src
wget http://zlib.net/zlib-1.2.8.tar.gz
tar zxvf zlib-1.2.8.tar.gz
cd zlib-1.2.8
./configure
make
make install
4.创建下载文件存放的目录(后面下载的都放入此目录),并进入
cd /root
mkdir download
cd download
5.下载nginx源码包(v1.8.0)最近稳定版
wget http://nginx.org/download/nginx-1.8.0.tar.gz
6.解压、编译、安装(采用默认安装配置,但pcre的位置需要指定)
tar zxvf nginx-1.8.0.tar.gz
cd nginx-1.8.0
./configure --with-pcre=/usr/local/src/pcre-8.37
make
make install
最终nginx的安装路径信息为:


Configuration summary
  + using PCRE library: /usr/local/src/pcre-8.37
  + OpenSSL library is not used
  + using builtin md5 code
  + sha1 library is not found
  + using system zlib library

  nginx path prefix: "/usr/local/nginx"
  nginx binary file: "/usr/local/nginx/sbin/nginx"
  nginx configuration prefix: "/usr/local/nginx/conf"
  nginx configuration file: "/usr/local/nginx/conf/nginx.conf"
  nginx pid file: "/usr/local/nginx/logs/nginx.pid"
  nginx error log file: "/usr/local/nginx/logs/error.log"
  nginx http access log file: "/usr/local/nginx/logs/access.log"
  nginx http client request body temporary files: "client_body_temp"
  nginx http proxy temporary files: "proxy_temp"
  nginx http fastcgi temporary files: "fastcgi_temp"
  nginx http uwsgi temporary files: "uwsgi_temp"
  nginx http scgi temporary files: "scgi_temp"
7.我们测试运行下服务器
/usr/local/nginx/sbin/nginx
然后本地通过wget访问下:
cd ~
wget http://localhost
访问结果如下,表示已经可以访问:
--2015-10-29 03:06:59--  http://localhost/
正在解析主机 localhost... ::1, 127.0.0.1
正在连接 localhost|::1|:80... 失败:拒绝连接。
正在连接 localhost|127.0.0.1|:80... 已连接。
已发出 HTTP 请求,正在等待回应... 200 OK
长度:612 [text/html]
正在保存至: “index.html”

100%[======================================>] 612         --.-K/s   in 0s

2015-10-29 03:06:59 (54.4 MB/s) - 已保存 “index.html” [612/612])
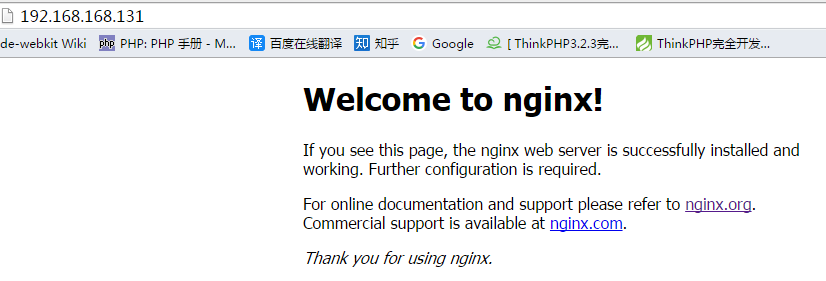
我们也可以通过外面浏览器去访问这个虚拟机,直接在浏览器输入该虚拟机ip: http://192.168.168.131 (具体IP以自己虚拟机为准),应该会展示出下页面(若无法访问,参考最下面):
8.以上虽然可以访问了,但每次需要手动去调用才执行,所以我们需要:
8.1.编写一个服务脚本,存放到/etc/init.d/nginx (/etc/init.d目录一般用于存放系统所有的服务程序),脚本内容如下:
  1 #!/bin/sh
  2 #
  3 # nginx - this script starts and stops the nginx daemin
  4 #
  5 # chkconfig:   - 85 15
  6 # description:  Nginx is an HTTP(S) server, HTTP(S) reverse
  7 #               proxy and IMAP/POP3 proxy server
  8 # processname: nginx
  9 # config:      /usr/local/nginx/conf/nginx.conf
 10 # pidfile:     /usr/local/nginx/logs/nginx.pid
 11
 12 # Source function library.
 13 . /etc/rc.d/init.d/functions
 14
 15 # Source networking configuration.
 16 . /etc/sysconfig/network
 17
 18 # Check that networking is up.
 19 [ "$NETWORKING" = "no" ] && exit 0
 20
 21 nginx="/usr/local/nginx/sbin/nginx"
 22 prog=$(basename $nginx)
 23
 24 NGINX_CONF_FILE="/usr/local/nginx/conf/nginx.conf"
 25
 26 lockfile=/var/lock/subsys/nginx
 27
 28 start() {
 29     [ -x $nginx ] || exit 5
 30     [ -f $NGINX_CONF_FILE ] || exit 6
 31     echo -n $"Starting $prog: "
 32     daemon $nginx -c $NGINX_CONF_FILE
 33     retval=$?
 34     echo
 35     [ $retval -eq 0 ] && touch $lockfile
 36     return $retval
 37 }
 38
 39 stop() {
 40     echo -n $"Stopping $prog: "
 41     killproc $prog -QUIT
 42     retval=$?
 43     echo
 44     [ $retval -eq 0 ] && rm -f $lockfile
 45     return $retval
 46 }
 47
 48 restart() {
 49     configtest || return $?
 50     stop
 51     start
 52 }
 53
 54 reload() {
 55     configtest || return $?
 56     echo -n $"Reloading $prog: "
 57     killproc $nginx -HUP
 58     RETVAL=$?
 59     echo
 60 }
 61
 62 force_reload() {
 63     restart
 64 }
 65
 66 configtest() {
 67   $nginx -t -c $NGINX_CONF_FILE
 68 }
 69
 70 rh_status() {
 71     status $prog
 72 }
 73
 74 rh_status_q() {
 75     rh_status >/dev/null 2>&1
 76 }
 77
 78 case "$1" in
 79     start)
 80         rh_status_q && exit 0
 81         $1
 82         ;;
 83     stop)
 84         rh_status_q || exit 0
 85         $1
 86         ;;
 87     restart|configtest)
 88         $1
 89         ;;
 90     reload)
 91         rh_status_q || exit 7
 92         $1
 93         ;;
 94     force-reload)
 95         force_reload
 96         ;;
 97     status)
 98         rh_status
 99         ;;
100     condrestart|try-restart)
101         rh_status_q || exit 0
102             ;;
103     *)
104         echo $"Usage: $0 {start|stop|status|restart|condrestart|try-restart|reload|force-reload|configtest}"
105         exit 2
106 esac
然后给此脚本添加运行权限:
chmod +x /etc/init.d/nginx
测试此脚本(停止服务、启动服务、重启服务),成功后会打印“确定”字样:
service nginx stop
service nginx start
service nginx restart
8.2.将服务脚本注册为系统服务并随系统启动
chkconfig nginx on
到此,Nginx就已安装完毕并可提供服务了