UICollectionView和UItableView一样都是继承自UIScrollView,因此它和UItableView非常的相似,但是它的布局比UItableView要丰富得多,可以多列布局,叠堆布局,圆形布局,弧形布局等等。
多列布局: 弧形布局:
弧形布局: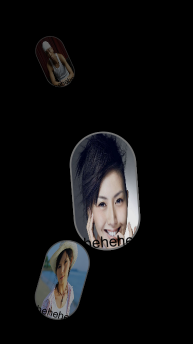
二.创建UICollectionView的步骤
1、需要一个layout(布局的样式)
2、初始化UICollectionView 同时需要 注册cellID 一定要与创建cell的地方 是同一个cellID
3.与tableView一样 有两个必须实现的方法(导入代理UICollectionViewDataSource)
(1)每组里面有多少行(item)
( 2)初始化cell的方法
三.代码
 1 @interface ViewController ()<UICollectionViewDelegate,UICollectionViewDataSource>
 2 {
 3     NSArray * List;
 4 }
 5
 6 @end
 7 static NSString * cellID = @"cellid";
 8 @implementation ViewController
 9
10 - (void)viewDidLoad {
11     [super viewDidLoad];
12     self.view.backgroundColor = [UIColor blackColor];
13    List = @[@"陈3.jpg",@"陈2.jpg",@"是1.jpg",@"是3.jpg"];
14   UICollectionViewFlowLayout * flowlayout = [[ UICollectionViewFlowLayout alloc]init];
15     //    设置collectionView里面的元素的大小
16     flowlayout.itemSize = CGSizeMake(WIDTH/4, HEIGHT/5);
17 //    设置两个元素之间的间距
18     flowlayout.minimumInteritemSpacing = 10;
19 //    设置UIcollecionView 的滚动方向
20 //    设置了contentSize 当超出了uicollectionView 范围之后就可以滚动
21     flowlayout.scrollDirection = UICollectionViewScrollDirectionHorizontal;
22     UICollectionView * collectionView = [[UICollectionView alloc]initWithFrame:CGRectMake(0, 100, WIDTH, HEIGHT/5) collectionViewLayout:flowlayout];
23     collectionView.delegate = self;
24     collectionView.dataSource = self;
25     [self.view addSubview:collectionView];
26 //    初始化UIcollectionView的时候 注册cell
27     [collectionView registerClass:[CollectionViewCell class] forCellWithReuseIdentifier:cellID];
28
29 }
#pragma mark--------collectionView必须实现的代理方法----------------------
- (NSInteger)collectionView:(UICollectionView *)collectionView numberOfItemsInSection:(NSInteger)section{
    return List.count;
}
- (UICollectionViewCell *)collectionView:(UICollectionView *)collectionView cellForItemAtIndexPath:(NSIndexPath *)indexPath{
    CollectionViewCell *cell = [collectionView dequeueReusableCellWithReuseIdentifier:cellID forIndexPath:indexPath];
    cell.imageView.image = [UIImage imageNamed:List[indexPath.row]];
    cell.nameLabel.text = @"hehehe";
    return cell;


}
代码里面的CollectionViewCell是我自己自定义的cell,代码如下:
CollectionViewCell.h文件的代码
1 #import <UIKit/UIKit.h>
2
3 @interface CollectionViewCell : UICollectionViewCell
4 @property (nonatomic,retain) UIImageView *imageView;
5 @property (nonatomic,retain) UILabel *nameLabel;
6 @end
CollectionViewCell.m文件的代码
- (instancetype)initWithFrame:(CGRect)frame {
    self = [super initWithFrame:frame];
    if (self) {

        self.imageView = [[UIImageView alloc]initWithFrame:CGRectMake(0, 0, WIDTH/5, HEIGHT/5)];
        self.imageView.layer.cornerRadius = WIDTH/10;
        self.imageView.layer.masksToBounds = YES;
        self.imageView.layer.borderWidth = 2;

        self.imageView.layer.borderColor = [UIColor grayColor].CGColor;
        self.nameLabel = [[UILabel alloc]initWithFrame:CGRectMake(0, CGRectGetMaxY(self.imageView.frame)-20, WIDTH/5, 20)];
        self.nameLabel.textColor = [UIColor blackColor];
                self.nameLabel.textAlignment =  NSTextAlignmentCenter;
        [self.contentView addSubview:self.imageView];
          [self.contentView addSubview:self.nameLabel];


    }

    return self;

}
然后把CollectionViewCell.h导入ViewController.m就可以实现多列布局了
四.弧形布局
弧形布局,弧形布局是我利用第三方类写出来的
在github上面搜AWCollectionViewDialLayout就可以了,用法也写在上面。
就是在项目里导入
AWCollectionViewDialLayout.h 和 AWCollectionViewDialLayout.m文件
之后在ViewController.m里面写入
1 AWCollectionViewDialLayout *dialLayout = [[AWCollectionViewDialLayout alloc] initWithRadius:300.0 andAngularSpacing:20.0 andCellSize:CGSizeMake(10, 10) andAlignment:WHEELALIGNMENTCENTER andItemHeight:100 andXOffset:100];
代码的数据可以修改,产生出不同效果。然后其他步骤不变。