修改1:2014-06-24 11:38:21
Linux添加硬盘是在原来安装的硬盘空间不够或者需要使用其他硬盘上的东西时候的解决办法,因为大多数初学者习惯使用虚拟机,这里以在Vmware虚拟机中实现Linux添加硬盘的具体步骤来详细介绍说这个问题。
Vmware中为linux增加硬盘
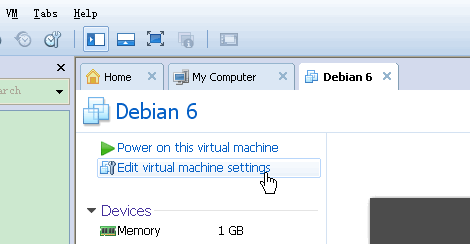
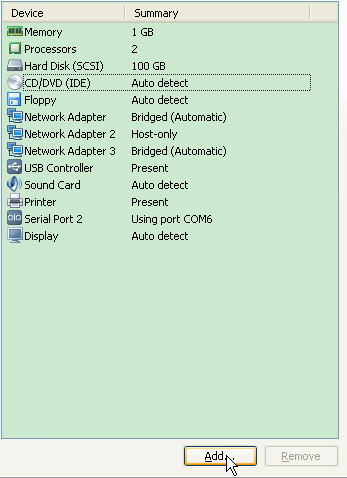
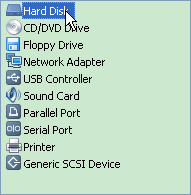
1. 在vmware的setting中为虚拟机增加一个硬盘。
对于VirtualBox:

2. 在vmware中看见 第1个硬盘是 /dev/sda , 第2个硬盘是 /dev/sdb
pengdl@localhost:~$ sudo fdisk -l
[sudo] password for pengdl:

Disk /dev/sdb: 53.7 GB, 53687091200 bytes
255 heads, 63 sectors/track, 6527 cylinders
Units = cylinders of 16065 * 512 = 8225280 bytes
Sector size (logical/physical): 512 bytes / 512 bytes
I/O size (minimum/optimal): 512 bytes / 512 bytes
Disk identifier: 0x00000000

Disk /dev/sdb doesn't contain a valid partition table

Disk /dev/sda: 107.4 GB, 107374182400 bytes
255 heads, 63 sectors/track, 13054 cylinders
Units = cylinders of 16065 * 512 = 8225280 bytes
Sector size (logical/physical): 512 bytes / 512 bytes
I/O size (minimum/optimal): 512 bytes / 512 bytes
Disk identifier: 0x0006effe

   Device Boot      Start         End      Blocks   Id  System
/dev/sda1   *           1       12803   102835200   83  Linux
/dev/sda2           12803       13055     2019329    5  Extended
/dev/sda5           12803       13055     2019328   82  Linux swap / Solaris
pengdl@localhost:~$
3. 创建硬盘信息
fdisk /dev/sdb
a. 按n添加分区,选p(主分区);
b. 选1,也就是sdb1;
c. 然后就是空间划分,一路回车。默认是使用整个磁盘空间。
d. 然后按w写入分区信息
pengdl@localhost:~$ sudo fdisk /dev/sdb
Device contains neither a valid DOS partition table, nor Sun, SGI or OSF disklabel
Building a new DOS disklabel with disk identifier 0xfd7fb007.
Changes will remain in memory only, until you decide to write them.
After that, of course, the previous content won't be recoverable.

Warning: invalid flag 0x0000 of partition table 4 will be corrected by w(rite)

WARNING: DOS-compatible mode is deprecated. It's strongly recommended to
         switch off the mode (command 'c') and change display units to
         sectors (command 'u').

Command (m for help): n
Command action
   e   extended
   p   primary partition (1-4)
p
Partition number (1-4): 1
First cylinder (1-6527, default 1):
Using default value 1
Last cylinder, +cylinders or +size{K,M,G} (1-6527, default 6527):
Using default value 6527

Command (m for help): w
The partition table has been altered!

Calling ioctl() to re-read partition table.
Syncing disks.
pengdl@localhost:~$
4. 格式化硬盘
mkfs.ext3 /dev/sdb1 (之前我用mkfs -t ext3 /dev/sdb1,当启动时总是失败)
pengdl@localhost:~$ sudo mkfs.ext3 /dev/sdb1
mke2fs 1.41.12 (17-May-2010)
文件系统标签=
操作系统:Linux
块大小=4096 (log=2)
分块大小=4096 (log=2)
Stride=0 blocks, Stripe width=0 blocks
3276800 inodes, 13107024 blocks
655351 blocks (5.00%) reserved for the super user
第一个数据块=0
Maximum filesystem blocks=0
400 block groups
32768 blocks per group, 32768 fragments per group
8192 inodes per group
Superblock backups stored on blocks:
        32768, 98304, 163840, 229376, 294912, 819200, 884736, 1605632, 2654208,
        4096000, 7962624, 11239424

正在写入inode表: 完成
Creating journal (32768 blocks): 完成
Writing superblocks and filesystem accounting information: 完成

This filesystem will be automatically checked every 22 mounts or
180 days, whichever comes first.  Use tune2fs -c or -i to override.
pengdl@localhost:~$
pengdl@localhost:~$ sudo fdisk -l

Disk /dev/sdb: 53.7 GB, 53687091200 bytes
255 heads, 63 sectors/track, 6527 cylinders
Units = cylinders of 16065 * 512 = 8225280 bytes
Sector size (logical/physical): 512 bytes / 512 bytes
I/O size (minimum/optimal): 512 bytes / 512 bytes
Disk identifier: 0xfd7fb007

   Device Boot      Start         End      Blocks   Id  System
/dev/sdb1               1        6527    52428096   83  Linux

Disk /dev/sda: 107.4 GB, 107374182400 bytes
255 heads, 63 sectors/track, 13054 cylinders
Units = cylinders of 16065 * 512 = 8225280 bytes
Sector size (logical/physical): 512 bytes / 512 bytes
I/O size (minimum/optimal): 512 bytes / 512 bytes
Disk identifier: 0x0006effe

   Device Boot      Start         End      Blocks   Id  System
/dev/sda1   *           1       12803   102835200   83  Linux
/dev/sda2           12803       13055     2019329    5  Extended
/dev/sda5           12803       13055     2019328   82  Linux swap / Solaris
pengdl@localhost:~$
5. 创建需要mount的目录
mkdir -p /opt
6. mount到指定的目录
mount /dev/sdb1 /opt -o rw
7. 如果需要每次启动加载,修改/etc/fstab文件
在fstab文件里面添加一行:
/dev/sdb1 /opt ext3 defaults 1 1
这样我们就完成了在虚拟机上Linux添加硬盘问题的解决。
最后,为了防止误删这个文件夹,可以参考:Linux下防止文件误删方法
补充:
这里重点说明一下/etc/fstab如何填写:
- 使用UUID进行挂载
UUID 全称是 Universally Unique Identifier,也就是说,每个分区有一个唯一的 UUID 值,这样就不会发生分区识别混乱的问题了
操作方法:
参见
http://www.cnblogs.com/pengdonglin137/p/3805504.html
http://www.cnblogs.com/pengdonglin137/p/3805457.html
- 如何填写fatab的其他字段
参见:
http://www.cnblogs.com/pengdonglin137/p/3805457.html
一个简单的 /etc/fstab,使用内核名称标识磁盘:
/etc/fstab
# <file system>        <dir>         <type>    <options>             <dump> <pass>
tmpfs                  /tmp          tmpfs     nodev,nosuid          0      0
/dev/sda1              /             ext4      defaults,noatime      0      1
/dev/sda2              none          swap      defaults              0      0
/dev/sda3              /home         ext4      defaults,noatime      0      2
字段定义
/etc/fstab 文件包含了如下字段,通过空格或 Tab 分隔:
<file system> <dir> <type> <options> <dump> <pass>
- <file systems> - 要挂载的分区或存储设备.
- <dir> - <file systems>的挂载位置。
- <type> - 要挂载设备或是分区的文件系统类型,支持许多种不同的文件系统:
ext2,ext3,ext4,reiserfs,xfs,jfs,smbfs,iso9660,vfat,ntfs,swap及auto。 设置成auto类型,mount 命令会猜测使用的文件系统类型,对 CDROM 和 DVD 等移动设备是非常有用的。 - <options> - 挂载时使用的参数,注意有些mount 参数是特定文件系统才有的。一些比较常用的参数有:
-
auto- 在启动时或键入了mount -a命令时自动挂载。noauto- 只在你的命令下被挂载。exec- 允许执行此分区的二进制文件。noexec- 不允许执行此文件系统上的二进制文件。ro- 以只读模式挂载文件系统。rw- 以读写模式挂载文件系统。user- 允许任意用户挂载此文件系统,若无显示定义,隐含启用noexec,nosuid,nodev参数。users- 允许所有 users 组中的用户挂载文件系统.nouser- 只能被 root 挂载。owner- 允许设备所有者挂载.sync- I/O 同步进行。async- I/O 异步进行。dev- 解析文件系统上的块特殊设备。nodev- 不解析文件系统上的块特殊设备。suid- 允许 suid 操作和设定 sgid 位。这一参数通常用于一些特殊任务,使一般用户运行程序时临时提升权限。nosuid- 禁止 suid 操作和设定 sgid 位。noatime- 不更新文件系统上 inode 访问记录,可以提升性能(参见 atime 参数)。nodiratime- 不更新文件系统上的目录 inode 访问记录,可以提升性能(参见 atime 参数)。relatime- 实时更新 inode access 记录。只有在记录中的访问时间早于当前访问才会被更新。(与 noatime 相似,但不会打断如 mutt 或其它程序探测文件在上次访问后是否被修改的进程。),可以提升性能(参见 atime 参数)。flush-vfat的选项,更频繁的刷新数据,复制对话框或进度条在全部数据都写入后才消失。defaults- 使用文件系统的默认挂载参数,例如ext4的默认参数为:rw,suid,dev,exec,auto,nouser,async.
- <dump> dump 工具通过它决定何时作备份. dump 会检查其内容,并用数字来决定是否对这个文件系统进行备份。 允许的数字是 0 和 1 。0 表示忽略, 1 则进行备份。大部分的用户是没有安装 dump 的 ,对他们而言 <dump> 应设为 0。
- <pass> fsck 读取 <pass> 的数值来决定需要检查的文件系统的检查顺序。允许的数字是0, 1, 和2。 根目录应当获得最高的优先权 1, 其它所有需要被检查的设备设置为 2. 0 表示设备不会被 fsck 所检查。
atime 参数
使用 noatime, nodiratime 或 relatime 可以提升 ext2, ext3 及 ext4 格式磁盘的性能。 Linux 在默认情况下使用atime选项,每次在磁盘上读取(或写入)数据时都会产生一个记录。这是为服务器设计的,在桌面使用中意义不大。默认的 atime 选项最大的问题在于即使从页面缓存读取文件(从内存而不是磁盘读取),也会产生磁盘写操作!
使用 noatime 选项阻止了读文件时的写操作。大部分应用程序都能很好工作。只有少数程序如 Mutt 需要这些信息。Mutt 的用户应该使用 relatime 选项。使用 relatime 选项后,只有文件被修改时才会产生文件访问时间写操作。nodiratime 选项仅对目录禁用了文件访问时间。relatime 是比较好的折衷,Mutt 等程序还能工作,但是仍然能够通过减少访问时间更新提升系统性能。
综合考虑:
我们这样填写fatab:
UUID=XXXXXXXXX /opt ext3 defaults,noatime 0 2
下面是我的配置截图:
