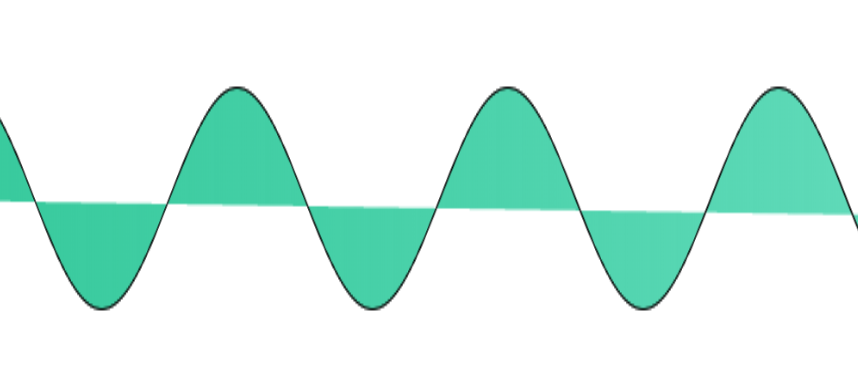
最近项目中,ui设计了个水波效果的背景动画,然而并没有gif或svg动画,开始试着用css实现了一下,动画效果并不是很好,网上查了下基本都是用贝赛尔曲线实现,想起以看的各种前波形图,于是想着用三角函数图像初略模拟一下
示例效果如下:
一、绘制sin函数图像
sin函数表达式如下,y=Asin(wx+φ)+h y= Asin(wx+φ)+h y=Asin(wx+φ)+h
其中A表示振幅,ω表示角频率(ω=2π/T,T为函数的周期),φ表示初相,h表示图像向y轴正方向平移的长度;(这里需要注意一下:h在数学学的本来是表示向上平移的,但在canvas中采用的是屏幕坐标系,即左上角为原点,h则表示向下平移);绘制代码如下:
(1)添加canvas标签
<canvas id="canvas"></canvas>
(2)添加css样式,设置canvas宽高
html,
body {
  padding: 0;
  margin: 0;
  width: 100%;
  height: 100%;
}
canvas {
  width: 100%;
  height: 100%;
}
(3)绘制函数图像
var canvas = document.getElementById("canvas"),
    ctx = canvas.getContext('2d'),
    width = canvas.width = canvas.offsetWidth,
    height = canvas.height = canvas.offsetHeight;
//声明参数
var A=50,
    W=1 / 50,
    Q=0,
    H= height / 2;
//绘图方法
(function draw(){
  ctx.clearRect(0, 0, width, height);//清空画布
  ctx.beginPath();                   //开始路径
  ctx.strokeStyle="#000";            //设置线条颜色
  ctx.lineWidth = 1;                 //设置线条宽度
  ctx.moveTo(0, height /2);          //起始点位置

  for (let x = 0; x <=  width; x++) {// 绘制x对应y的
    var y = A*Math.sin(W*x+Q) +H
    ctx.lineTo(x, y)
  }

  ctx.stroke();                      //绘制路径
  ctx.closePath();                   //闭合路径
})()
这样我们可以得到以下图像:

二、为函数图像添加动画
上面得到的是是一个静态的函数图像,而我们一般见到的的波形图或水波都是随时间连续变化的,这里就要用到上一步中的参数相位φ,(js即代码中的Q) ,我们将φ随时间不断增加或减小,即可得到不同时间的不同图像;使用window.requestAnimationFrame实现帧动画;
修改以上代码为:
var speed=-0.02;

(function draw(){
  window.requestAnimationFrame(draw);
  ctx.clearRect(0, 0, width, height);
  ctx.beginPath();
  ctx.strokeStyle="#000";
  ctx.lineWidth = 1;
  ctx.moveTo(0, height /2);
  Q+=speed;
  for (let x = 0; x <=  width; x++) {
    var y = A*Math.sin(W*x+Q) +H;
    ctx.lineTo(x, y);
  }
  ctx.stroke();
  ctx.closePath();
})()
效果如下(渣渣截图软件):

三、绘制完整填充路径
以上路径虽有闭合,但却不满足我们需要填充的部分,直接填充效果如下:

完整填充路径应如图所示:

闭合路径后创建一个渐变颜色,作为填充颜色,代码如下:
var lingrad = ctx.createLinearGradient(0,0,width,0);
 lingrad.addColorStop(0, 'rgba(0,186,128,0.8)');
 lingrad.addColorStop(1, 'rgba(111,224,195,1)');

(function draw(){
  window.requestAnimationFrame(draw);
  ctx.clearRect(0, 0, width, height);
  ctx.beginPath();
  ctx.strokeStyle="#000";
  ctx.fillStyle = lingrad;
  ctx.lineWidth = 1;
  ctx.moveTo(0, height /2);
  Q+=speed;
  for (let x = 0; x <=  width; x++) {
    var y = A*Math.sin(W*x+Q) +H;
    ctx.lineTo(x, y);
  }
  ctx.lineTo(width, height);
  ctx.lineTo(0, height);
  ctx.fill();
  ctx.closePath();
})()
效果如下:

四、完善水波动画
1、首先可以对上面波形叠加一个频率更高的波形,使波形无规矩
var s = 0.1*Math.sin(x/150)+1;
var y = A*Math.sin(W*x+Q) +H;
y=y*s;
2、再添加一个相位变化不同的波形,其渐变填充与上一个渐变方向相反使其形成相互重叠的阴影效果;
并设置路径重叠效果globalCompositeOperation;
自己根据效果配置相关参数,调节波形;
完整代码如下:
var canvas = document.getElementById("canvas"),
   ctx = canvas.getContext('2d'),
   width = canvas.width = canvas.offsetWidth,
   height = canvas.height = canvas.offsetHeight;

var A=30,
   W=1 /200,
   Q=0,
   H= height / 2;

var A2=30,
   W2=1/300,
   Q2=0,
   H2= height / 2;

var speed=-0.01;
var speed2=-0.02;

var lingrad = ctx.createLinearGradient(0,0,width,0);
lingrad.addColorStop(0, 'rgba(0,186,128,0.8)');
lingrad.addColorStop(1, 'rgba(111,224,195,1)');

var lingrad2 = ctx.createLinearGradient(0,0,width,0);
lingrad2.addColorStop(0,'rgba(111,224,195,1)');
lingrad2.addColorStop(1, 'rgba(0,186,128,0.8)');

(function draw(){
  window.requestAnimationFrame(draw);
  ctx.clearRect(0, 0, width, height);
  ctx.beginPath();
  ctx.fillStyle = lingrad;
  ctx.moveTo(0, height /2);
  //绘制第一个波形
  Q+=speed;
  for (let x = 0; x <=  width; x++) {
    var s = 0.1*Math.sin(x/150)+1;
    var y = A*Math.sin(W*x+Q) +H;
    y=y*s;
    ctx.lineTo(x, y);
  }
  ctx.lineTo(width, height);
  ctx.lineTo(0, height);
  ctx.fill();
  ctx.closePath()
  //设置重叠效果
  ctx.globalCompositeOperation = "destination-over"
  //绘制第二个波形
  ctx.beginPath();
  ctx.fillStyle = lingrad2;
  Q2+=speed2;
  for (let x = 0; x < width; x++) {
    var y = A2*Math.sin(x*W2+Q2) +H2;
    ctx.lineTo(x, y);
  }
  ctx.lineTo(width,height);
  ctx.lineTo(0,height);
  ctx.fill()
  ctx.closePath();

})()