一、环境
- Idea 2020.1
- JDK 1.8
- maven
二、目的
初识Spring Boot,spring boot入门的第一个示例。
三、步骤
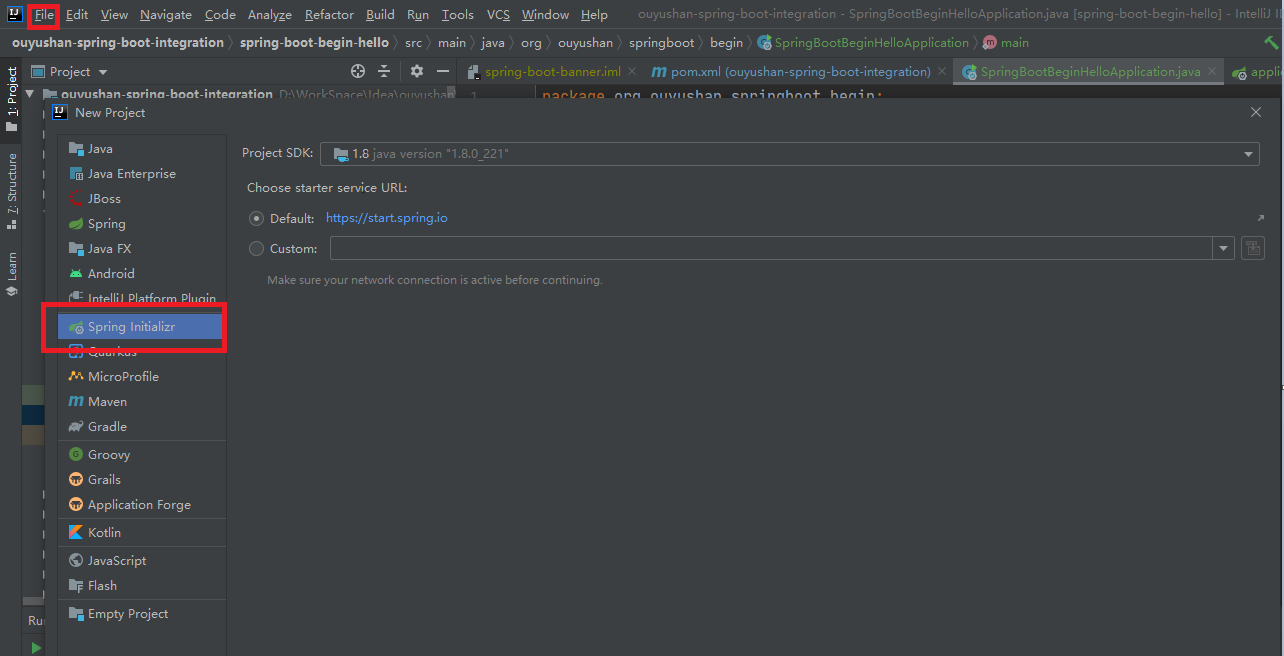
3.1、点击File -> New Project -> Spring Initializer,点击next
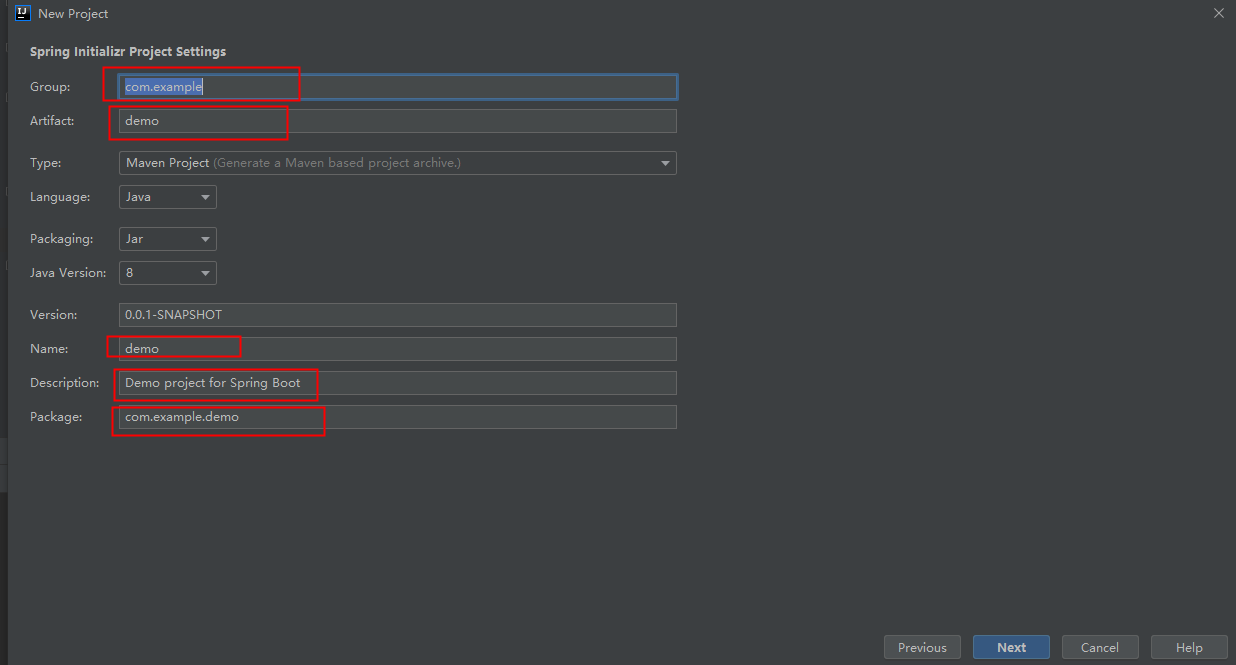
3.2、在对应地方修改自己的项目信息
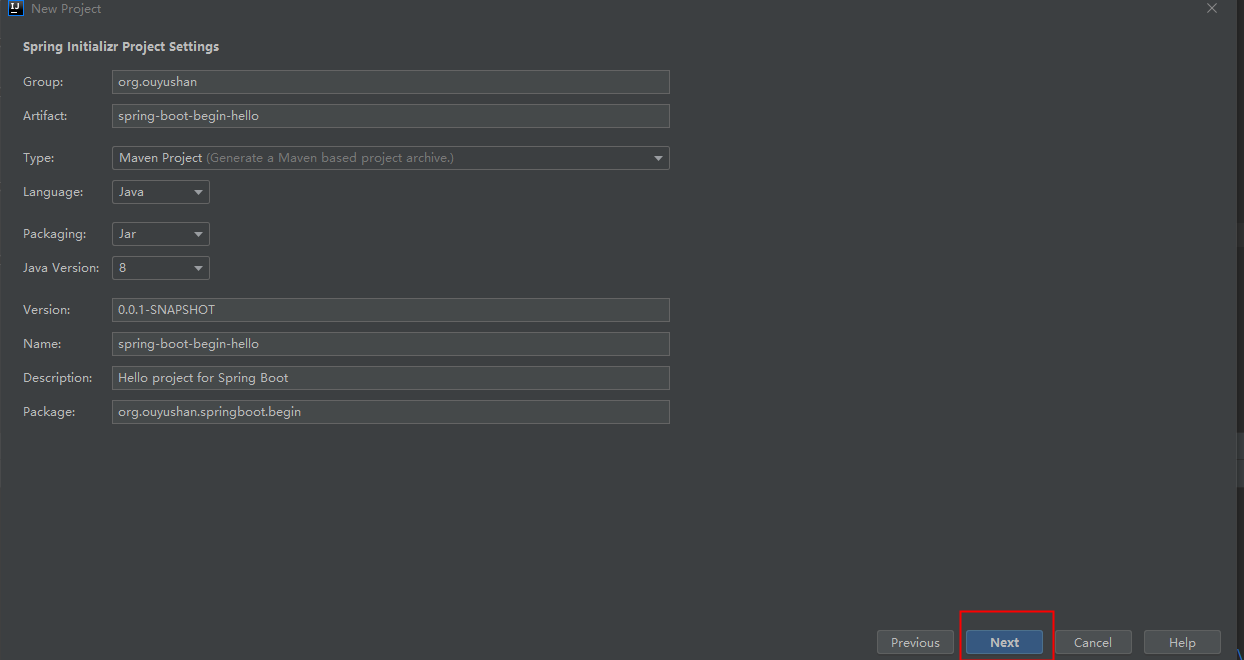
3.3、修改后如下,点击next
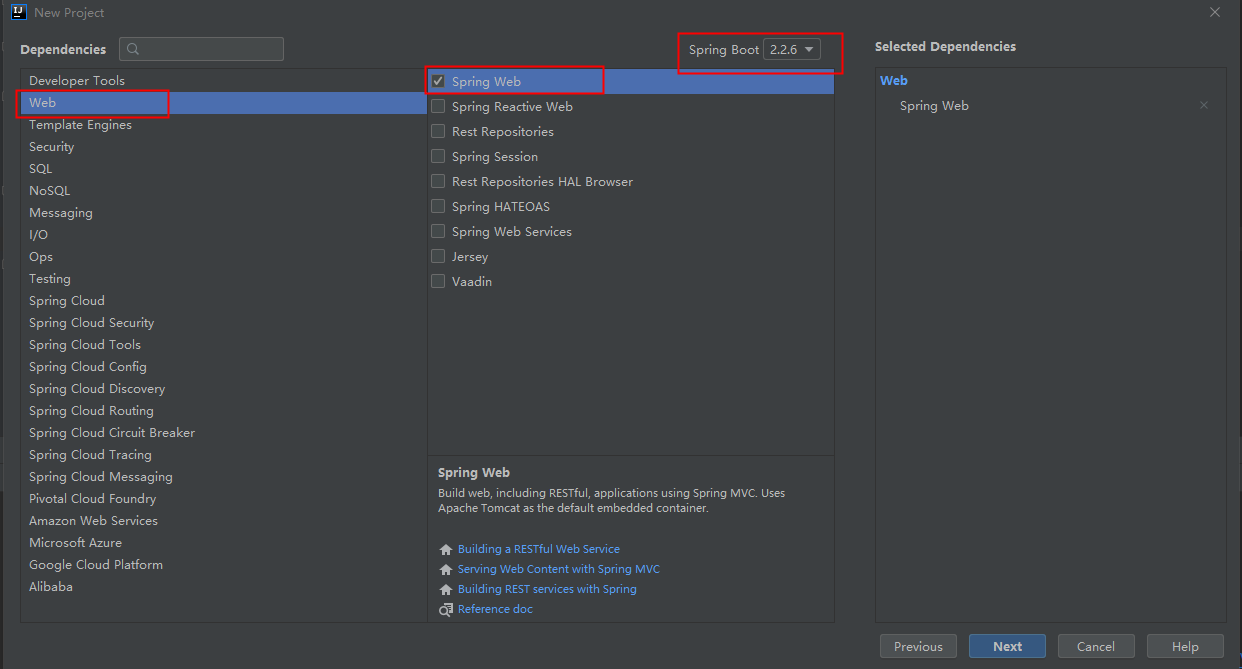
3.4、选择Web依赖,选中Spring Web。可以选择Spring Boot版本,本次默认为2.2.6,点击Next
3.5、编辑工程名和项目路径,确定后点击Finish完成

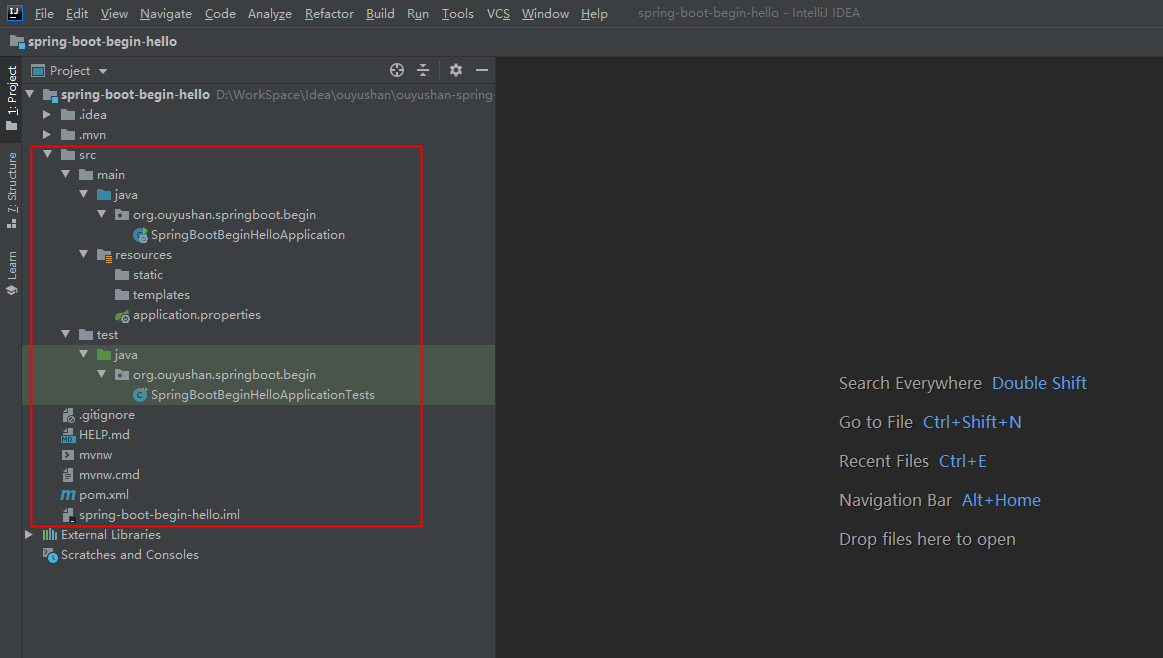
3.6、完成新建工程
四、代码分析
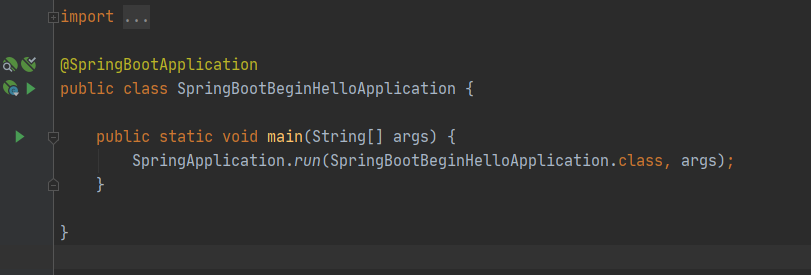
4.1、运行项目 执行SpringBootBeginHelloApplication下的main方法
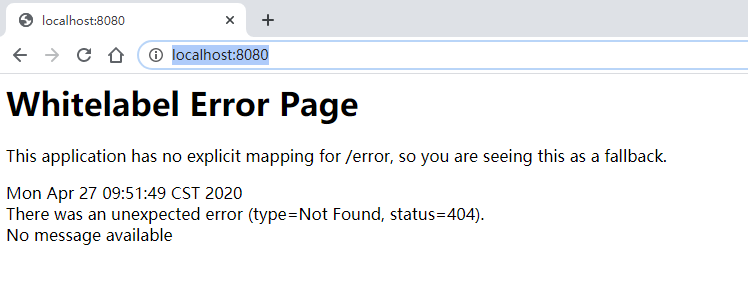
4.2、测试运行
浏览器访问
显示结果如下,表示该web项目正常启动
4.3、新增测试接口

新建包controller,然后建立HelloController类,具体代码如下:


 1 package org.ouyushan.springboot.begin.controller;
 2
 3 import org.springframework.web.bind.annotation.GetMapping;
 4 import org.springframework.web.bind.annotation.RequestMapping;
 5 import org.springframework.web.bind.annotation.RestController;
 6
 7 /**
 8  * @Description
 9  * @Author ouyushan
10 * @Email ouyushan@hotmail.com
11 * @Date 2020/4/27
12 */
13
14 @RestController
15 @RequestMapping("/springboot")
16 public class HelloController {
17
18     @GetMapping("/hello")
19     public String hello() {
20         return "Hello,Spring Boot!";
21     }
22
23 }
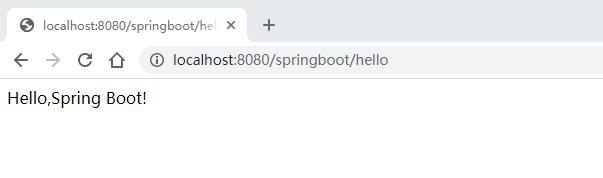
4.4、新接口测试
再次启动程序后浏览器访问:
接口请求返回如下:
 1 <?xml version="1.0" encoding="UTF-8"?>
 2 <project xmlns="http://maven.apache.org/POM/4.0.0" xmlns:xsi="http://www.w3.org/2001/XMLSchema-instance"
 3          xsi:schemaLocation="http://maven.apache.org/POM/4.0.0 https://maven.apache.org/xsd/maven-4.0.0.xsd">
 4     <modelVersion>4.0.0</modelVersion>
 5     <parent>
 6         <groupId>org.springframework.boot</groupId>
 7         <artifactId>spring-boot-starter-parent</artifactId>
 8         <version>2.2.6.RELEASE</version>
 9         <relativePath/> <!-- lookup parent from repository -->
10     </parent>
11     <groupId>org.ouyushan</groupId>
12     <artifactId>spring-boot-begin-hello</artifactId>
13     <version>0.0.1-SNAPSHOT</version>
14     <name>spring-boot-begin-hello</name>
15     <description>Hello project for Spring Boot</description>
16
17     <!--指定jdk版本-->
18     <properties>
19         <java.version>1.8</java.version>
20     </properties>
21
22     <dependencies>
23         <!--指定spring boot web依赖-->
24         <dependency>
25             <groupId>org.springframework.boot</groupId>
26             <artifactId>spring-boot-starter-web</artifactId>
27         </dependency>
28
29         <dependency>
30             <groupId>org.springframework.boot</groupId>
31             <artifactId>spring-boot-starter-test</artifactId>
32             <scope>test</scope>
33             <exclusions>
34                 <exclusion>
35                     <groupId>org.junit.vintage</groupId>
36                     <artifactId>junit-vintage-engine</artifactId>
37                 </exclusion>
38             </exclusions>
39         </dependency>
40     </dependencies>
41
42     <build>
43         <plugins>
44             <plugin>
45                 <groupId>org.springframework.boot</groupId>
46                 <artifactId>spring-boot-maven-plugin</artifactId>
47             </plugin>
48         </plugins>
49     </build>
50
51 </project>
五、知识点
5.1、spring boot 项目可通过以下方式指定jdk版本
1     <!--指定jdk版本-->
2     <properties>
3         <java.version>1.8</java.version>
4     </properties>