JetBrainstorm家族 2019年版本
亲测:2019.3.2 | 2019.1.3
1. 先下载压缩包解压后得到jetbrains-agent.jar,把它放到你认为合适的文件夹内。
下载页面:https://zhile.io/2018/08/17/jetbrains-license-server-crack.html
2. 启动你的IDE,如果上来就需要注册,选择:试用(Evaluate for free)进入IDE
3. 点击你要注册的IDE菜单:"Configure" 或 "Help" -> "Edit Custom VM Options ..."
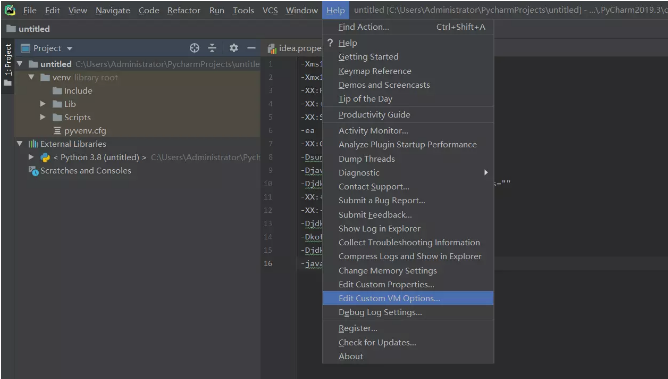
如果提示是否要创建文件,请点"Yes"。
mac:
Don't edit .vmoptions and .properties files directly, it will violate the application signature, always make a copy of the files under IDE configuration directory and edit the copy instead. See this answer for details. The original file is located in /Applications/<Product>.app/Contents/bin folder (/Applications/<Product>.app/bin for older IDE versions).
参考文章:https://intellij-support.jetbrains.com/hc/en-us/articles/206544869
3. 在打开的vmoptions编辑窗口末行添加:-javaagent:/absolute/path/to/jetbrains-agent.jar
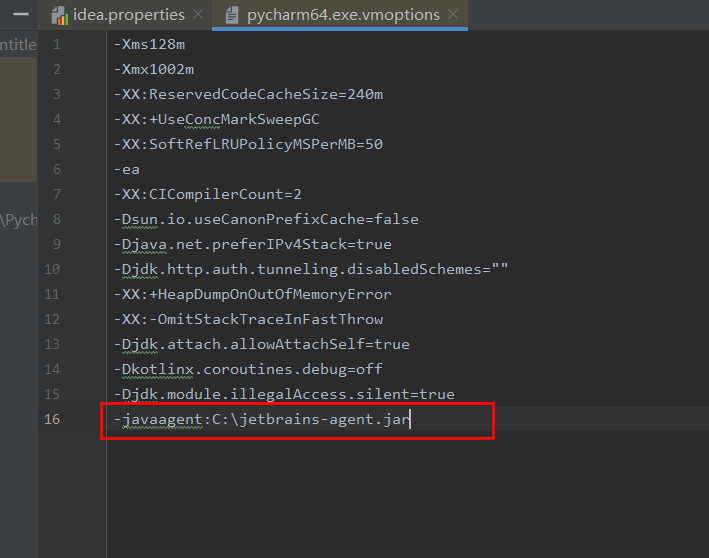
目录随意,只要你能保证不被删除。一定要自己确认好路径(不要使用中文路径),填错会导致IDE打不开!!!最好使用绝对路径。
一个vmoptions内只能有一个-javaagent参数。
示例:
mac: -javaagent:/Users/neo/jetbrains-agent.jar
linux: -javaagent:/home/neo/jetbrains-agent.jar
windows: -javaagent:C:Users
eojetbrains-agent.jar
如果还是填错了,参考这篇文章编辑vmoptions补救:
https://intellij-support.jetbrains.com/hc/en-us/articles/206544519
4. 重启你的IDE。
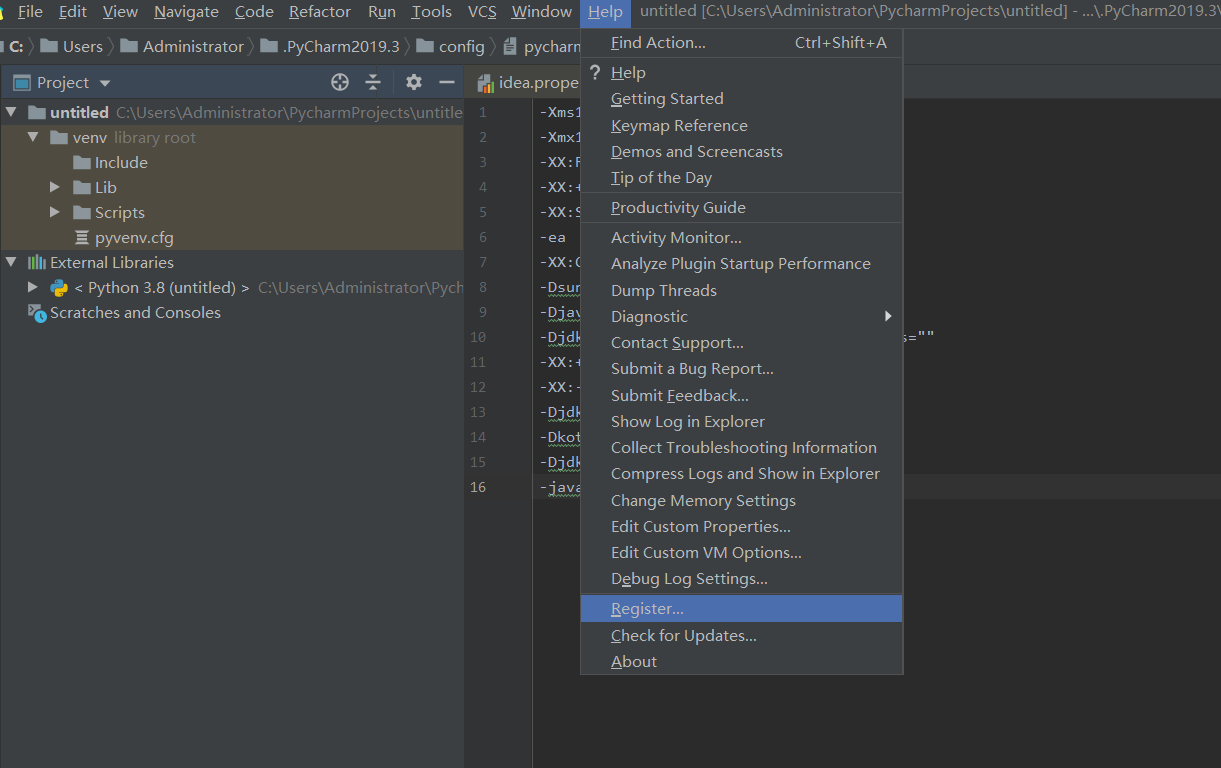
5. 点击IDE菜单 "Help" -> "Register..." 或 "Configure" -> "Manage License..."
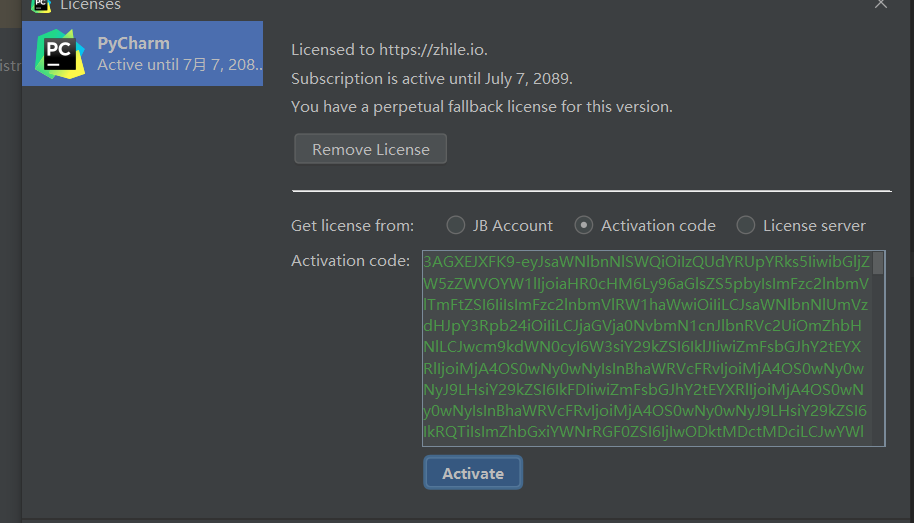
支持两种注册方式:License server 和 Activation code:
这里建议使用Activation code方式,(注意粘贴ACTIVATION_CODE.txt注册码后,点击下方Activate按钮,上方注册信息就会从30天试用改为2089年,一定要点击Activate后再点击close)

1). 选择License server方式,地址填入:http://jetbrains-license-server 或 https://fls.jetbrains-agent.com (应该会自动填上)
或者点击按钮:"Discover Server"来自动填充地址。
2). 选择Activation code方式离线激活,请使用:ACTIVATION_CODE.txt 内的注册码激活
如果激活窗口一直弹出(error 1653219),请去hosts文件里移除jetbrains相关的项目
如果你需要自定义License name,请访问:https://zhile.io/custom-license.html
6.完成后点击Help>About,查看注册信息
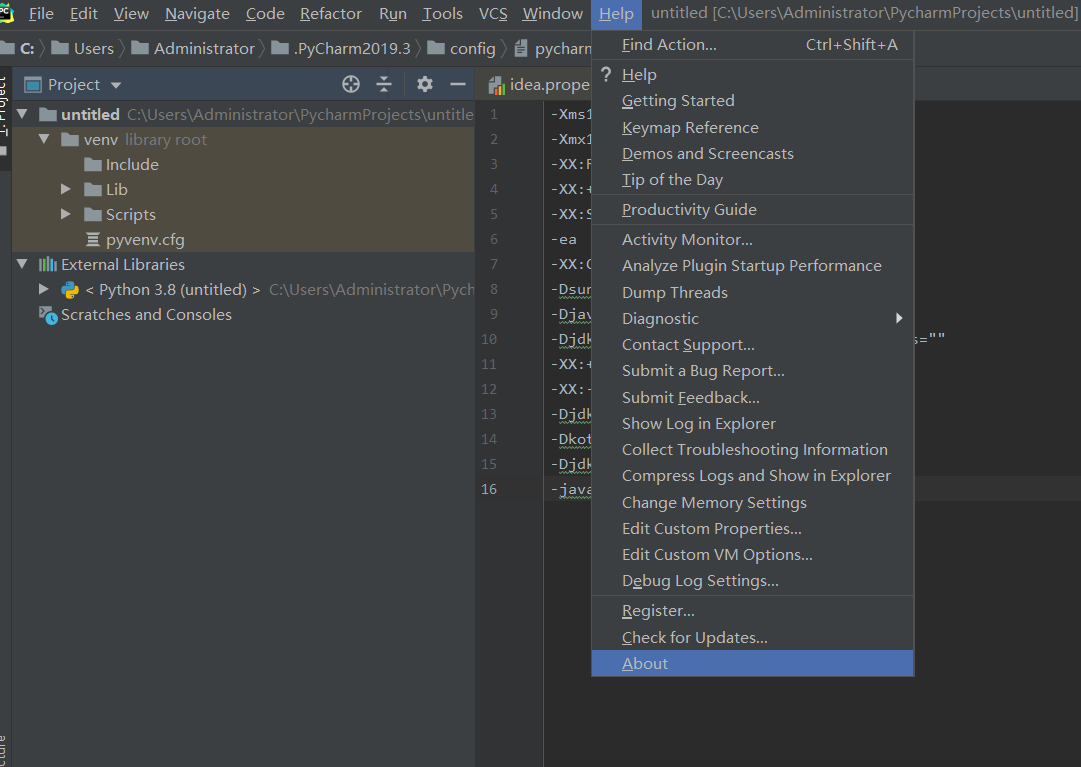
会发现注册信息变了
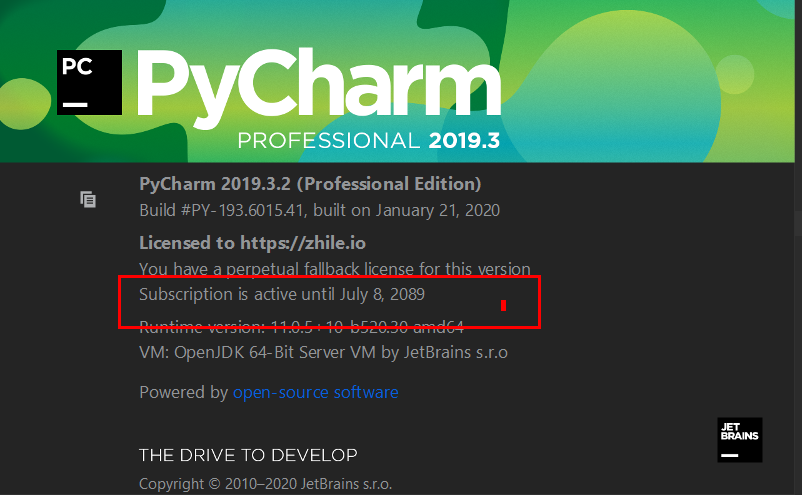
问题
pycharm64.exe.vmoptions(此处为pycharm其他IDE同理)文件中jetbrains-agent.jar目录位置一定要填写正确,否则会打不开IDE
pycharm64.exe.vmoptions一定不要用记事本直接更改,要在IDE中更改
jetbrains-agent.jar一定要放在不会被随意删除的位置
最后感谢 https://zhile.io 的开源项目