1.rpm安装mysql5.7
yum remove mariadb* -y
rpm -ivh mysql-community-common-5.7.25-1.el7.x86_64.rpm
rpm -ivh mysql-community-libs-5.7.25-1.el7.x86_64.rpm
rpm -ivh mysql-community-client-5.7.25-1.el7.x86_64.rpm
rpm -ivh mysql-community-server-5.7.25-1.el7.x86_64.rpm
2.启动mysql,更改root密码
systemctl start mysqld
grep "temporary password" /var/log/mysqld.log
mysqladmin -uroot -p password
3.主从配置
修改mysql配置文件/etc/my.cnf,添加以下内容
[client]
user=root
password=JPcms123!
[mysqld]
server-id=1
read-only=1
log-bin=mysql-bin
relay-log=mysql-relay-bin
replicate-wild-ignore-table=mysql.%
replicate-wild-ignore-table=test.%
replicate-wild-ignore-table=information_schema.%
创建同步账户
mysql>grant replication slave on *.* to 'repl_user'@'192.168.1.%' identified by 'REPL_passwd123!';
mysql>grant all on *.* to 'root'@'192.168.1.%' identified by 'JPcms123456!';    #很重要
查看master状态

在slave上设置master
change master to master_host='192.168.1.111',master_user='repl_user',master_password='REPL_passwd123!',master_log_file='mysql-bin.000001',master_log_pos=742;
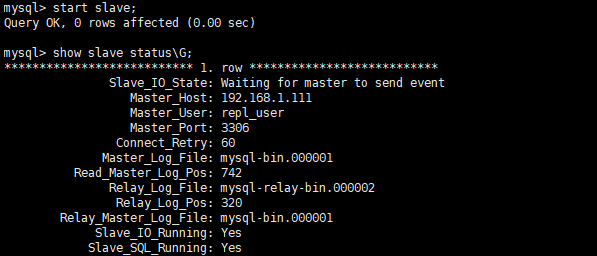
查看slave状态
start slave;
show slave statusG;

4.配置3个节点ssh互信
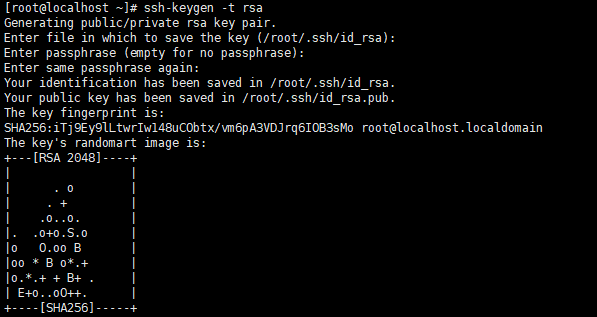
ssh-keygen -t rsa
ssh-copy-id -i /root/.ssh/id_rsa.pub root@192.168.1.111
ssh-copy-id -i /root/.ssh/id_rsa.pub root@192.168.1.112
ssh-copy-id -i /root/.ssh/id_rsa.pub root@192.168.1.113

最后测试三个节点之间可以无密码登录
ssh 192.168.1.111 date
ssh 192.168.1.112 date
ssh 192.168.1.113 date

5.安装MHA
安装依赖包
rpm -ivh mysql-community-libs-compat-5.7.25-1.el7.x86_64.rpm
yum install epel-release -y
yum install perl-DBD-MySQL perl-Config-Tiny perl-Log-Dispatch perl-Parallel-ForkManager perl-Config-IniFiles perl-Time-HiRes
在3个节点安装MHA的node
rpm -ivh mha4mysql-node-0.58-0.el7.centos.noarch.rpm
在slave/MHA manager节点上安装mha4mysql-manage
rpm -ivh mha4mysql-manager-0.58-0.el7.centos.noarch.rpm
6.配置MHA
mkdir -p /etc/mha/scripts
vim /etc/masterha_default.cnf
[server default]
user=root
password=JPcms123456!
ssh_user=root
repl_user=repl_user
repl_password=REPL_passwd123!
ping_interval=1
secondary_check_script=masterha_secondary_check -s 192.168.1.111 -s 192.168.1.112 -s 192.168.1.113 --user=repl_user --master_host=localhost.localdomain --master_ip=192.168.1.111 --master_port=3306
master_ip_failover_script="/etc/mha/scripts/master_ip_failover"
# master_ip_online_change_script="/etc/mha/scripts/master_ip_online_change"
# shutdown_script= /script/masterha/power_manager
report_script="/etc/mha/scripts/send_report"
vim /etc/mha/app1.cnf
脚本
#!/usr/bin/env perl
use strict;
use warnings FATAL => 'all';
use Getopt::Long;
my (
 $command, $ssh_user, $orig_master_host, $orig_master_ip,
 $orig_master_port, $new_master_host, $new_master_ip, $new_master_port
);
my $vip = '192.168.1.115/24';
my $key = '1';
my $ssh_start_vip = "/sbin/ifconfig eth0:$key $vip";
my $ssh_stop_vip = "/sbin/ifconfig eth0:$key down";
GetOptions(
 'command=s' => $command,
 'ssh_user=s' => $ssh_user,
 'orig_master_host=s' => $orig_master_host,
 'orig_master_ip=s' => $orig_master_ip,
 'orig_master_port=i' => $orig_master_port,
 'new_master_host=s' => $new_master_host,
 'new_master_ip=s' => $new_master_ip,
 'new_master_port=i' => $new_master_port,
);
exit &main();
sub main {
 print "

IN SCRIPT TEST====$ssh_stop_vip==$ssh_start_vip===

";
 if ( $command eq "stop" || $command eq "stopssh" ) {
 my $exit_code = 1;
 eval {
 print "Disabling the VIP on old master: $orig_master_host
";
 &stop_vip();
 $exit_code = 0;
 };
 if ($@) {
 warn "Got Error: $@
";
 exit $exit_code;
 }
 exit $exit_code;
 }
 elsif ( $command eq "start" ) {
 my $exit_code = 10;
 eval {
 print "Enabling the VIP - $vip on the new master - $new_master_host
";
 &start_vip();
 $exit_code = 0;
 };
 if ($@) {
 warn $@;
 exit $exit_code;
 }
 exit $exit_code;
 }
 elsif ( $command eq "status" ) {
 print "Checking the Status of the script.. OK
";
 exit 0;
 }
 else {
 &usage();
 exit 1;
 }
}
sub start_vip() {
 `ssh $ssh_user@$new_master_host " $ssh_start_vip "`;
}
sub stop_vip() {
 return 0 unless ($ssh_user);
 `ssh $ssh_user@$orig_master_host " $ssh_stop_vip "`;
}
sub usage {
 print
 "Usage: master_ip_failover --command=start|stop|stopssh|status --orig_master_host=host
--orig_master_ip=ip --orig_master_port=port --new_master_host=host --new_master_ip=ip
--new_master_port=port
";
}
在master上添加VIP
ifconfig eth0:1 192.168.1.115/24
测试MHA
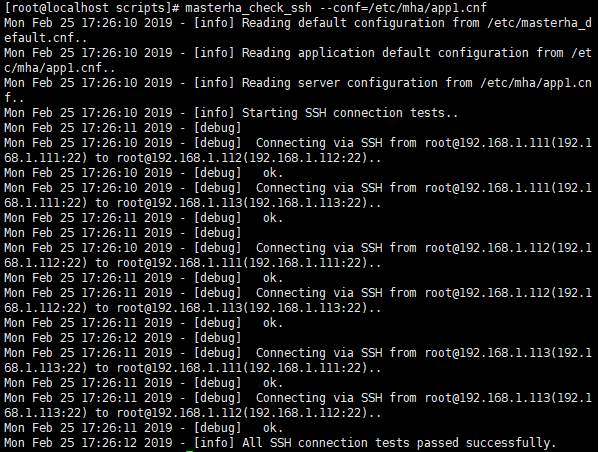
a.通过 masterha_check_ssh 验证 ssh 信任登录是否成功
masterha_check_ssh --conf=/etc/mha/app1.cnf

b.masterha_check_repl 验证 mysql 复制是否成功
masterha_check_repl --conf=/etc/mha/app1.cnf