准备测试环境
单元测试通常由三个部分组成:
Arrange – 为测试准备或设置边界条件
Act – 执行操作
Assert — 验证是否是预期的结果
我们使用NUnit作为我们的测试框架。首先,我们引入一个基类SpecificationBase,以允许我们用更自然的方式编写我们的单元测试。SpecificationBase的代码如下所示:
public abstract class SpecificationBase
{
    [TestFixtureSetUp]
    public void TestFixtureSetUp()
    {
        BeforeAllTests();
    }
    [SetUp]
    public void SetUp()
    {
        Given();
        When();
    }
    [TearDown]
    public void TearDown()
    {
        CleanUp();
    }
    [TestFixtureTearDown]
    public void TestFixtureTearDown()
    {
        AfterAllTests();
    }
    protected virtual void BeforeAllTests() { }
    protected virtual void Given() { }
    protected virtual void When() { }
    protected virtual void CleanUp() { }
    protected virtual void AfterAllTests() { }
}
上面类中使用到了NUnit的四个重要特性:
TestFixtureSetup — 在当前测试类中的所有测试函数运行前调用
TestFixtureTearDown— 在当前测试类的所有测试函数运行完毕后调用
Setup— 在当前测试类的每一个测试函数运行前调用
TearDown— 在当前测试类的每一个测试函数运行后调用
关于NUnit的详细使用方法可以参考这篇文章:NUnit详细使用方法。
在我们的基类中,四个方法都调用虚拟方法。这样实现的好处是它的子类就不再用处理特性了。
下面我们添加一个Then特性,这个特性定义为TestAttribute的子特性。代码如下:
public class ThenAttribute : TestAttribute
{
}
有了这个Then特性,就可以在我们的测试中使用given-when-then语法了。
为了表示前面基类的用法,我们编写一个验证Name值对象属性的单元测试,代码如下:
public class when_creating_a_name_value_object : SpecificationBase
{
    private string lastName;
    private string firstName;
    private string middleName;
    private Name result;
    protected override void Given()
    {
        lastName = "Schenker";
        firstName = "Gabriel";
        middleName = "N.";
    }
    protected override void When()
    {
        result = new Name(lastName, firstName, middleName);
    }
    [Then]
    public void it_should_populate_the_last_name_property()
    {
        Assert.Equals(result.LastName, lastName);
    }
    [Then]
    public void it_should_populate_the_first_name_property()
    {
        Assert.Equals(result.FirstName, firstName);
    }
    [Then]
    public void it_should_populate_the_middle_name_property()
    {
        Assert.Equals(result.MiddleName, middleName);
    }
}
测试映射
为了弄清楚数据库架构是否正确以及一个实体是否正确地映射到底层数据库架构,我们必须执行一些步骤。第一步是创建一个实体并初始化值,代码如下:
var product = new Product
{
    Name = "Apple",
    Description = "Description for apple",
    UnitPrice = 1.50m,
    ReorderLevel = 10,
    Discontinued = true,
};
然后我们必须保存product,如下面的代码所示:
session.Save(product);
session.Flush();
session.Flush()用于将所有的修改强制写入到数据库,我们的例子中是一个新的product记录。
如果一个新的数据库记录创建成功,那么我们想知道是否所有的属性已经按照定义写入到数据库中。为了实现这个目的,我们必须加载刚刚写入数据库中的product,代码如下:
session.Evict(product);
var fromDb = session.Get<Product>(product.Id);
session.Evict(product)用于移除保存在一级缓存中的实体,以确保测试的数据来自数据库而非一级缓存。
在测试断言(assert)部分,我们首先要确保product存储在数据库中。如果没有存储在数据库中,在加载实体的时候NHibernate会返回null,代码如下:
Assert.That(fromDb, Is.Not.Null);
知道数据存储在数据库中之后,就需要和原来的product实体比较属性值,代码如下:
Assert.That(fromDb.Name, Is.EqualTo(product.Name));
Assert.That(fromDb.Description, Is.EqualTo(product.Description));
Assert.That(fromDb.UnitPrice, Is.EqualTo(product.UnitPrice));
Assert.That(fromDb.ReorderLevel, Is.EqualTo(product.ReorderLevel));
Assert.That(fromDb.Discontinued, Is.EqualTo(product.Discontinued));
如果这个测试通过,我们就可以保证:
1. Product实体的数据库架构是正确的。
2. Product实体的映射定义是正确的。
使用Fluent NHibernate测试映射
Fluent NHiernate程序集包含一个PersistenceSpecification<T>类,我们可以使用它快速定义测试。Product实体测试的代码如下所示:
new PersistenceSpecification<Product>(session)
.CheckProperty(x => x.Name, "Apple")
.CheckProperty(x => x.Description, "Description for apple")
.CheckProperty(x => x.UnitPrice, 1.50m)
.CheckProperty(x => x.ReorderLevel, 10)
.CheckProperty(x => x.Discontinued, true)
.VerifyTheMappings();
对想测试的每个属性,我们调用CheckProperty方法。执行测试,必须在最后调用VerifyTheMappings方法。
创建一个基本的测试
在这个例子中,为我们的映射测试实现基本的框架。
1. 打开在NHibernate初学者指南(5):映射模型到数据库之方式一中使用的OrderingSystem。
2. 在解决方案中添加一个类库项目:OrderingSystem.Tests。
3. 为OrderingSystem.Tests项目添加对NHibernate.dll,NHibernate.ByteCode.Castle.dll和FluentNHibernate.dll程序集的引用。
4. 确保OrderingSystem.项目引用了NHibernate.dll和FluentNHibernate.dll这两个程序集。如果没有,引用它们。
5. 下载NUnit,解压,并为OrderingSystem.Tests添加对nunit.framework.dll的引用。
6. 在OrderingSystem.Tests中添加一个类ThenAttribute,继承自NUnit的TestAttribute类,如下面的代码所示:
public class ThenAttribute : TestAttribute
{
}
7. 在OrderingSystem.Tests中添加一个类:SpecificationBase,和前面的SpecificationBase类代码一样。
8. 添加另一个抽象类:MappingSpecificationBase,它继承自SpecificationBase,代码如下:
public abstract class MappingSpecificationBase : SpecificationBase
{
    protected Configuration configuration;
    private ISessionFactory sessionFactory;
    protected ISession session;

    protected override void BeforeAllTests()
    {
        configuration = Fluently.Configure()
        .Database(DefineDatabase)
        .Mappings(DefineMappings)
        .BuildConfiguration();
        CreateSchema(configuration);
        sessionFactory = configuration.BuildSessionFactory();
    }

    protected ISession OpenSession()
    {
        return sessionFactory.OpenSession();
    }
    protected override void Given()
    {
        base.Given();
        session = OpenSession();
    }
    protected abstract IPersistenceConfigurer DefineDatabase();
    protected abstract void DefineMappings(MappingConfiguration m);
    protected virtual void CreateSchema(Configuration cfg) { }
}
9. 在OrderingSystem.Tests中添加一个类:entity_mapping_spec,继承自MappingSpecificationBase并使用[TestFixture]特性修饰,如下面的代码所示:
[TestFixture]
public class entity_mapping_spec : MappingSpecificationBase
{
}
10. 重写DefineDatabase方法,代码如下:
protected override IPersistenceConfigurer DefineDatabase()
{
    return MsSqlConfiguration.MsSql2008
                             .ConnectionString("server=.;" +
                             "database=NH3BeginnersGuide;" +
                             "integrated security=SSPI;");
}
11. 重写DefineMappings方法,添加如下代码:
protected override void DefineMappings(MappingConfiguration m)
{
    m.FluentMappings.AddFromAssemblyOf<ProductMap>();
}
12. 重写CreateSchema方法,添加如下代码:
protected override void CreateSchema(NHibernate.Cfg.Configuration cfg)
{
    new SchemaExport(cfg).Execute(false, true, false);
}
13. 添加一个方法测试Product实体映射是否正确,代码如下:
[Then]
public void it_should_correctly_map_a_product()
{
    new PersistenceSpecification<Product>(session)
    .CheckProperty(x => x.Name, "Apple")
    .CheckProperty(x => x.Description, "c")
    .CheckProperty(x => x.UnitPrice, 1.50m)
    .CheckProperty(x => x.ReorderLevel, 10)
    .CheckProperty(x => x.Discontinued, true)
    .VerifyTheMappings();
}
14. 现在运行测试会抛出NHibernate.InvalidProxyTypeException异常。原因在于如果实体类定义了一个带参的构造函数,则必须显式地定义一个无参的构造函数。此外,定义在类中的方法,同样必须加上virtual关键字。详细参考NHibernate测试的几个小问题这篇文章。
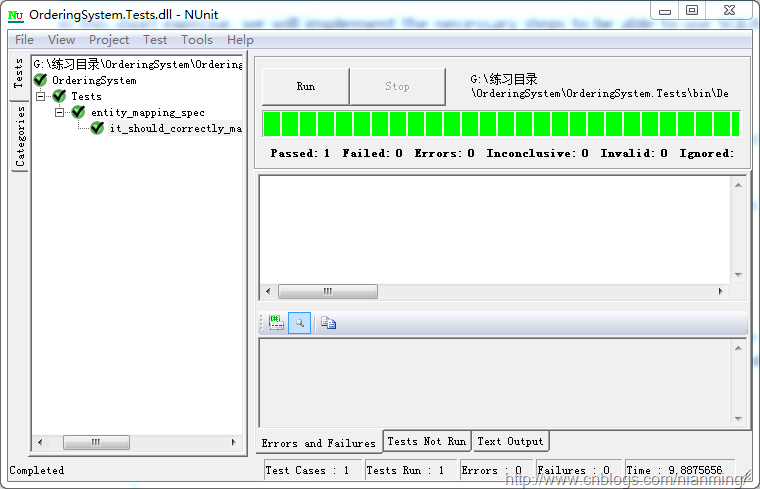
15. 修改之后,运行成功,如下图所示:
在测试中使用SQLite
1. 在前面代码的基础上完成。
2. 在OrderingSystem.Tests项目中添加一个文件夹:UsingSqLite。
3. 为OrderingSystem.Tests添加对System.Data.SQLite.dll程序集的引用,将它的属性Copy Local设为True。
4. 在UsingSqLite文件夹中添加一个类:entity_mapping_spec_for_sqlite,继承自MappingSpecificationBase并使用TestFixture修饰,代码如下所示:
[TestFixture]
public class entity_mapping_spec_for_sqlite : MappingSpecificationBase
{
}
5. 重写DefineDatabase方法,代码如下:
protected override IPersistenceConfigurer DefineDatabase()
{
    return SQLiteConfiguration.Standard.InMemory().ShowSql();
}
6. 重写DefineMappings方法,代码如下:
protected override void DefineMappings(MappingConfiguration m)
{
    m.FluentMappings.AddFromAssemblyOf<ProductMap>();
}
7. 重写Given方法,代码如下:
protected override void Given()
{
    base.Given();
    new SchemaExport(configuration)
    .Execute(false, true, false, session.Connection, null);
}
8. 添加Product实体映射的测试代码,如下:
[Then]
public void it_should_correctly_map_a_product()
{
    new PersistenceSpecification<Product>(session)
    .CheckProperty(x => x.Name, "Apple")
    .CheckProperty(x => x.Description, "Some description")
    .CheckProperty(x => x.UnitPrice, 1.50m)
    .CheckProperty(x => x.ReorderLevel, 10)
    .CheckProperty(x => x.Discontinued, true)
    .VerifyTheMappings();
}
9. 运行测试,如下图所示:
