| 这个作业属于哪个课程 | 班级课程的主页链接 |
|---|---|
| 这个作业的要求在哪里 | 作业要求链接地址 |
| 学号-姓名 | 17041524-张剑平 |
| 作业学习目标 | 1.掌握Linux系统环境C语言编程能的概念。2.学习Linux系统进程概念 |
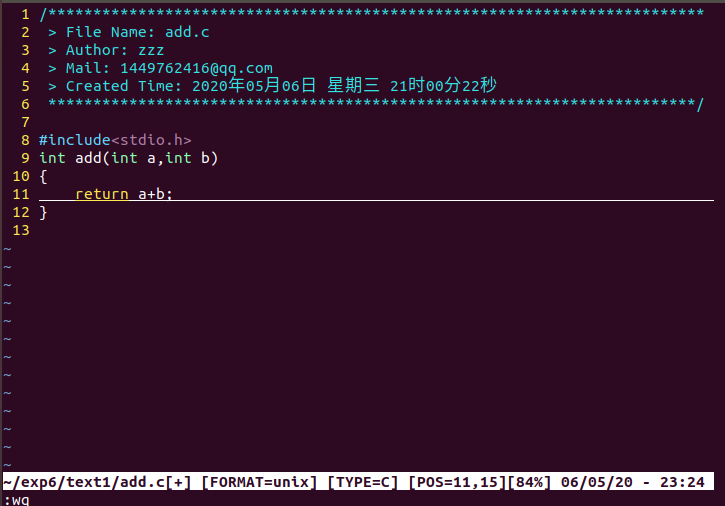
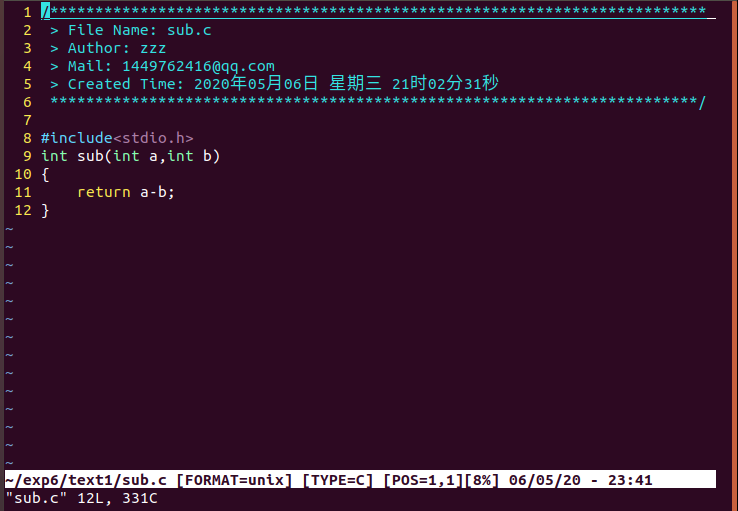
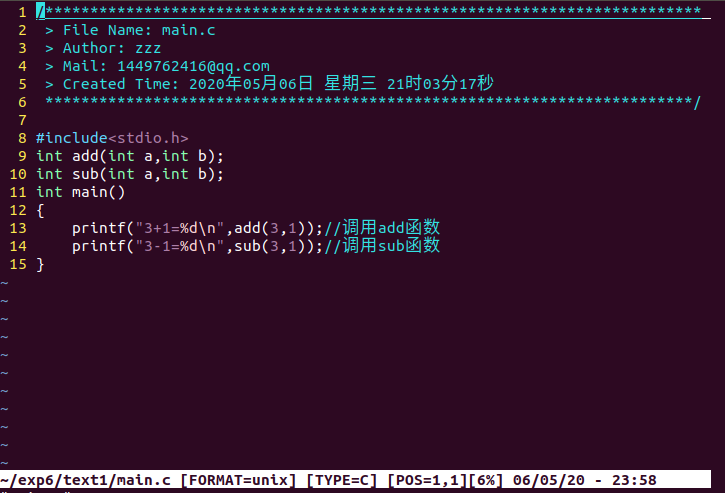
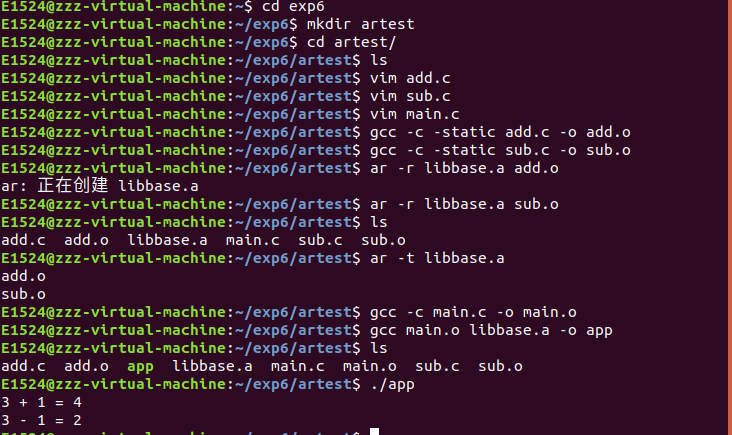
1.请举例说明静态链接库的创建与使用。
gcc -c -static add.c -o add.o   //-static指定编辑器链接静态库,将.c文件生成.o文件
ar -r libbase.a add.o   //使用ar工具制作静态库
ar -t libbase.a  //查看包中的内容
gcc -c main.c -o main.o //将.c文件生成.o文件
gcc main.o libbase.a -o app //链接为最终可执行文件
./app  //执行
2.请举例说明共享库的创建与使用。
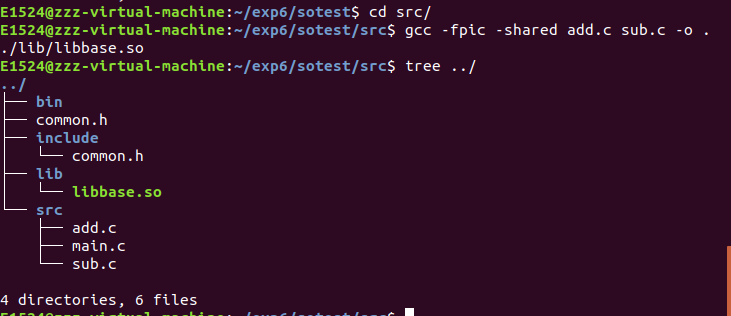
a.初始目录:
(1)创建共享目录:
-fpic		#产生代码位置无关代码
-shared		#生成共享库
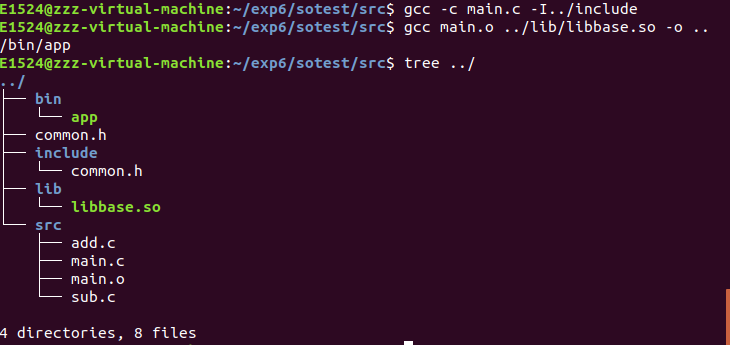
(2)使用自己的共享库
1)、指定相对路径:
-I../include #在头文件的搜索路径列表中添加到指定目录
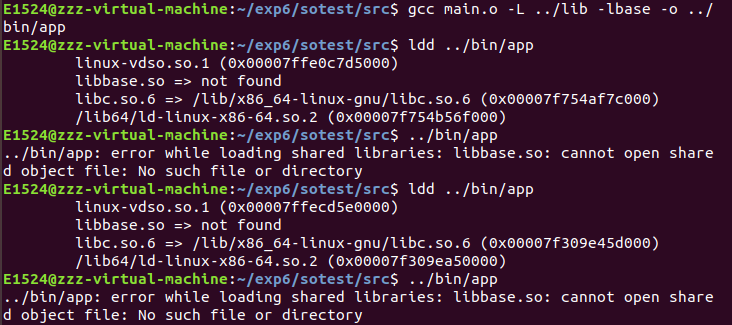
2)、只给链接器动态库名称(需要后面添加一个环境变了才可正常运行) :
ldd ../bin/app #查看可执行文件依赖的动态链接库
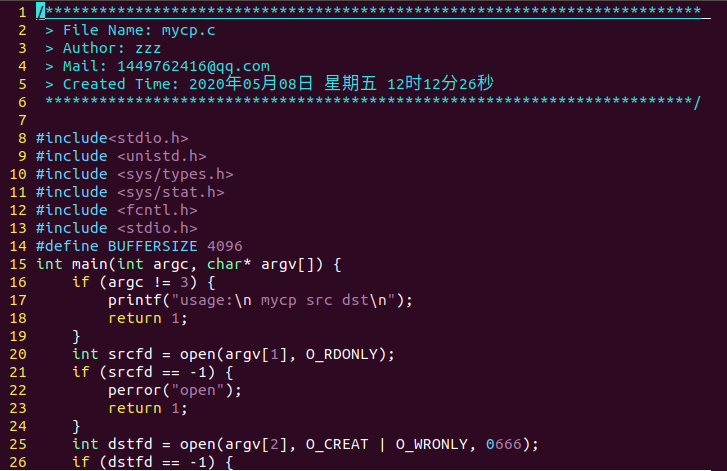
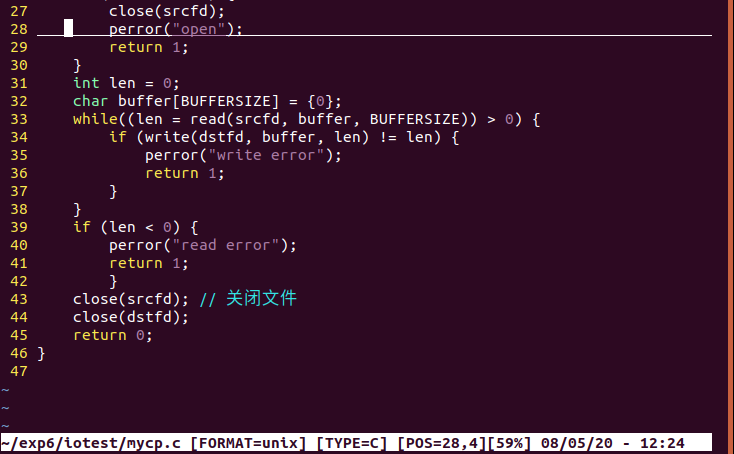
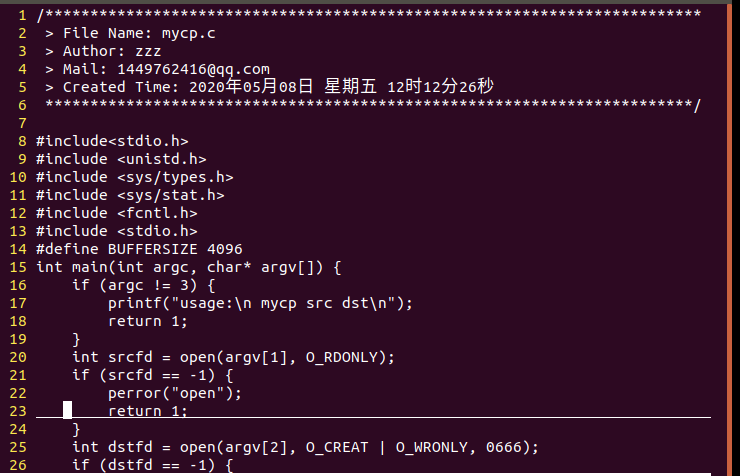
3.编程实现一个简单文件的复制命令。
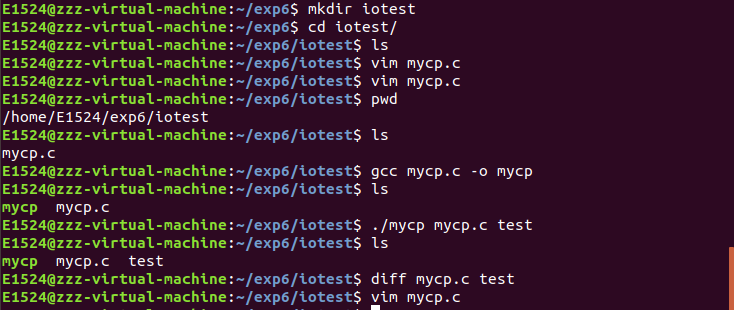
gcc mycp.c -o mycp //将.c文件生成.o文件
./mycp mycp.c test  //将mycp文件复制到test文件中
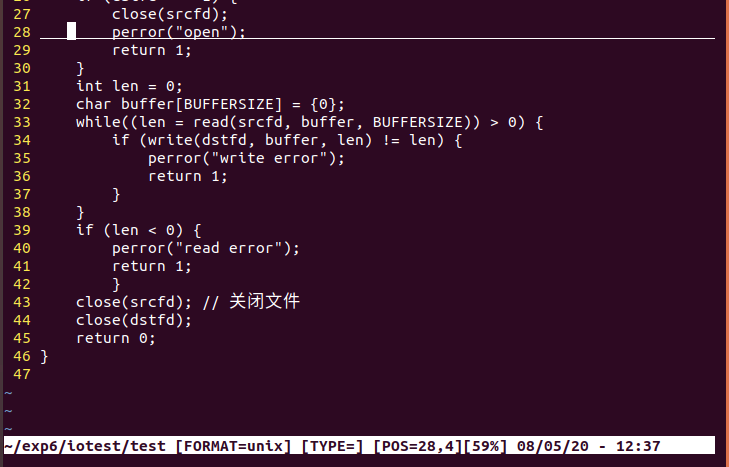
diff mycp.c test //以逐行的方式比较两文件的异同
复制文件——test:
4.使用fok创建一个子程序,进程创建成功后父子进程分别输出不同的内容。
fork函数简介
(1)依赖的头文件 #include <unistd.h>
(2)fork的原理和概念:
fork子进程就是从父进程拷贝一个新的进程出来,子进程和父进程的进程ID不同,但用户数据一样。
(3)父进程和子进程
执行fork函数后有2种返回值:
对于父进程,返回的是子进程的PID(即返回一个大于0的数字);
对于子进程,则返回0,所以我们可以通过pid这个返回值来判断当前进程是父进程还是子进程。
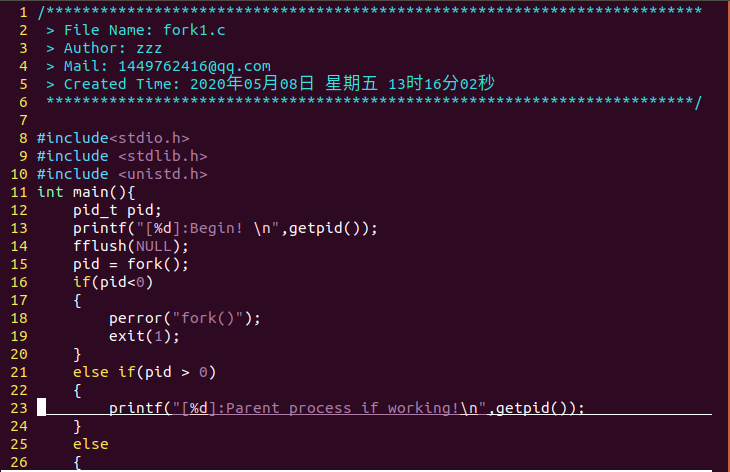
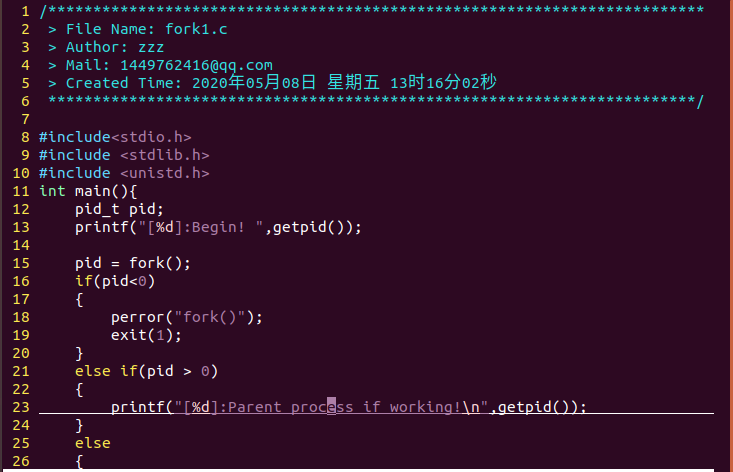
#include <stdio.h>
#include <stdlib.h>
#include <unistd.h>
int main(){
	pid_t pid;
	printf("[%d]:Begin!
",getpid());
	fflush(NULL);
	pid = fork();
	if(pid<0)
	{
		perror("fork()");
		exit(1);
	}
	else if(pid > 0)
	{
		printf("[%d]:Parent process if working!
",getpid());
	}
	else
	{
		printf("[%d]:Child process if working!
",getpid());
	}
	printf("[%d]:Finish!
",getpid());
	return 0;
}
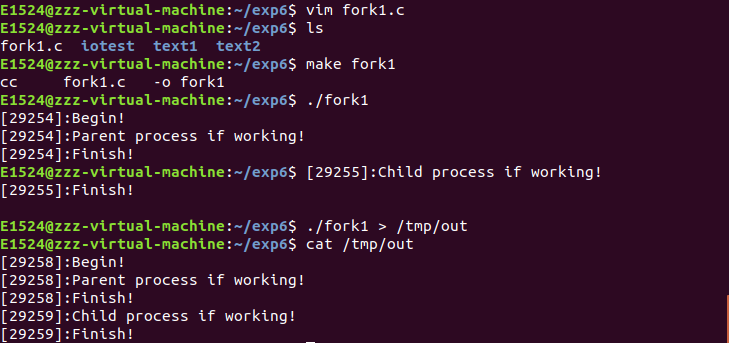
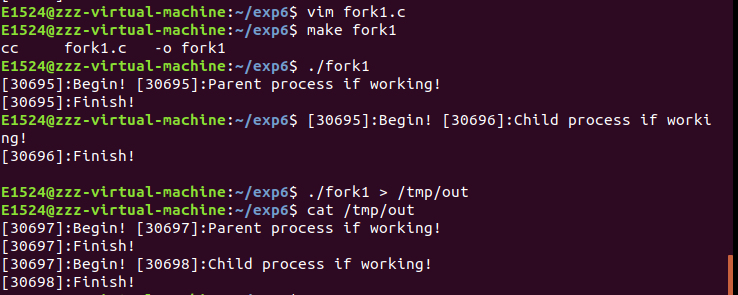
make fork1  //用系统自带的Makefile来编译生成可执行文件
./fork1 > /tmp/out  //将输出重定向到/tmp/out
全缓冲:
全缓冲指的是系统在填满标准IO缓冲区之后才进行实际的IO操作注意,对于驻留在磁盘上的文件来说通常是由标准IO库实施全缓冲。
行缓冲:
在这种情况下,标准IO在输入和输出中遇到换行符时执行IO操作;注意,当流涉及终端的时候,通常使用的是行缓冲。
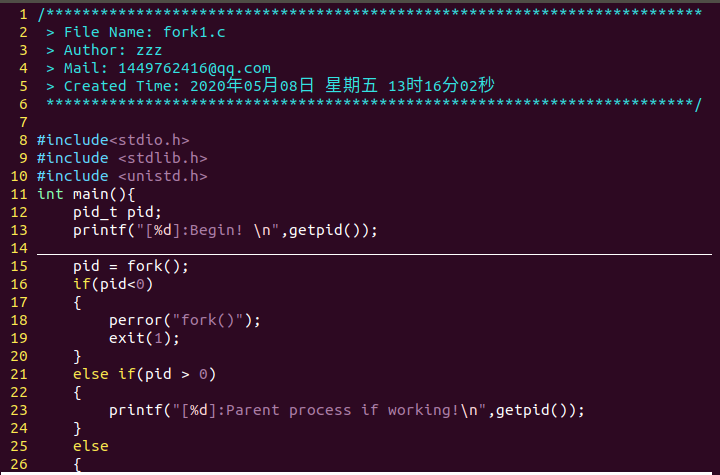
删除fork1.c中的fflush(NULL)命令。
./fork > /tmp/out  //删除fflush(NULL)后的输出结果在子程序工作前多了一个Begin
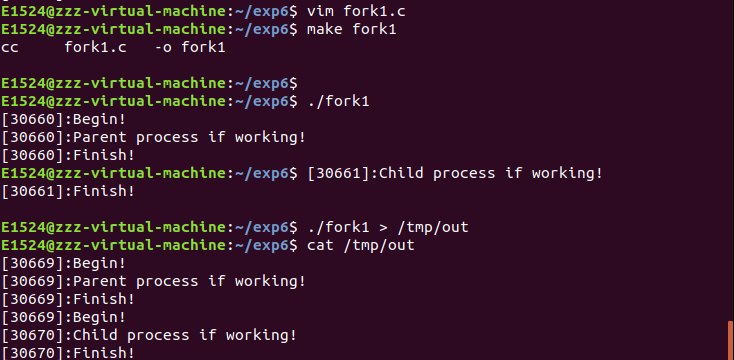
进一步删除第13行中的
,查看运行结果。
删除
后运行是Begin!与后面父进程和子进程之间不换行。
5.使用fork创建多个子进程。
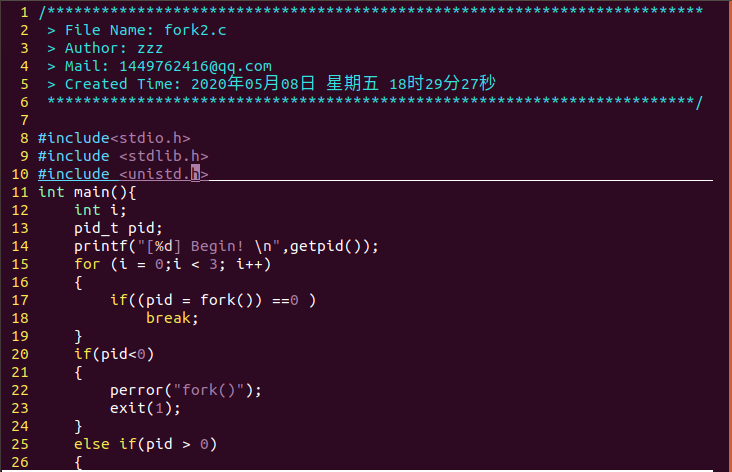
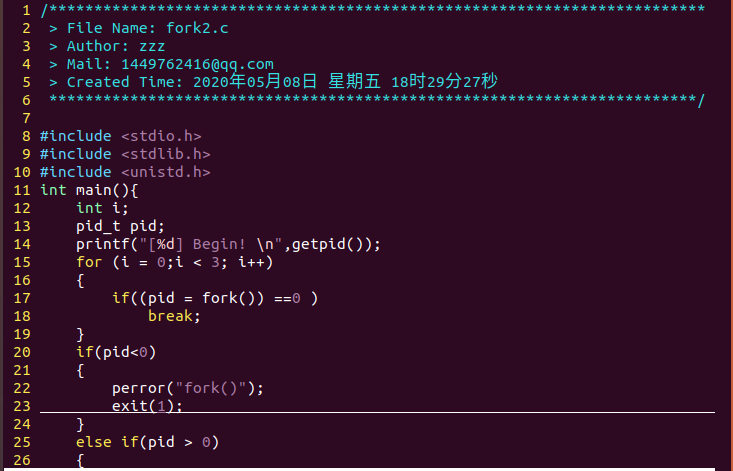
#include <stdio.h>
#include <stdlib.h>
#include <unistd.h>
int main(){
	int i;
	pid_t pid;
	printf("[%d] Begin!
",getpid());
	for (i = 0;i < 3; i++)
	{
		if((pid = fork()) ==0 )
			break;
	}
	if(pid<0)
	{
		perror("fork()");
		exit(1);
	}
	else if(pid > 0)
	{
		printf("[%d] Parent process is working!
",getpid());
	}
	else
	{
		printf("[%d] Child process %d is working!
",getpid(),i);
	}
	return 0;
}
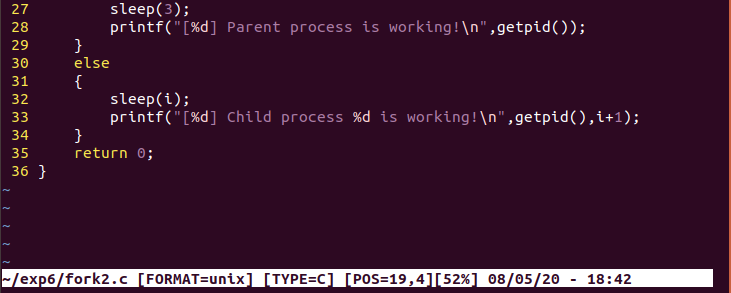
使用sleep函数简单控制进程输出顺序。
#include <stdio.h>
#include <stdlib.h>
#include <unistd.h>
int main(){
	int i;
	pid_t pid;
	printf("[%d] Begin!
",getpid());
	for (i = 0;i < 3; i++)
	{
		if((pid = fork()) ==0 )
			break;
	}
	if(pid<0)
	{
		perror("fork()");
		exit(1);
	}
	else if(pid > 0)
	{
		sleep(3);
		printf("[%d] Parent process is working!
",getpid());
	}
	else
	{
		sleep(i);
		printf("[%d] Child process %d is working!
",getpid(),i+1);
	}
	return 0;
}
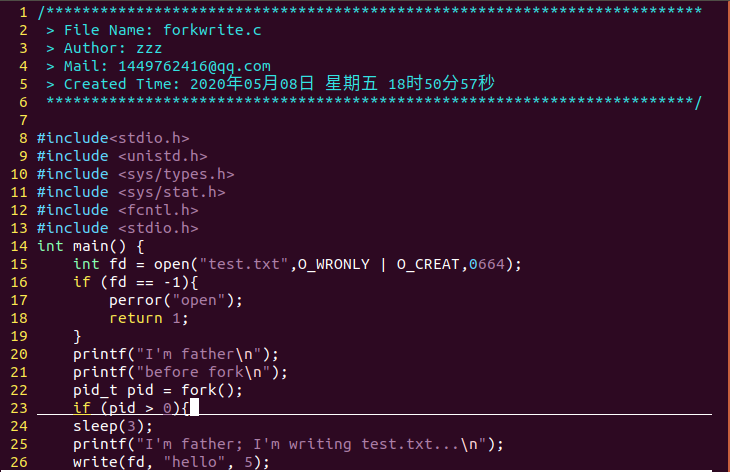
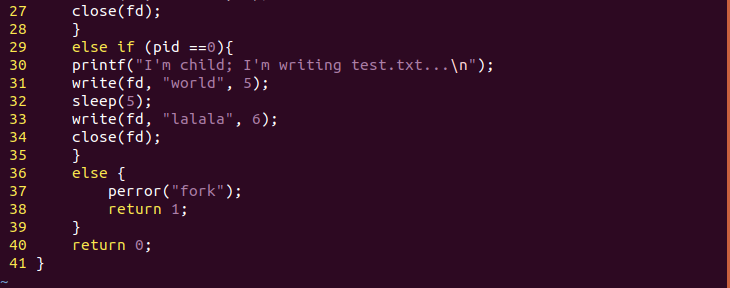
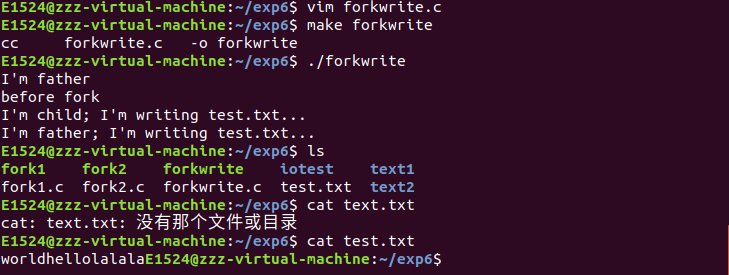
6.在fork之前以写的方式创建一个文件test.txt。然后fork出的子程序立即向文件中写入"world",然后睡眠5秒。而让父进程在fork后睡眠3秒后向test.txt写入"hello",并关闭描述符。子程序恢复后,又向test.txt文件中写入"lalala"后关闭描述符,结束。
#include <stdio.h>
#include <unistd.h>
#include <sys/types.h>
#include <sys/stat.h>
#include <fcntl.h>
#include <stdio.h>
int main() {
	int fd = open("test.txt",O_WRONLY | O_CREAT,0664);
	if (fd == -1){
		perror("open");
		return 1;
	}
	printf("I'm father
");
	printf("before fork
");
	pid_t pid = fork();
	if (pid > 0){
	sleep(3);
	printf("I'm father; I'm writing test.txt...
");
	write(fd, "hello", 5);
	close(fd);
	}
	else if (pid ==0){
	printf("I'm child; I'm writing test.txt...
");
	write(fd, "world", 5);
	sleep(5);
	write(fd, "lalala", 6);
	close(fd);
	}
	else {
		perror("fork");
		return 1;
	}
	return 0;
}
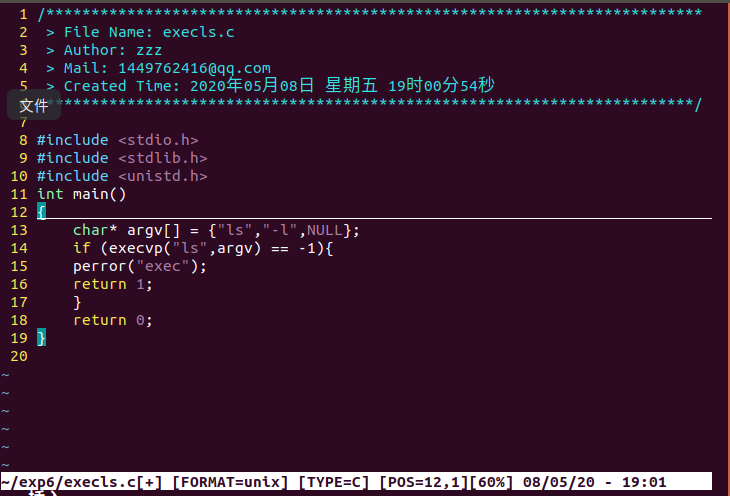
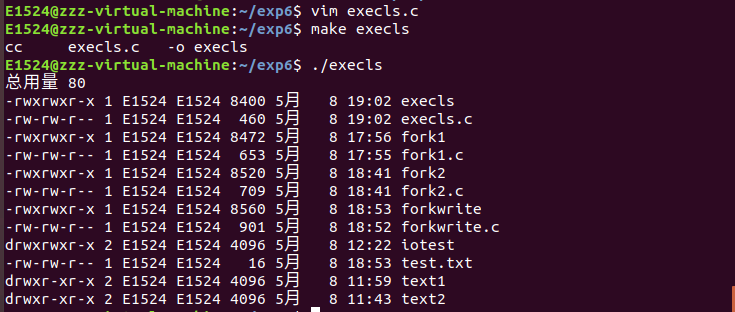
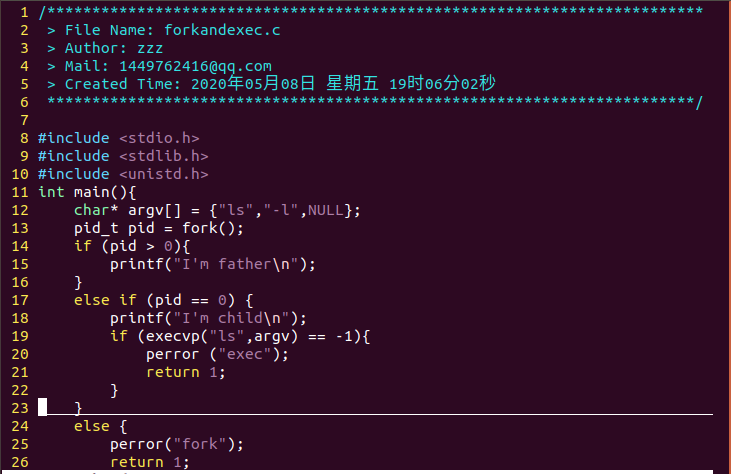
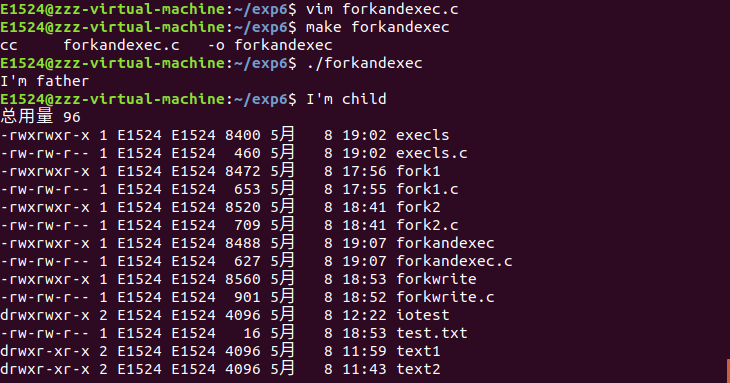
7.分别在主函数中使用execvp启动1s命令以及使用fork函数产生子进程调用execvp启动1s.
a.使用execvp启动ls命令
#include <stdio.h>
#include <stdlib.h>
#include <unistd.h>
int main(){
	char* argv[] = {"ls","-l",NULL};
	if (execvp("ls",argv) == -1){
	perror("exec");
	return 1;
	}
	return 0;
}
b.使用fork函数产生子进程调用execvp启动ls
#include <stdio.h>
#include <stdlib.h>
#include <unistd.h>
int main(){
	char* argv[] = {"ls","-l",NULL};
	pid_t pid = fork();
	if (pid > 0){
		printf("I'm father
");
	}
	else if (pid == 0) {
		printf("I'm child
");
		if (execvp("ls",argv) == -1){
			perror ("exec");
			return 1;
		}
	}
	else {
		perror("fork");
		return 1;
	}
	return 0;
}
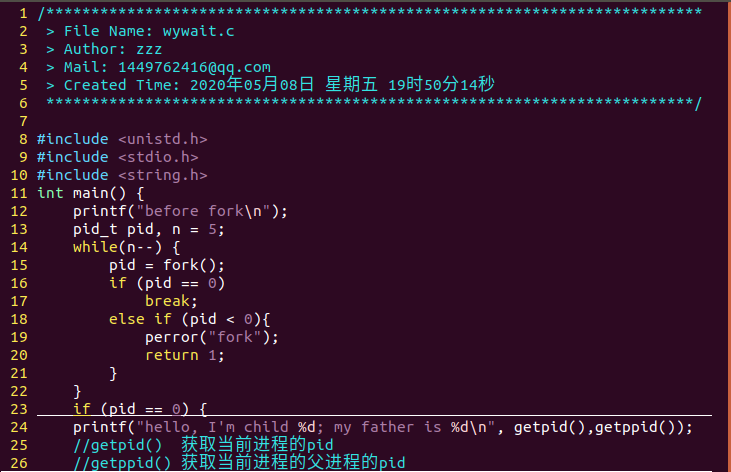
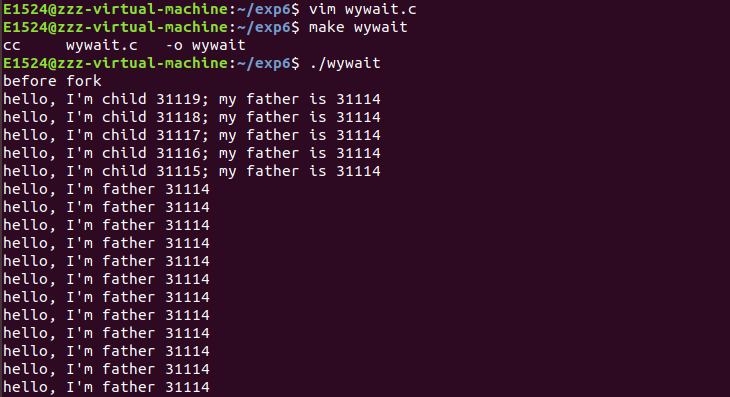
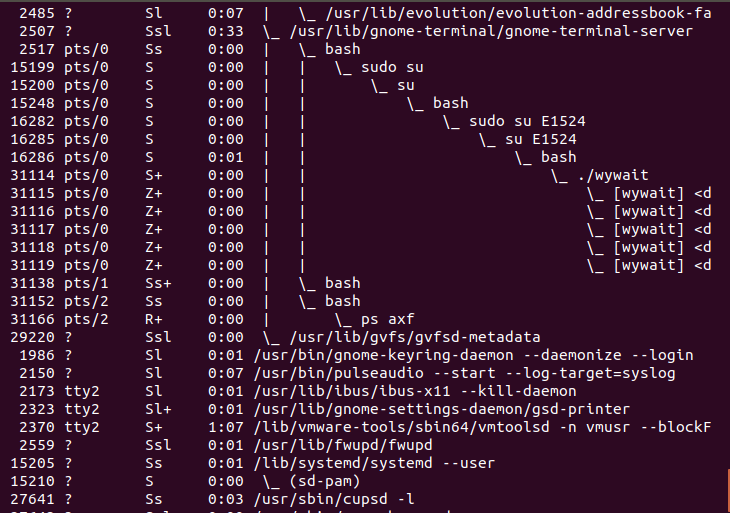
8.创建5个僵尸进程,并在终端通过 ps axf 命令查看僵尸进程信息。
#include <unistd.h>
#include <stdio.h>
#include <string.h>
int main() {
	printf("before fork
");
	pid_t pid, n = 5;
	while(n--) {
		pid = fork();
		if (pid == 0)
			break;
		else if (pid < 0){
			perror("fork");
			return 1;
		}
	}
	if (pid == 0) {
	printf("hello, I'm child %d; my father is %d
", getpid(),getppid());
	//getpid()  获取当前进程的pid
	//getppid() 获取当前进程的父进程的pid
	return 0;
	}
	while(1) {
		sleep(3);
		printf("hello, I'm father %d
", getpid());
	}
	return 0;
}
ps axf		显示进程见关联的树状结构图
另开一终端输入	ps axf	查看僵尸进程,显示如下:
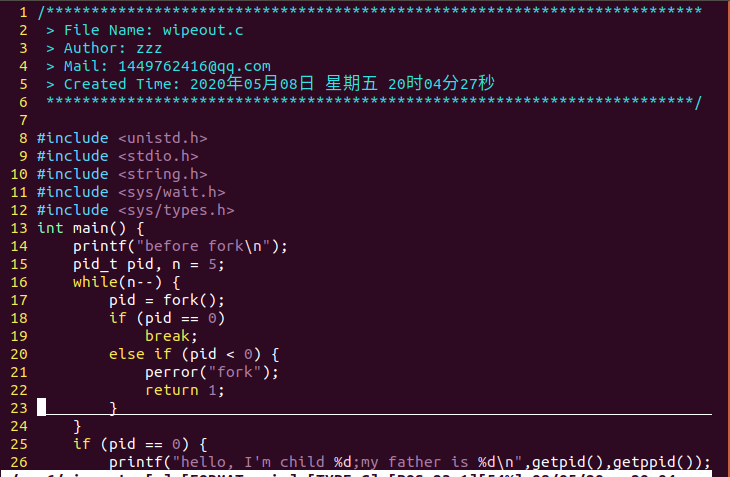
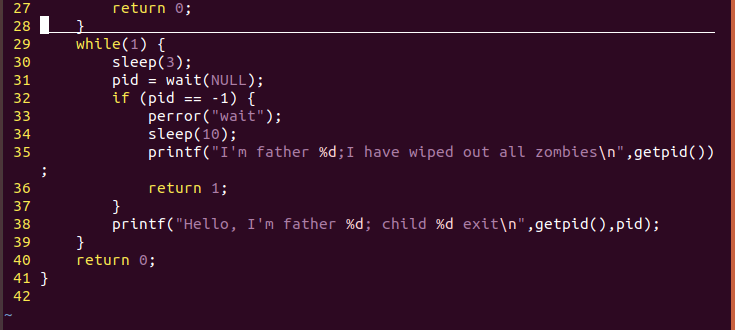
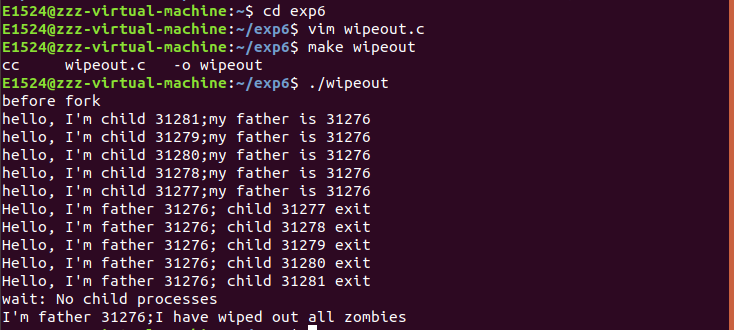
9.通过 wait 来清理僵尸进程。
#include <unistd.h>
#include <stdio.h>
#include <string.h>
#include <sys/wait.h>
#include <sys/types.h>
int main() {
	printf("before fork
");
	pid_t pid, n = 5;
	while(n--) {
		pid = fork();
		if (pid == 0)
			break;
		else if (pid < 0) {
			perror("fork");
			return 1;
		}
	}
	if (pid == 0) {
		printf("hello, I'm child %d;my father is %d
",getpid(),getppid());
		return 0;
	}
	while(1) {
		sleep(3);
		pid = wait(NULL);
		if (pid == -1) {
			perror("wait");
			sleep(10);
			printf("I'm father %d;I have wiped out all zombies
",getpid());
			return 1;
		}
		printf("Hello, I'm father %d; child %d exit
",getpid(),pid);
	}
	return 0;
}
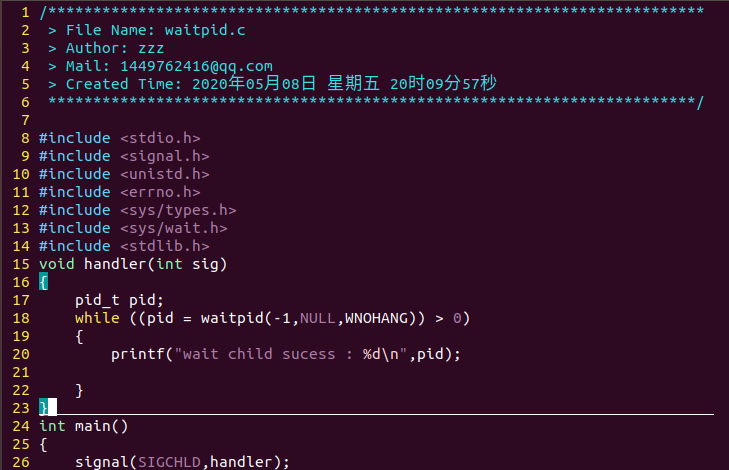
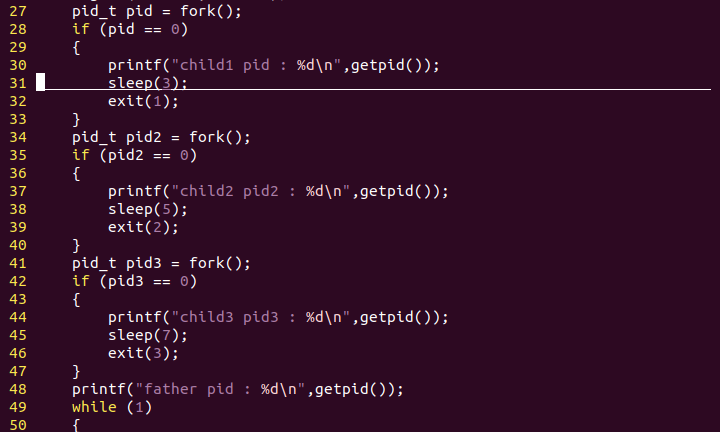
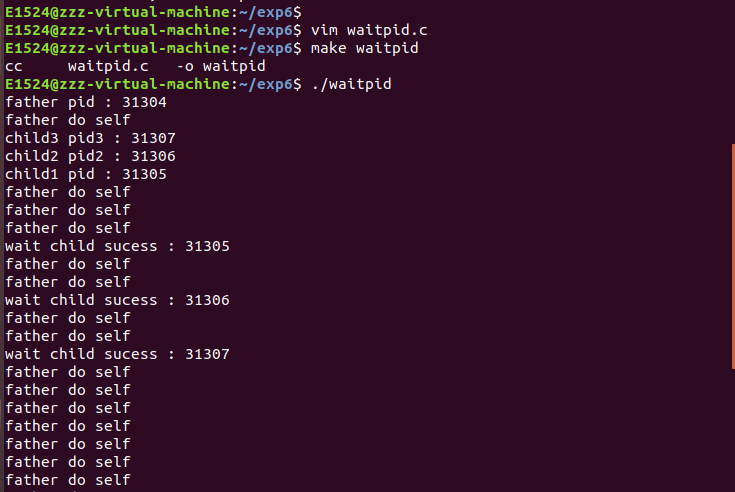
10.父进程通过 waitpid 函数等待特定子进程结束,若该子进程不结束,父进程一直阻塞。
#include <stdio.h>
#include <signal.h>
#include <unistd.h>
#include <errno.h>
#include <sys/types.h>
#include <sys/wait.h>
#include <stdlib.h>
void handler(int sig)
{
	pid_t pid;
	while ((pid = waitpid(-1,NULL,WNOHANG)) > 0)
	{
		printf("wait child sucess : %d
",pid);

	}
}
int main()
{
	signal(SIGCHLD,handler);
	pid_t pid = fork();
	if (pid == 0)
	{
		printf("child1 pid : %d
",getpid());
		sleep(3);
		exit(1);
	}
	pid_t pid2 = fork();
	if (pid2 == 0)
	{
		printf("child2 pid2 : %d
",getpid());
		sleep(5);
		exit(2);
	}
	pid_t pid3 = fork();
	if (pid3 == 0)
	{
		printf("child3 pid3 : %d
",getpid());
		sleep(7);
		exit(3);
	}
	printf("father pid : %d
",getpid());
	while (1)
	{
		printf("father do self
");
		sleep(1);
	}
	return 0;
}
