上面一章“zabbix实现mysql数据库的监控(二)”使用MPM来监控mysql,但是遇到安装问题始终解决不了,这里改用percona-monitoring-plugins进行zabbxi上监控mysql数据库了。
percona-monitoring-plugins的详细介绍请见:https://www.percona.com/software/mysql-tools/percona-monitoring-plugins
一、环境准备
- php开发环境搭建
- 下载percona-monitoring-plugins文件
1、php环境搭建
由于percona-monitoring-plugins是用php写的,所以需要搭建php的开发环境,具体步骤如下:
1)安装apache:安装apache时需要提前安装apr,apr-util,pcre依赖包
wget http://archive.apache.org/dist/apr/apr-1.4.5.tar.gz
tar zxvf apr-1.4.5.tar.gz
cd apr-1.4.5
./configure --prefix=/usr/local/apr
make && make install

wget http://archive.apache.org/dist/apr/apr-util-1.3.12.tar.gz
tar zxvf apr-util-1.3.12.tar.gz
cd apr-util-1.3.12
./configure --prefix=/usr/local/apr-util -with-apr=/usr/local/apr/bin/apr-1-config
make && make install

wget http://jaist.dl.sourceforge.net/project/pcre/pcre/8.10/pcre-8.10.zip
unzip pcre-8.10.zip
cd pcre-8.10
./configure --prefix=/usr/local/pcre
make && make install

--Apache安装
cd httpd-2.4.17
./configure --prefix=/usr/local/apache
make && make install
2)安装php:安装php前需要提前安装libxml2依赖
tar zxvf libxml2-2.6.32.tar.gz
cd libxml2-2.6.32
./configure --prefix=/usr/local/libxml2
make && make install

cd php-5.6.16
./configure --prefix=/usr/local/php --with-mysql=/usr/local/mysql --with-apxs2=/usr/local/apache/bin/apxs --with-mysqli=/usr/local/mysql/bin/mysql_config
--with-mysql-sock=/tmp/mysql.sock --with-config-file-path=/usr/local/lib --with-libxml-dir=/usr/local/libxml2
make && make install
3)配置apache和php
#修改apache配置文件,添加apache支持php
vim /usr/local/apache/conf/httpd.conf
AddType application/x-httpd-php .php
AddType application/x-httpd-php-source .phps

#到php安装包里找php.ini.dist,如果没有,php.ini-development也可以,然后将它复制到 /usr/local/lib/php.ini
cp php.ini-development php.ini.dist
cp php.ini.dist /usr/local/lib/php.ini
2、下载percona-monitoring-plugins文件
官网下载地址:https://www.percona.com/downloads/percona-monitoring-plugins/
为了方便,我们这里下载rpm版本,安装后目录结构是这样的:
-----/var/lib/zabbix/percona
--------------------------scripts
--------------------------------get_mysql_stats_wrapper.sh
--------------------------------ss_get_mysql_stats.php
--------------------------templates
--------------------------------userparameter_percona_mysql.conf                                   #key配置文件
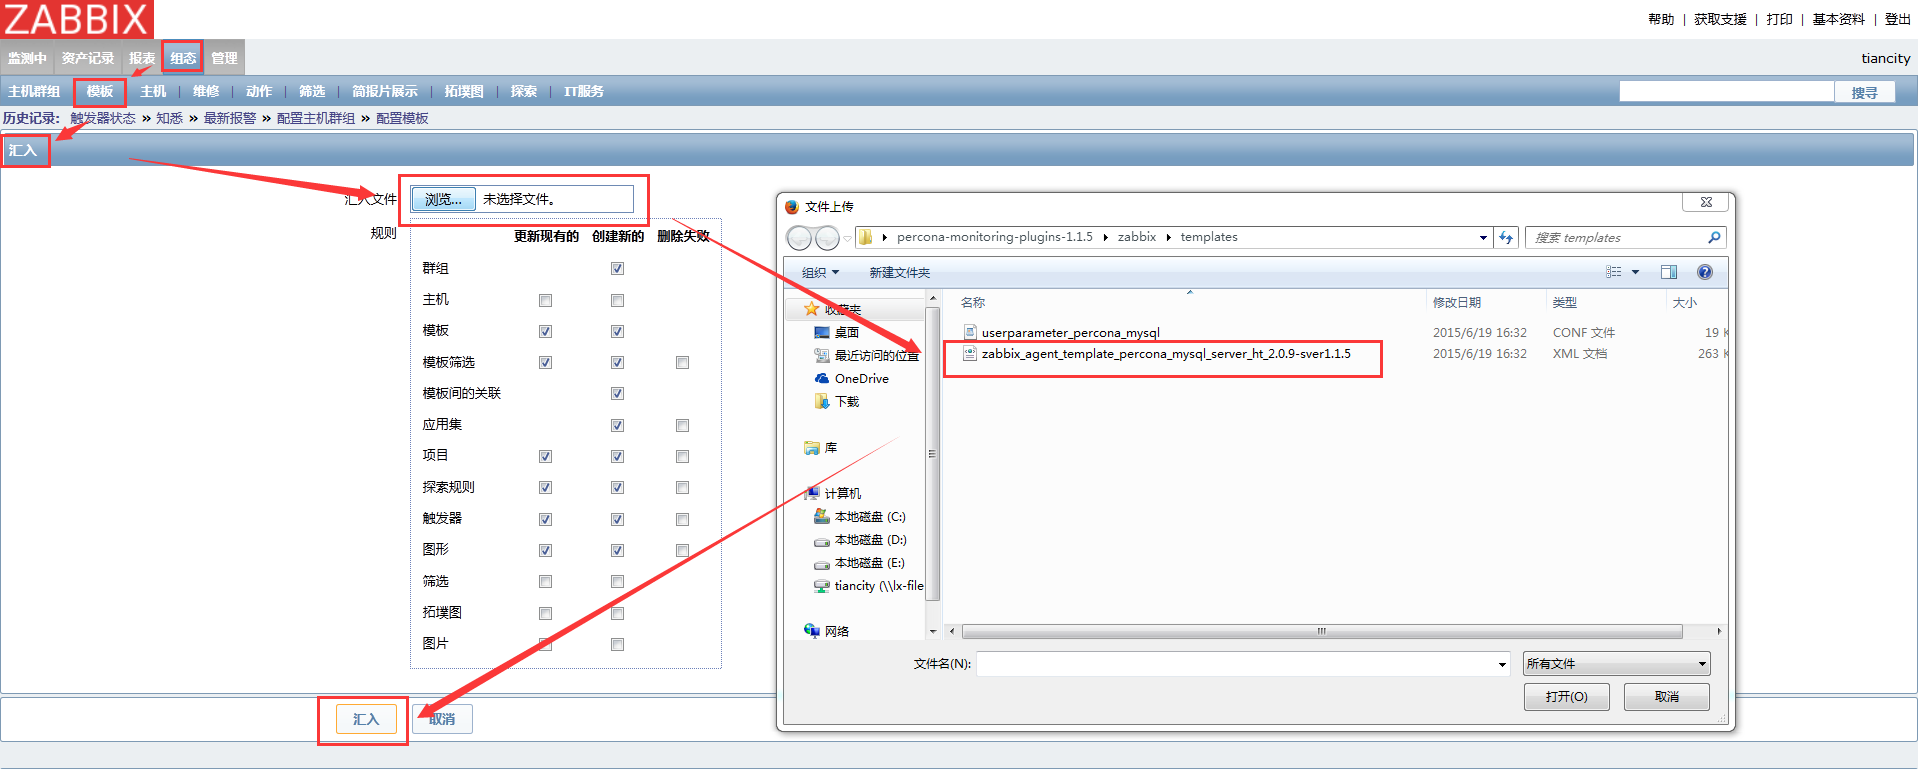
--------------------------------zabbix_agent_template_percona_mysql_server_ht_2.0.9-sver1.1.5.xml  #模板文件,需要导入前端zabbix模板中
二、安装配置percona-monitoring-plugins
1、安装percona-monitoring-plugins
[root@node1 software]# yum install percona-zabbix-templates-1.1.5-1.noarch.rpm
默认安装到/var/lib/zabbix/percona目录下面。
2、将key配置文件拷贝到zabbix_agentd.conf.d目录下
[root@node1 zabbix_agentd.conf.d]# cp /var/lib/zabbix/percona/templates/userparameter_percona_mysql.conf /usr/local/zabbix/etc/zabbix_agentd.conf.d
[root@node1 zabbix_agentd.conf.d]# ll
总用量 20
-rw-r--r--. 1 root root 18866 11月 21 02:34 userparameter_percona_mysql.conf
如果没有该目录,可以手工新建一个。
3、确保zabbix_agentd.conf中包括以下参数:
[root@node1 etc]# vim zabbix_agentd.conf
      Include=/usr/local/zabbix/etc/zabbix_agentd.conf.d/
4、重启agentd服务
[root@node1 etc]# /etc/init.d/zabbix_agentd restart
5、修改ss_get_mysql_stats.php脚本
[root@node1 etc]# vim /var/lib/zabbix/percona/scripts/ss_get_mysql_stats.php
            $mysql_user = 'mpm';
            $mysql_pass = 'mpm';
            $mysql_port = 3306;
确保以上用户名和密码是可以连接到mysql数据库。
6、测试percona-monitoring-plugins
/usr/local/php/bin/php -q /var/lib/zabbix/percona/scripts/ss_get_mysql_stats.php --host 127.0.0.1 --items gg
gg表示监控中的一个item,正常情况下一般都是返回个数字,可以到tmp目录下看缓存文件,里面存了各种监控项目及值。
7、将xml模板导入到zabbix中

到这里,用zabbix监控mysql就完成了,下面截取几张具体监控效果:


