状态说明: onCreate(生成) onStart(启动) onResume(恢复)
onPause(暂停) onStop(停止) onDestroy(销毁) onRestart(重新启动)
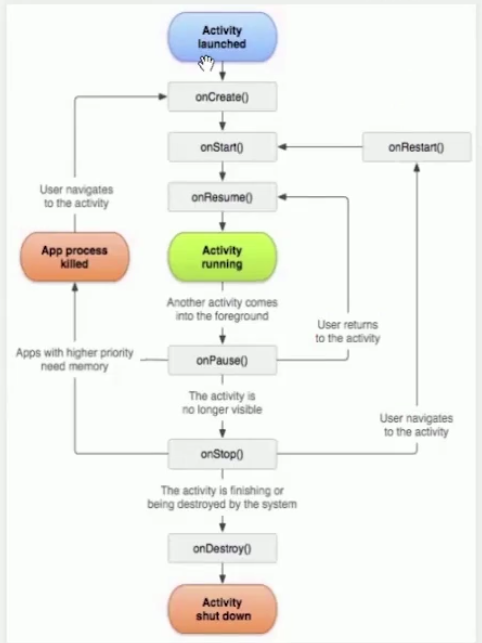
生命周期的流程
对于单个Activity的生命周期
1.正常启动的时候onCreate-->onStart-->onResume,正常退出时 onPause()->onStop-->OnDestoy()
2.如果是切换为后台操作, onPause-->onStop,回到当前页面的操作onRestart-->onStart-->onResume
3.如果是被更高级别的程序消失,如息屏,则该应用会被强行杀死,重新打开的流程是onCreate-->onStart-->onResume
多个Activity切换时
当启动另外一个Activity时,当前Activity:onPause-->onStop,当点击返回按钮时
当另外一个Activity退出是,当前activity:onRestart-->onStart-->onResume
打开界面对话框,即重新打开一个dialog_activity,这里的话需要对AndroidMainfest.xml进行设置
<activity android:name=".DialogActivity"
      android:theme="@style/Theme.AppCompat.Dialog">
</activity>
完整代码MainActivity.java
package com.example.lifecycledemo;

import androidx.appcompat.app.AlertDialog;
import androidx.appcompat.app.AppCompatActivity;

import android.content.Intent;
import android.os.Bundle;
import android.util.Log;
import android.view.View;

public class MainActivity extends AppCompatActivity {


    //单个Activity的生命周期
    //1.正常启动onCreate-->Onstart-->onReusme, 正常退出onPause-->onStop-->Ondestroy,再次启动 onCreate-->Onstart-->onReusme
    //2.已经处于前台的activity,点击主页按钮离开当前activity, onPause-->onStop,回到activity onRestart-->onStart-->onReusmne
    //3.Activity不可操作onPause-->onStop(如:息屏,打开了其他的Activity),而应用被强行杀死了
    //回到Activity,onCreate-->onStart-->onResume

    //多个Activity切换时
    //当启动另外一个Activity时,当前Acitivity:onPause-->onStop,当点击返回按钮
    //使另外一个Activity退出,当前activity:onRestart-->onStart-->onResume
    //创建方法

    //对话框存在时
    //1.普通对话框对生命周期没有任何影响
    //2.如果有一个Activity伪装成对话框,那么当它启动时,之前的Activity:onPause
    //对话框消失后,回调onResume再次回到前台
    @Override
    protected void onCreate(Bundle savedInstanceState) {
        super.onCreate(savedInstanceState);
        setContentView(R.layout.activity_main);
        Log.e("TAG", "onCreate--创建");
    }

    //启动
    @Override
    protected void onStart(){
        super.onStart();
        Log.e("TAG", "onCreate--启动");
    }

    //恢复
    @Override
    protected void onResume() {
        super.onResume();
        Log.e("TAG", "onCreate--恢复");
    }

    //暂停
    @Override
    protected void onPause() {
        super.onPause();
        Log.e("TAG", "onCreate--暂停");
    }

    //停止
    @Override
    protected void onStop() {
        super.onStop();
        Log.e("TAG", "onCreate--停止");
    }

    //销毁
    @Override
    protected void onDestroy(){
        super.onDestroy();
        Log.e("TAG", "onCreate--销毁");
    }

    //重启
    @Override
    protected void onRestart() {
        super.onRestart();
        Log.e("TAG", "onCreate--重启");
    }

    public void myclick(View view) {
        switch (view.getId()) {
            case R.id.btn1: //启动第二个activity
                //参数1::环境上下文
                //参数2:跳转的Activity的对象
                Intent intent = new Intent(this, MainActivity2.class);
                startActivity(intent);
                break;
            case R.id.btn2: //打开对话框
                //普通对话框不会影响生命周期
                AlertDialog.Builder builder = new AlertDialog.Builder(this);
                builder.setTitle("提示")
                        .setMessage("这是一条提示:请认真观察生命周期的变换")
                        .setPositiveButton("确定", null).show();
                break;
            case R.id.btn3://界面(本质)对话框样式
                Intent it2 = new Intent(this, DialogActivity.class);
                startActivity(it2);

                break;

        }
    }
}
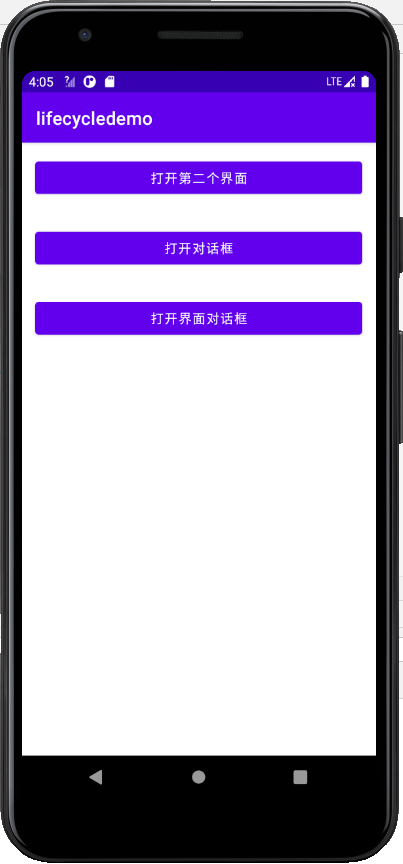
activity_main.xml
<?xml version="1.0" encoding="utf-8"?>
<LinearLayout xmlns:android="http://schemas.android.com/apk/res/android"
    xmlns:app="http://schemas.android.com/apk/res-auto"
    xmlns:tools="http://schemas.android.com/tools"
    android:layout_width="match_parent"
    android:layout_height="match_parent"
    tools:context=".MainActivity"
    android:orientation="vertical">

    <Button
        android:layout_width="match_parent"
        android:layout_height="wrap_content"
        android:onClick="myclick"
        android:id="@+id/btn1"
        android:text="打开第二个界面"
        android:layout_margin="15dp" />

    <Button
        android:layout_width="match_parent"
        android:layout_height="wrap_content"
        android:onClick="myclick"
        android:text="打开对话框"
        android:id="@+id/btn2"
        android:layout_margin="15dp"/>

    <Button
        android:layout_width="match_parent"
        android:layout_height="wrap_content"
        android:onClick="myclick"
        android:text="打开界面对话框"
        android:id="@+id/btn3"
        android:layout_margin="15dp"/>


</LinearLayout>
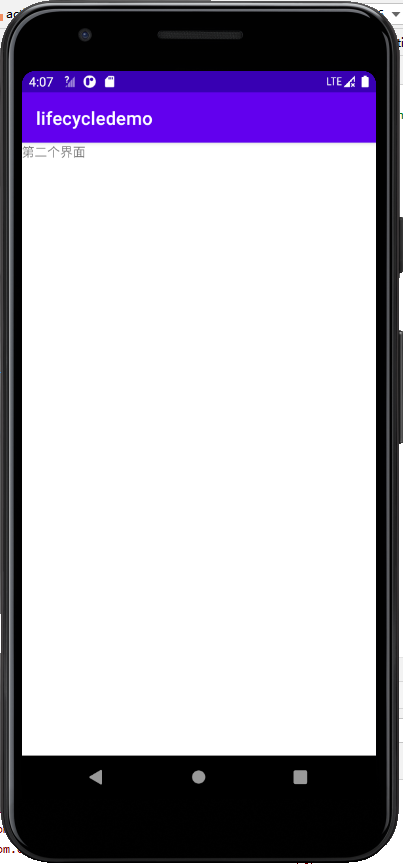
MainActivity2.java 用于其他页面的切换
package com.example.lifecycledemo;

import androidx.appcompat.app.AppCompatActivity;

import android.os.Bundle;

public class MainActivity2 extends AppCompatActivity {

    @Override
    protected void onCreate(Bundle savedInstanceState) {
        super.onCreate(savedInstanceState);
        setContentView(R.layout.activity_main2);
    }
}
activity_main2.xml
<?xml version="1.0" encoding="utf-8"?>
<LinearLayout xmlns:android="http://schemas.android.com/apk/res/android"
    xmlns:app="http://schemas.android.com/apk/res-auto"
    xmlns:tools="http://schemas.android.com/tools"
    android:layout_width="match_parent"
    android:layout_height="match_parent"
    tools:context=".MainActivity2">

    <TextView
        android:layout_width="match_parent"
        android:layout_height="match_parent"
        android:text="第二个界面" />


</LinearLayout>
打开界面对话框,用于生成一个界面activity
DialogActivity.java
package com.example.lifecycledemo;

import androidx.appcompat.app.AppCompatActivity;

import android.os.Bundle;

public class DialogActivity extends AppCompatActivity {

    @Override
    protected void onCreate(Bundle savedInstanceState) {
        super.onCreate(savedInstanceState);
        setContentView(R.layout.activity_dialog);
    }
}
activity_dialog.xml
<?xml version="1.0" encoding="utf-8"?>
<androidx.constraintlayout.widget.ConstraintLayout xmlns:android="http://schemas.android.com/apk/res/android"
    xmlns:app="http://schemas.android.com/apk/res-auto"
    xmlns:tools="http://schemas.android.com/tools"
    android:layout_width="match_parent"
    android:layout_height="match_parent"
    tools:context=".DialogActivity">


    <TextView
        android:id="@+id/textView"
        android:layout_width="wrap_content"
        android:layout_height="wrap_content"
        android:text="TextView"
        app:layout_constraintBottom_toBottomOf="parent"
        app:layout_constraintEnd_toEndOf="parent"
        app:layout_constraintStart_toStartOf="parent"
        app:layout_constraintTop_toTopOf="parent" />
</androidx.constraintlayout.widget.ConstraintLayout>
AndroidMainfest.xml 需要对对话框的activity进行设置主题
<?xml version="1.0" encoding="utf-8"?>
<manifest xmlns:android="http://schemas.android.com/apk/res/android"
    package="com.example.lifecycledemo">

    <application
        android:allowBackup="true"
        android:icon="@mipmap/ic_launcher"
        android:label="@string/app_name"
        android:roundIcon="@mipmap/ic_launcher_round"
        android:supportsRtl="true"
        android:theme="@style/Theme.Lifecycledemo">
        <activity android:name=".DialogActivity"
            android:theme="@style/Theme.AppCompat.Dialog"></activity>
        <activity android:name=".MainActivity2" />
        <activity android:name=".MainActivity">
            <intent-filter>
                <action android:name="android.intent.action.MAIN" />

                <category android:name="android.intent.category.LAUNCHER" />
            </intent-filter>
        </activity>
    </application>

</manifest>