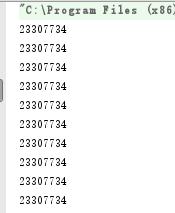
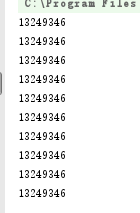
都是通过例子来介绍
1.饿汉单例(简单的说就是一上来就创建对象)
先创建一个单例的类MySingleton
package demo01;

/**
 * Created by mycom on 2018/3/6.
 */
public class MySingleton {
    private static MySingleton instance = new MySingleton();

    private MySingleton(){}

    public static MySingleton getInstance() {
        return instance;
    }
}
在编写线程类,并且测试
package demo01;

/**
 * Created by mycom on 2018/3/6.
 */
public class MyThread extends Thread {
    @Override
    public void run() {
        System.out.println(MySingleton.getInstance().hashCode());
    }

    public static void main(String[] args) {

        MyThread[] mts = new MyThread[10];
        for(int i = 0 ; i < mts.length ; i++){
            mts[i] = new MyThread();
        }

        for (int j = 0; j < mts.length; j++) {
            mts[j].start();
        }
    }
}
如果运行的结果所有的都是一样的,说明实验成功,

2.懒汉单例(用到的时候才会创建对象)
线程安全的---方法中声明synchronized关键字
package demo01;

/**
 * Created by mycom on 2018/3/6.
 */
public class MySingleton {
    private static MySingleton instance = null;

    private MySingleton(){}

    public synchronized static MySingleton getInstance() {
        try {
            if(instance != null){//懒汉式

            }else{
                //创建实例之前可能会有一些准备性的耗时工作
                Thread.sleep(300);
                instance = new MySingleton();
            }
        } catch (InterruptedException e) {
            e.printStackTrace();
        }
        return instance;
    }
}
package demo01;

/**
 * Created by mycom on 2018/3/6.
 */
public class MyThread extends Thread {
    @Override
    public void run() {
        System.out.println(MySingleton.getInstance().hashCode());
    }

    public static void main(String[] args) {

        MyThread[] mts = new MyThread[10];
        for(int i = 0 ; i < mts.length ; i++){
            mts[i] = new MyThread();
        }

        for (int j = 0; j < mts.length; j++) {
            mts[j].start();
        }
    }
}

3.使用静态内置类实现单例模式(对上面MySingleton的代码进行改动)
package demo01;

/**
 * Created by mycom on 2018/3/6.
 */
public class MySingleton {
    //内部类
    private static class MySingletonHandler{
        private static MySingleton instance = new MySingleton();
    }

    private MySingleton(){}

    public static MySingleton getInstance() {
        return MySingletonHandler.instance;
    }
}
测试结果

。。。。。。。