数据准备
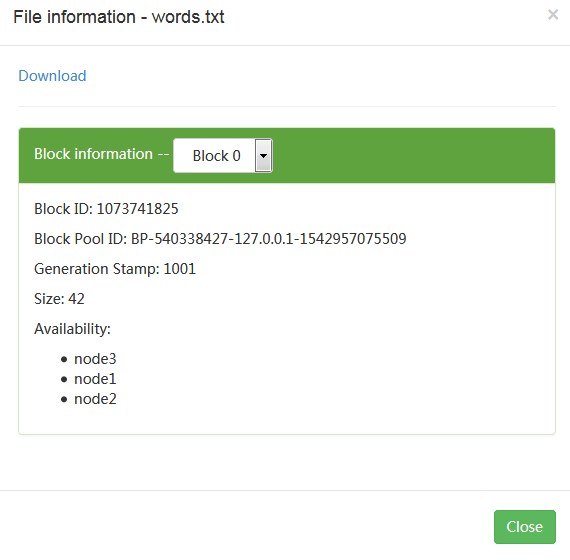
通过HDFS 命令方式将本地words.txt文件上传到HDFS上
首先使用hdfs 来创建input文件夹
[root@node1 ~]#  hdfs dfs -mkdir /input
[root@node1 ~]# hdfs dfs -ls /input
[root@node1 ~]# hdfs dfs -put /root/words.txt /input
[root@node1 ~]# hdfs dfs -ls /input
Found 1 items
-rw-r--r--   3 root supergroup         42 2017-11-26 04:10 /input/words.txt
[root@node1 ~]# hdfs dfs -cat /input/words.txt
Java Java
dtt dtt
Hello World Hello World


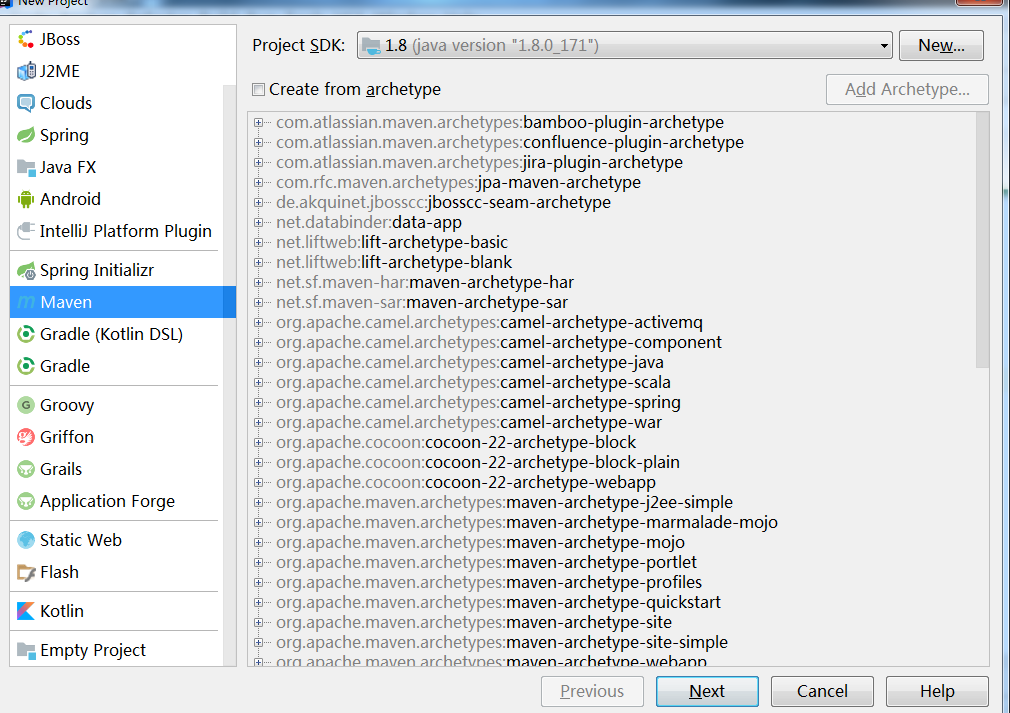
目录结构
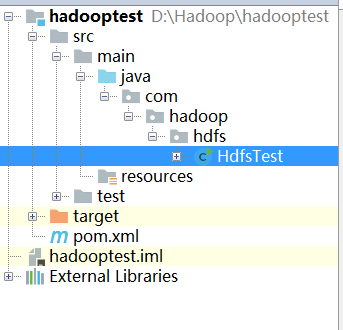
点击打开pom.xml添加
<?xml version="1.0" encoding="UTF-8"?>
<project xmlns="http://maven.apache.org/POM/4.0.0"
         xmlns:xsi="http://www.w3.org/2001/XMLSchema-instance"
         xsi:schemaLocation="http://maven.apache.org/POM/4.0.0 http://maven.apache.org/xsd/maven-4.0.0.xsd">
    <modelVersion>4.0.0</modelVersion>

    <groupId>com.dtt.hadoop</groupId>
    <artifactId>hadoop-test</artifactId>
    <version>1.0-SNAPSHOT</version>
    <dependencies>
    <dependency>
        <groupId>junit</groupId>
        <artifactId>junit</artifactId>
        <version>3.8.1</version>
        <scope>test</scope>
    </dependency>

    <dependency>
        <groupId>org.apache.hadoop</groupId>
        <artifactId>hadoop-core</artifactId>
        <version>2.6.0-mr1-cdh5.11.0</version>
    </dependency>
<!-- https://mvnrepository.com/artifact/org.apache.hadoop/hadoop-common -->
    <dependency>
        <groupId>org.apache.hadoop</groupId>
        <artifactId>hadoop-common</artifactId>
        <version>2.7.3</version>
    </dependency>
<!-- https://mvnrepository.com/artifact/org.apache.hadoop/hadoop-hdfs -->
    <dependency>
        <groupId>org.apache.hadoop</groupId>
        <artifactId>hadoop-hdfs</artifactId>
        <version>2.7.3</version>
    </dependency>
 <!-- https://mvnrepository.com/artifact/org.apache.hadoop/hadoop-client -->
    <dependency>
        <groupId>org.apache.hadoop</groupId>
        <artifactId>hadoop-mapreduce-client-core</artifactId>
        <version>2.7.3</version>
    </dependency>


    </dependencies>
<!-- 设定主仓库,按设定顺序进行查找。 -->
    <repositories>
        <repository>
            <id>maven-aliyun</id>
            <name>maven-aliyun</name>
            <url>http://maven.aliyun.com/nexus/content/groups/public</url>
        </repository>
    </repositories>
 <!-- 设定插件仓库 -->
    <pluginRepositories>
        <pluginRepository>
            <id>maven-aliyun</id>
            <name>maven-aliyun</name>
            <url>http://maven.aliyun.com/nexus/content/groups/public</url>
        </pluginRepository>
    </pluginRepositories>

</project>
编辑Java代码
在HdfsTest.java类中编辑代码如下:
package com.hadoop.hdfs;


import org.apache.hadoop.conf.Configuration;
import org.apache.hadoop.fs.FileSystem;
import org.apache.hadoop.fs.Path;
import org.apache.hadoop.io.IOUtils;

import java.io.IOException;
import java.io.InputStream;
import java.net.URI;

public class HdfsTest {
    public static void main(String[] args) throws IOException {
        String uri = "hdfs://192.168.55.128:9000/input/words.txt";
        Configuration cfg = new Configuration();
        FileSystem fs = FileSystem.get(URI.create(uri), cfg);
        InputStream in = null;
        in = fs.open(new Path(uri));
        IOUtils.copyBytes(in, System.out, 4096, false);

        IOUtils.closeStream(in);
    }
}
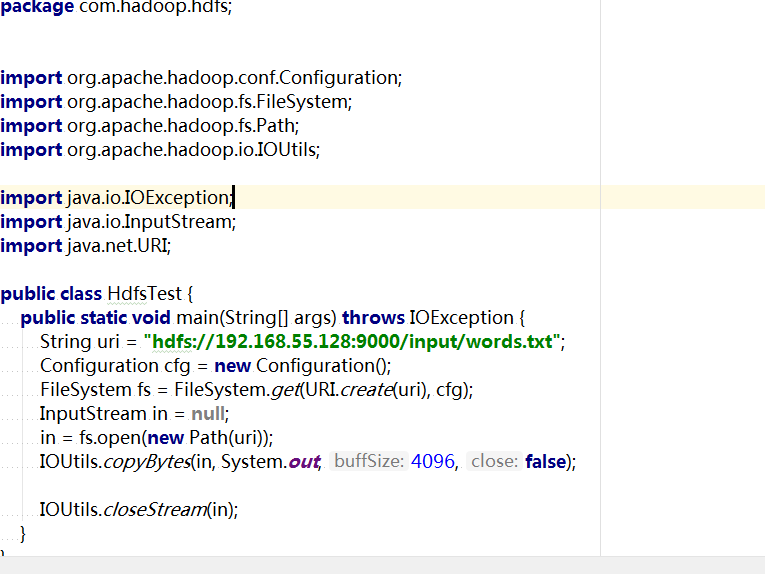
程序说明:
Configuration类:该类的对象封转了客户端或者服务器的配置。
FileSystem类:该类的对象是一个文件系统对象,可以用该对象的一些方法来对文件进行操作。FileSystem fs = FileSystem.get(conf);通过FileSystem的静态方法get获得该对象。
String uri="hdfs://192.168.55.128:9000/user/root/input/word.txt"要与core-site.xml文件中的fs.defaultFS配置对应,其值是hdfs://node1:9000。由于本地Windows系统的hosts文件没有配置node1,所以这里需要IP地址表示。
本地运行
右键单击hdfsTest类,在弹出的快捷菜单中选择“Run ”。
等待数秒后,将看到输入结果。

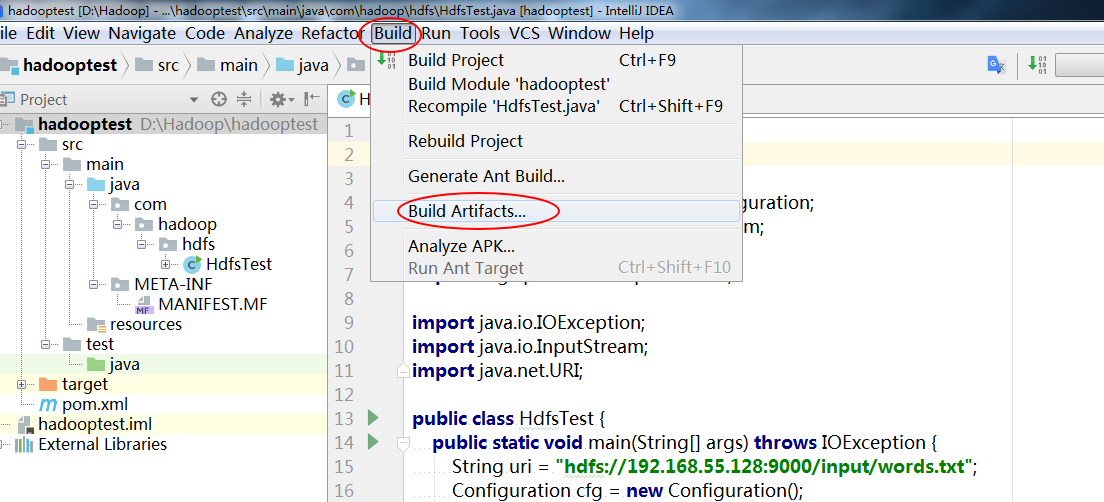
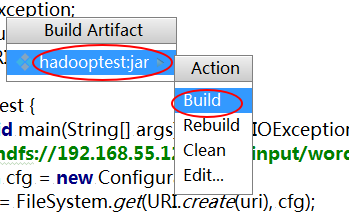
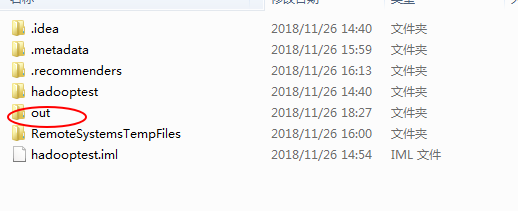
导出Jar包
将该类导出为 hadooptest.jar.j:
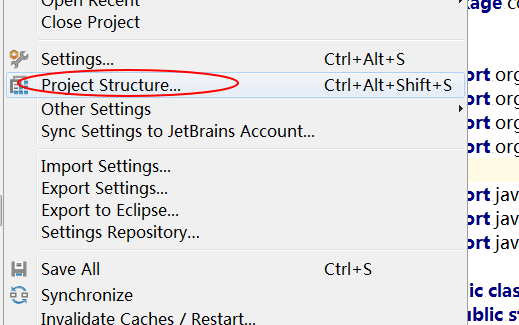
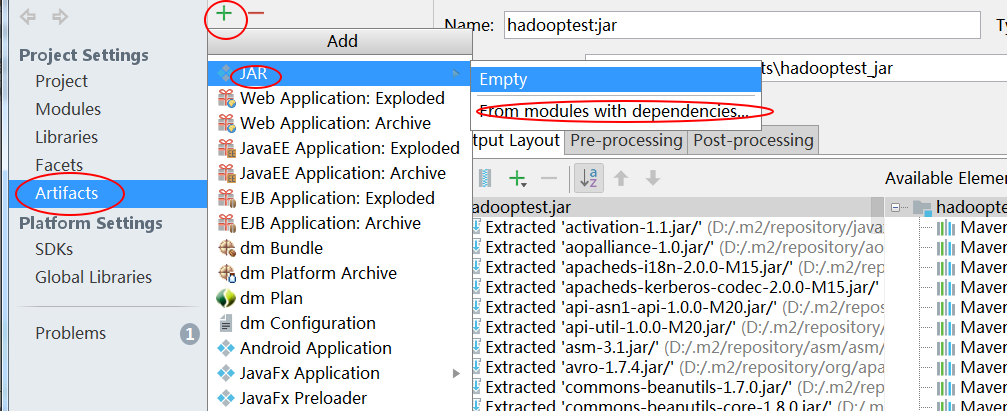

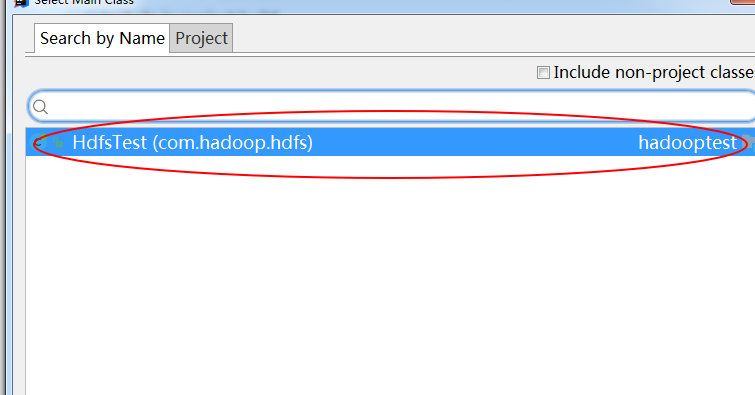

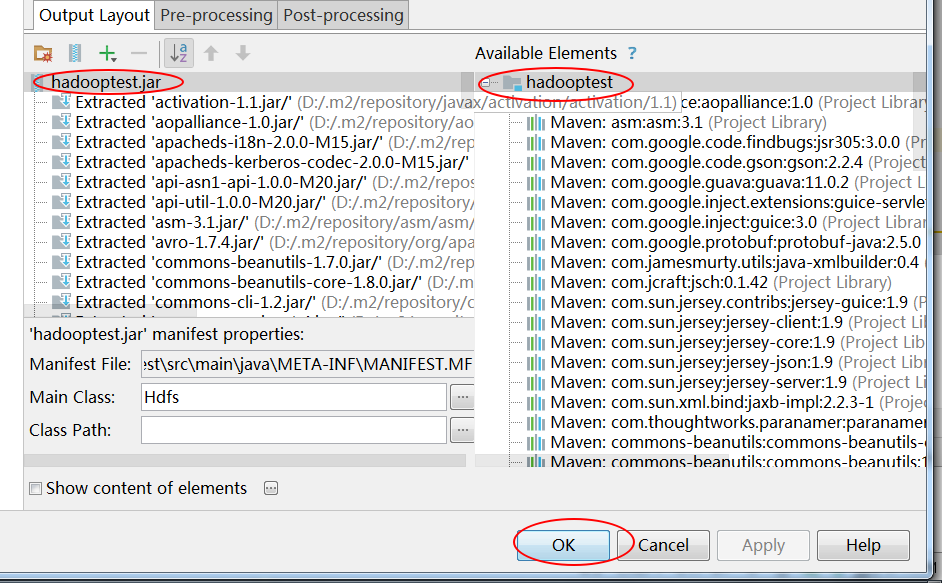

将jar上传集群中一个节点下 ,比如node3。
这里还是通过SFX上传

在node3(192.168.55.130)节点上执行命令:
hadoop jar hadooptest.jar com.hadoop.hdfs.HdfsTest
