在前面一篇博客里,我们介绍了利用TensorFlow 和训练好的 Googlenet 来生成简单的单一通道的pattern,接下来,我们要进一步生成更为有趣的一些pattern,之前的简单的pattern都是基于单一通道,单一尺度的,现在我们来试试多尺度下生成的pattern
# 这部分代码和之前单一通道的一样
# boilerplate code
from __future__ import print_function
import os
from io import BytesIO
import numpy as np
from functools import partial
import PIL.Image
from IPython.display import clear_output, Image, display, HTML

import tensorflow as tf

# !wget https://storage.googleapis.com/download.tensorflow.org/models/inception5h.zip && unzip inception5h.zip

model_fn = 'tensorflow_inception_graph.pb'

# creating TensorFlow session and loading the model
graph = tf.Graph()
sess = tf.InteractiveSession(graph=graph)
with tf.gfile.FastGFile(model_fn, 'rb') as f:
    graph_def = tf.GraphDef()
    graph_def.ParseFromString(f.read())
t_input = tf.placeholder(np.float32, name='input') # define the input tensor
imagenet_mean = 117.0
t_preprocessed = tf.expand_dims(t_input-imagenet_mean, 0)
tf.import_graph_def(graph_def, {'input':t_preprocessed})

layers = [op.name for op in graph.get_operations() if op.type=='Conv2D' and 'import/' in op.name]
feature_nums = [int(graph.get_tensor_by_name(name+':0').get_shape()[-1]) for name in layers]

print('Number of layers', len(layers))
print('Total number of feature channels:', sum(feature_nums))


# Picking some internal layer. Note that we use outputs before applying the ReLU nonlinearity
# to have non-zero gradients for features with negative initial activations.
layer = 'mixed4d_3x3_bottleneck_pre_relu'
channel = 64

# start with a gray image with a little noise
img_noise = np.random.uniform(size=(224,224,3)) + 100.0

# Multiscale image generation
# 多尺度图像的生成
def tffunc(*argtypes):
    # Helper that transforms TF-graph generating function into a regular one.
    # See "resize" function below.
    placeholders = list(map(tf.placeholder, argtypes))
    def wrap(f):
        out = f(*placeholders)
        def wrapper(*args, **kw):
            return out.eval(dict(zip(placeholders, args)), session=kw.get('session'))
        return wrapper
    return wrap

# Helper function that uses TF to resize an image
def resize(img, size):
    img = tf.expand_dims(img, 0)
    return tf.image.resize_bilinear(img, size)[0,:,:,:]
resize = tffunc(np.float32, np.int32)(resize)

def calc_grad_tiled(img, t_grad, tile_size=512):
    # Compute the value of tensor t_grad over the image in a tiled way.
    # Random shifts are applied to the image to blur tile boundaries over
    # multiple iterations.
    sz = tile_size
    h, w = img.shape[:2]
    sx, sy = np.random.randint(sz, size=2)
    img_shift = np.roll(np.roll(img, sx, 1), sy, 0)
    grad = np.zeros_like(img)
    for y in range(0, max(h-sz//2, sz),sz):
        for x in range(0, max(w-sz//2, sz),sz):
            sub = img_shift[y:y+sz,x:x+sz]
            g = sess.run(t_grad, {t_input:sub})
            grad[y:y+sz,x:x+sz] = g
    return np.roll(np.roll(grad, -sx, 1), -sy, 0)

# octave_n 表示阶数
# octave_scale 表示尺度变化的倍数
def render_multiscale(t_obj, img0=img_noise, iter_n=10, step=1.0, octave_n=3, octave_scale=1.4):
    t_score = tf.reduce_mean(t_obj) # defining the optimization objective
    t_grad = tf.gradients(t_score, t_input)[0] # behold the power of automatic differentiation!

    img = img0.copy()
    for octave in range(octave_n):
        if octave>0:
            hw = np.float32(img.shape[:2])*octave_scale
            img = resize(img, np.int32(hw))
        for i in range(iter_n):
            g = calc_grad_tiled(img, t_grad)
            # normalizing the gradient, so the same step size should work
            g /= g.std()+1e-8         # for different layers and networks
            img += g*step
            print('.', end = ' ')
        clear_output()
        showarray(visstd(img))

render_multiscale(T(layer)[:,:,:,channel])
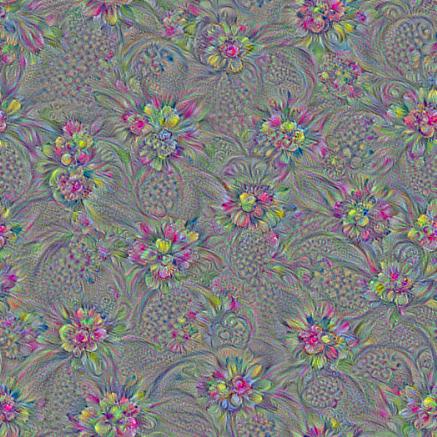
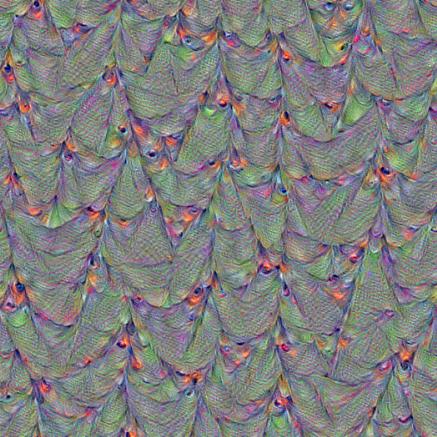
看看一些生成的效果图:
layer = ‘mixed4d_3x3_bottleneck_pre_relu’
channel = 100
octave_n=4, octave_scale=1.25

layer = ‘mixed4d_3x3_bottleneck_pre_relu’
channel = 60
octave_n=4, octave_scale=1.25

layer = ‘mixed4d_3x3_bottleneck_pre_relu’
channel = 139
octave_n=4, octave_scale=1.25
layer = ‘mixed4b_3x3_bottleneck_pre_relu’
channel = 24
octave_n=4, octave_scale=1.25
参考来源: