搭建好开发环境介绍:
- 硬件平台:HP Z800 工作站 内存:24GB 硬盘:1TB
- 虚拟化环境:XenServer 6.2.0
- VM1:Ubuntu 12.04 amd64 server | IP:192.168.137.50
- VM2:Ubuntu 12.04 amd64 server | IP:192.168.137.51
- VM3:Ubuntu 12.04 amd64 server | IP:192.168.137.52
1、从Git安装Appscale
在Xen上安装好Ubuntu 12.04 server版本号后,使用root用户登录,然后执行:
wget -O – http://bootstrap.appscale.com | sh
然后会从git clone到本地。进行自己主动化安装。该命令会执行以下的操作:
安装git
apt-get install -y git-core
构建appscale
cd /root
git clone git://github.com/AppScale/appscale.git
cd appscale/debian
bash appscale_build.sh
构建appscale-tools
cd /root
git clone git://github.com/AppScale/appscale-tools.git
cd appscale-tools/debian
bash appscale_build.sh
不出意外,基本能够完毕自己主动化安装。假设报错,请Google。
2、VM准备
首先将上面安装的VM进行clone,这里使用,复制出VM1和VM2。
然后对每一个VM进行设置静态IP:改动每一个VM的/etc/network/interfaces文件
VM1:
6 | dns-nameservers 114.114.114.114 |
VM2:
6 | dns-nameservers 114.114.114.114 |
VM3:
6 | dns-nameservers 114.114.114.114 |
相应也改动每一个VM的主机名。(配置文件/etc/hostname)
3、准备启动
三个VM又一次启动后,在master上执行:
初始化集群。
改动自己主动生成的配置文件:AppScalefile
2 | master : 192.168.137.50 |
3 | appengine : 192.168.137.50 |
4 | database : 192.168.137.51 |
5 | zookeeper : 192.168.137.52 |
4、启动集群
执行命令:
看到以下输出信息:
01 | Starting AppScale 1.14.0 over a virtualized cluster. |
02 | Log in to your head node: ssh -i /root/.appscale/appscale6099037d27e2439c8396c88148e5037b.key root@192.168.137.50 |
03 | Head node successfully initialized at 192.168.137.50. It is now starting up cassandra. |
04 | Copying over deployment credentials |
05 | Starting AppController at 192.168.137.50 |
06 | Please wait for the AppController to finish pre-processing tasks. |
08 | Please wait for AppScale to prepare your machines for use. |
09 | Copying over needed files and starting the AppController on the other VMs |
10 | UserAppServer is at 192.168.137.51 |
11 | Enter your desired admin e-mail address: admin@geekcome.com |
14 | Creating new user account admin@geekcome.com |
15 | Creating new user account admin@192.168.137.50 |
16 | Your XMPP username is admin@192.168.137.50 |
17 | Granting admin privileges to admin@geekcome.com |
18 | AppScale successfully started! |
这样就成功启动。
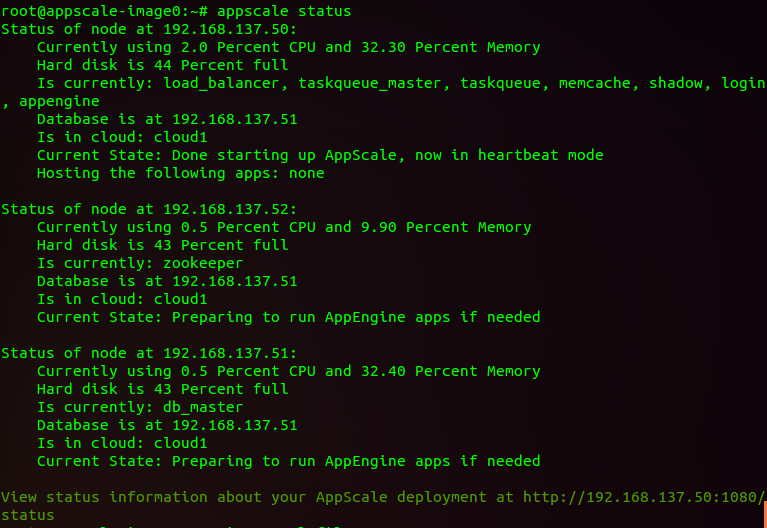
使用命令查看appscale status查看集群的状态:
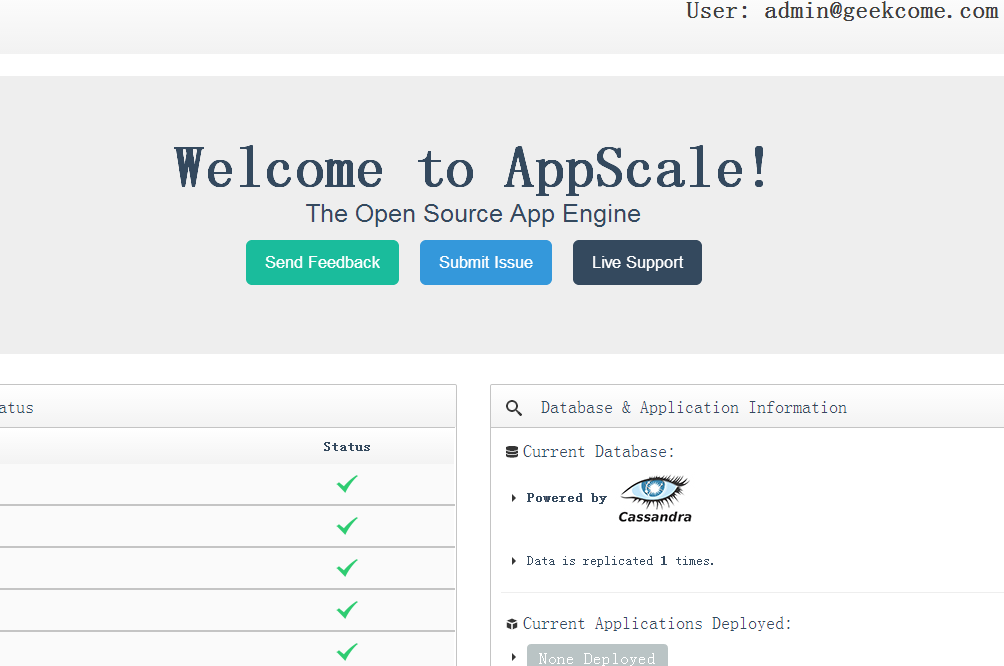
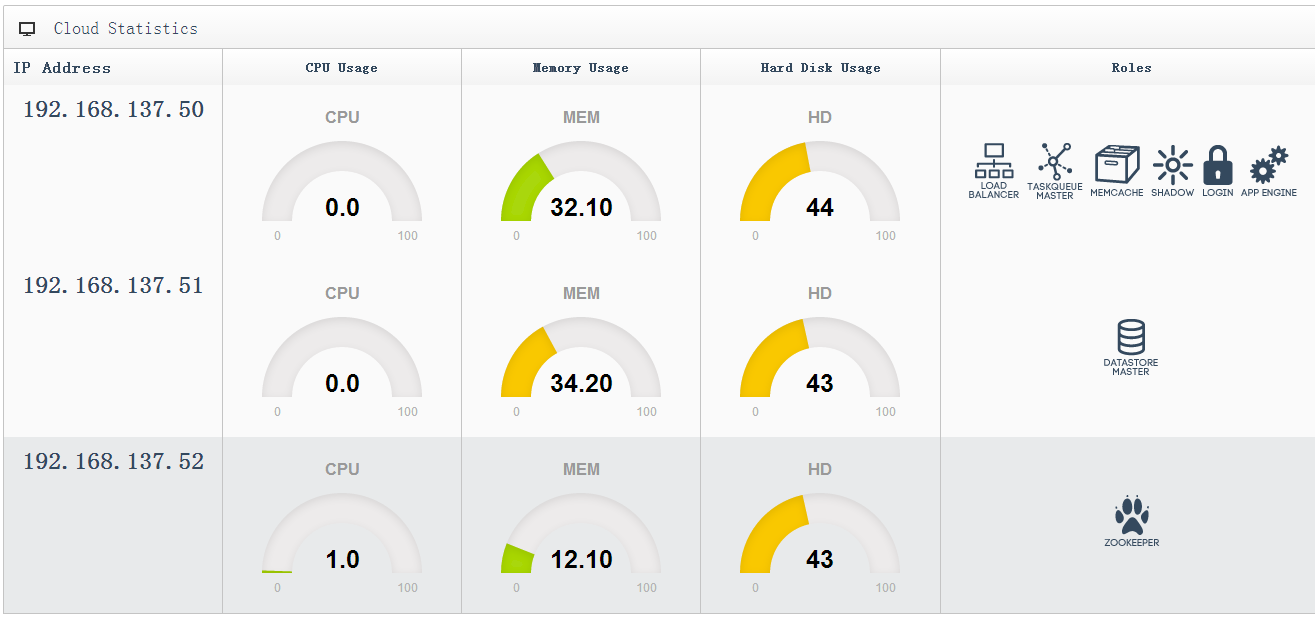
能够登录web管理端:https://192.168.137.50:1443/
提示:本文版权归作者,欢迎转载,但未经作者允许必须保留此段声明,且在文章页面明显位置给出原文连接。
假设对文章有不论什么问题,都能够在评论中留言,我会尽可能的答复您,谢谢你的阅读
(完)