一、创建项目与应用
#创建项目
fnngj@fnngj-H24X:~/djpy$ django-admin.py startproject mysite3
fnngj@fnngj-H24X:~/djpy$ cd mysite3
#在项目下创建一个account应用
fnngj@fnngj-H24X:~/djpy/mysite3$ python manage.py startapp account
数据库 model
model里的代码
from django.db import models

# Create your models here.
class User(models.Model):
    username = models.CharField(max_length=50)
    password = models.CharField(max_length=50)
    email = models.EmailField()


密码是yy12345678
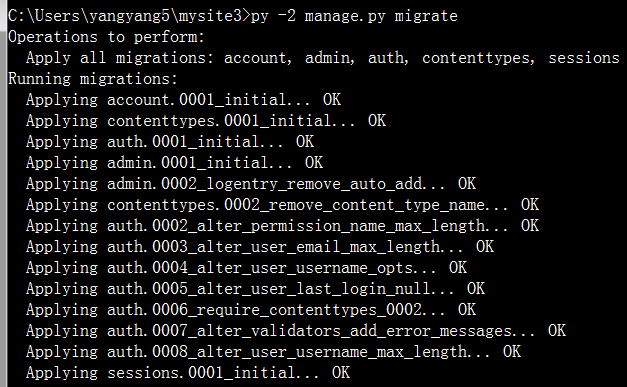
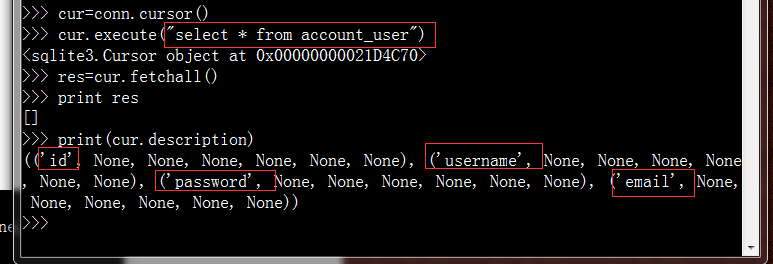
查看sqlite数据库,已经建好表啦
二。创建视图 逻辑层
# -*- coding: utf-8 -*-
from __future__ import unicode_literals

from django.shortcuts import render,render_to_response
from django.template import loader,Context
from django.http import HttpResponse
from django import forms
from account.models import User

# Create your views here.

#定义表单模型
class UserForm(forms.Form):
    username=forms.CharField(label='用户名:',max_length=100)
    password=forms.CharField(label='密码:',widget=forms.PasswordInput())
    email=forms.EmailField(label='电子邮件:')


def register(request):
    if request.methos=='POST':
        uf=UserForm(request.POST)
        if uf.is_vaild():
            #获取表单信息
            username=uf.cleaned_data['username']
            password=uf.cleaned_data['password']
            email=uf.cleaned_data['email']

            #将表单数据写入数据库
            user=User()
            user.username=username
            user.password=password
            user.email=email
            user.save()

            #返回注册成功页面
            return render_to_response('success.html',{'username':username})
    else:
        uf=UserForm()
    return render_to_response('register.html',{'uf':uf})
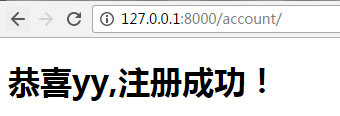
这个逻辑中主要做了几件事,首先提供给用户一个注册页面(register.html),UserForm类定义了表单在注册页面上的显示。接受用户填写的表单信息,然后将表单信息写入到数据库,最后返回给用户一个注册成功的页面(success.html)
三、创建模板文件(前端页面)
在逻辑层提到了两个页面,一个注册页,一个注册成功页面。所以我们要把这两个页面创建出来。
先在mysite3/account/目录下创建templates目录,接着在mysite3/account/templates/目录下创建register.html 文件:
<?xml version="1.0" encoding="UTF-8"?>
<!DOCTYPE html PUBLIC "-//W3C//DTD XHTML 1.0 Strict//EN" "http://www.w3.org/TR/xhtml1/DTD/xhtml1-strict.dtd">
<html xmlns="http://www.w3.org/1999/xhtml" xml:lang="en" lang="en">
<head>
    <meta http-equiv="Content-Type" content="text/html; charset=UTF-8" />
    <title>用户注册</title>
</head>
  <style type="text/css">
    body{color:#efd;background:#453;padding:0 5em;margin:0}
    h1{padding:2em 1em;background:#675}
    h2{color:#bf8;border-top:1px dotted #fff;margin-top:2em}
    p{margin:1em 0}
  </style>
<body>
<h1>注册页面:</h1>
<form method = 'post' enctype="multipart/form-data">
{{uf.as_p}}
<input type="submit" value = "ok" />
</form>
</body>
</html>
<?xml version="1.0" encoding="UTF-8"?>
<!DOCTYPE html PUBLIC "-//W3C//DTD XHTML 1.0 Strict//EN" "http://www.w3.org/TR/xhtml1/DTD/xhtml1-strict.dtd">
<html xmlns="http://www.w3.org/1999/xhtml" xml:lang="en" lang="en">
<head>
    <meta http-equiv="Content-Type" content="text/html; charset=UTF-8" />
    <title></title>
</head>
<body>
    <h1>恭喜{{username}},注册成功!</h1>
</form>
</body>
</html>
四。设置url
设置URL的配置也是django web框架的一大特色。打开mysite3/mysite3/urls.py:
from django.conf.urls import url,include
from django.contrib import admin

admin.autodiscover()

urlpatterns = [
    url(r'^admin/', admin.site.urls),
    url(r'^account/', include('account.urls')),
]
在mysite3/account/目录下创建urls.py文件:
from django.conf.urls import url
from account import views

urlpatterns=[
    url(r'^$',views.register,name='register'),
   url(r'^register/$',views.register,name='register'),
                     ]
这里人配置表示:访问
http://127.0.0.1:8000/account/
http://127.0.0.1:8000/account/register/
都会指向一个注册页面。
最后的注意:
以免错误的再次出现,
打开mysite3/mysite3/settings.py文件,将下面一行代码注释:

MIDDLEWARE_CLASSES = (
    'django.contrib.sessions.middleware.SessionMiddleware',
    'django.middleware.common.CommonMiddleware',
    #'django.middleware.csrf.CsrfViewMiddleware',
    'django.contrib.auth.middleware.AuthenticationMiddleware',
    'django.contrib.messages.middleware.MessageMiddleware',
    'django.middleware.clickjacking.XFrameOptionsMiddleware',
)

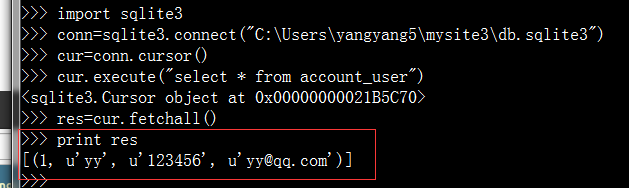
在数据库查看我存入的数据
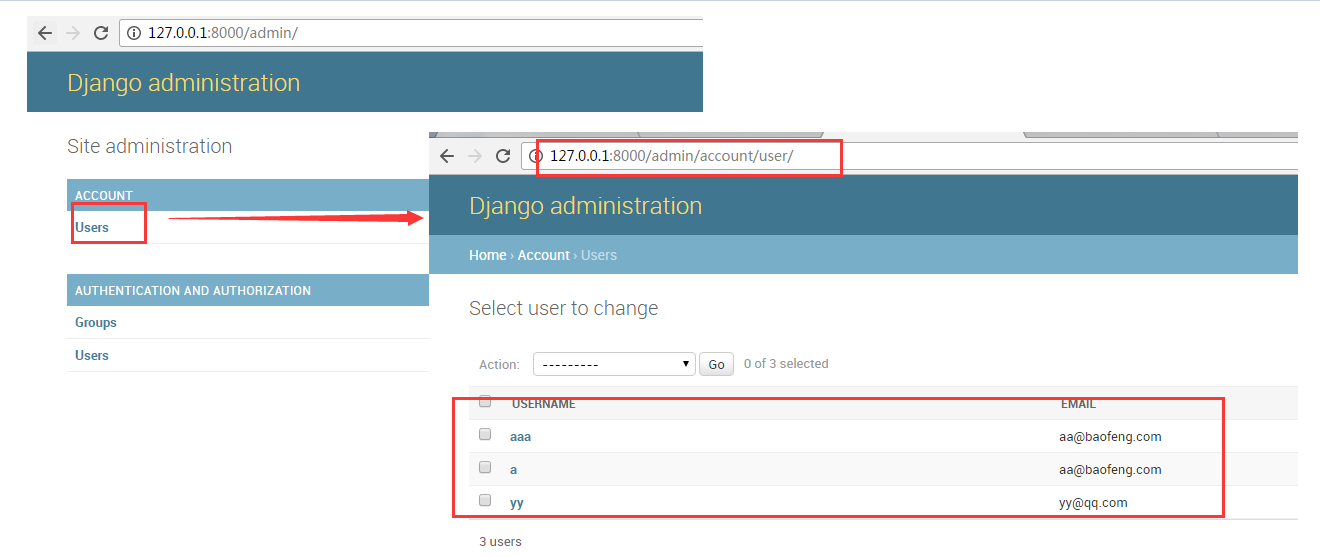
当然,用admin后台的方式,看起来更舒服
配置admin后台:
在我们创建项目的时候,admin就已经建立了,
1、配置urls.py
from django.conf.urls import url,include
from django.contrib import admin

urlpatterns = [
    url(r'^admin/', admin.site.urls),  #把admin配置文件加载进来?
    url(r'^blog/',include('blog.urls')),
]
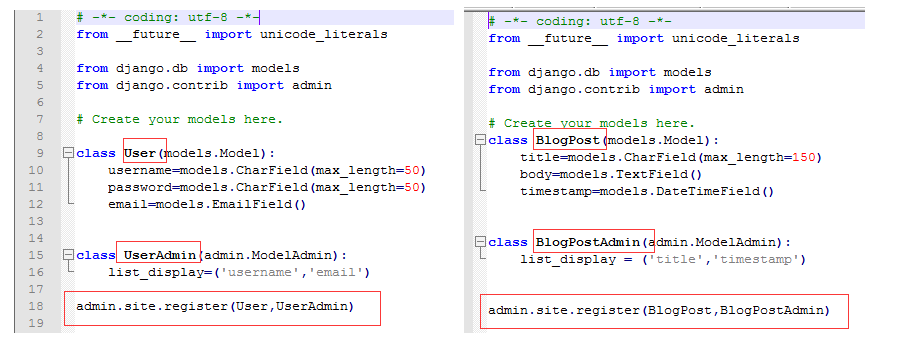
2.在model里
from __future__ import unicode_literals

from django.db import models
from django.contrib import admin

# Create your models here.

class User(models.Model):
    username=models.CharField(max_length=50)
    password=models.CharField(max_length=50)
    email=models.EmailField()


class UserAdmin(admin.ModelAdmin):
	list_display=('username','email')

admin.site.register(User,UserAdmin)
重新初始化数据库:
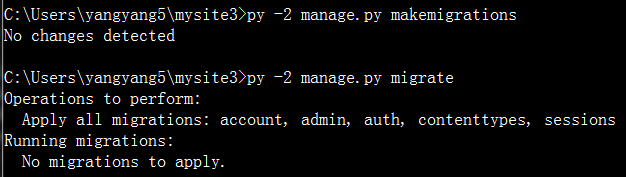
好像没有更新呀??
ok啦~