这回使用visual studio code折腾php代码的调试,又是一顿折腾,无论如何都进不了断点。好在就要放弃使用visual studio code工具的时候,折腾好了,汗~
这里把步骤记录下来:
1、安装一站式php工具wampserver
我安装的是最新的3.1.3 64bit的版本,这个版本内置了4个版本的php,默认使用的是php 5.6.35。如果需要调试php,必须要使用php 7.0以上的版本,这个可能是跟我使用的visual studio code的php插件有关。这里切换到php 7的版本。
2、安装并配置xdebug参数
wampserver默认是内置了xdebug的,不过需要修改一下xdebug的参数。
找到wampserver的托盘工具,左键点击-》PHP->PHP Settings,勾选xdebug.remote_enable,这一项
然后,左键点击-》PHP->php.ini文件,发现会在php.ini文件自动生成如下内容:
; XDEBUG Extension
[xdebug]
zend_extension ="D:/Program/wamp64/bin/php/php7.0.29/zend_ext/php_xdebug-2.6.0-7.0-vc14-x86_64.dll"

xdebug.remote_enable = On
xdebug.profiler_enable = off
xdebug.profiler_enable_trigger = Off
xdebug.profiler_output_name = cachegrind.out.%t.%p
xdebug.profiler_output_dir ="D:/Program/wamp64/tmp"
xdebug.show_local_vars=0
需要添加一行内容,修改后的内容为:
; XDEBUG Extension
[xdebug]
zend_extension ="D:/Program/wamp64/bin/php/php7.0.29/zend_ext/php_xdebug-2.6.0-7.0-vc14-x86_64.dll"

xdebug.remote_enable = On
xdebug.remote_autostart=on
xdebug.profiler_enable = off
xdebug.profiler_enable_trigger = Off
xdebug.profiler_output_name = cachegrind.out.%t.%p
xdebug.profiler_output_dir ="D:/Program/wamp64/tmp"
xdebug.show_local_vars=0
红色的部分是我添加的内容,一直进不了断点,是因为我这句标红的内容没有加,xdebug.remote_autostart参数并不能像xdebug.remote_enable参数一样可以通过菜单开启,汗~~
修改以后,记得重启apache服务
3、安装visual studio code的php插件

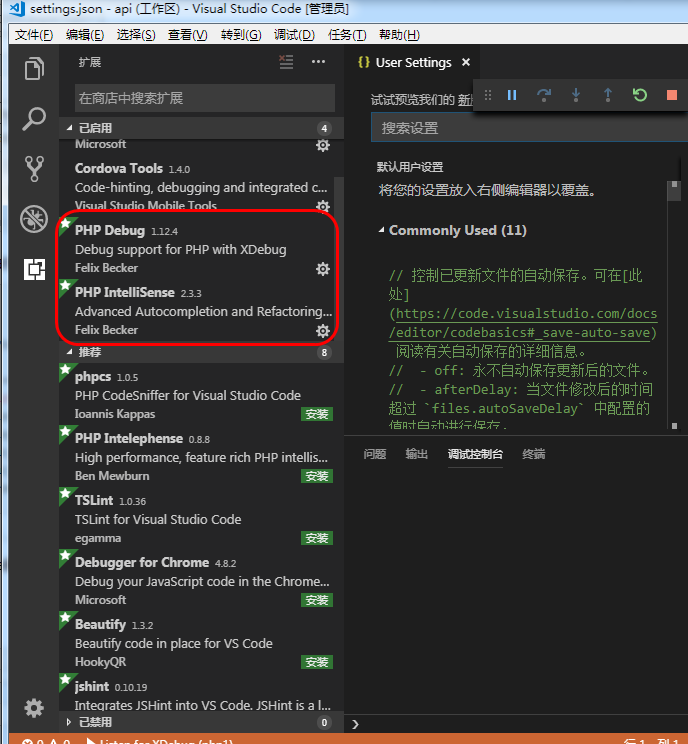
如图所示,添加
PHP IntelliSense和PHP Debug两个插件
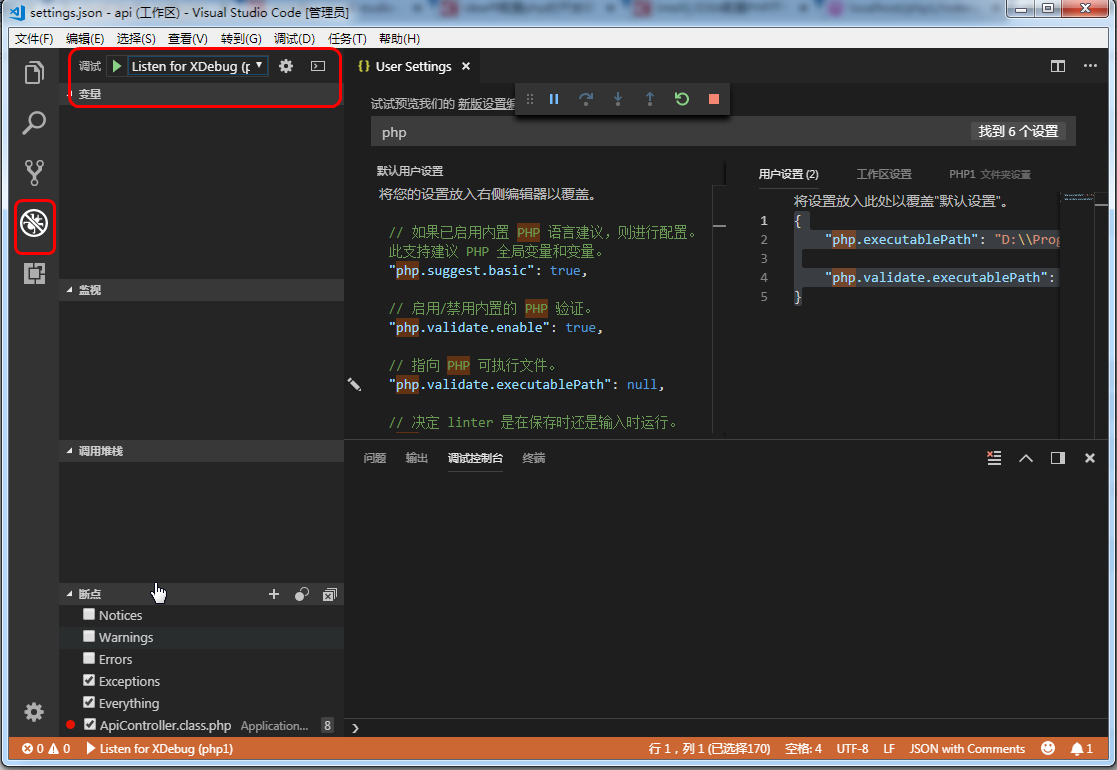
这两个插件都需要配置php的路径,菜单:文件-》首选项-》设置
用户设置,我修改为:
{
    "php.executablePath": "D:\Program\wamp64\bin\php\php7.0.29\php.exe",

    "php.validate.executablePath": "D:\Program\wamp64\bin\php\php7.0.29\php.exe"
}
我这里引用的是wampserver内置的php的版本,注意要跟上面启用的php的版本保持一致。
4、Visual Studio Code启用调试
到调试这一栏,添加php的调试,并且启用调试

那么在代码中添加断点,运行代码,就可以进行php代码的调试了!