前言
因项目的需要,而且当前组件库并不支持业务,所以,重新对日历组件进行封装。该篇博客就对实现日历的思路进行存档,方便以后的查阅。
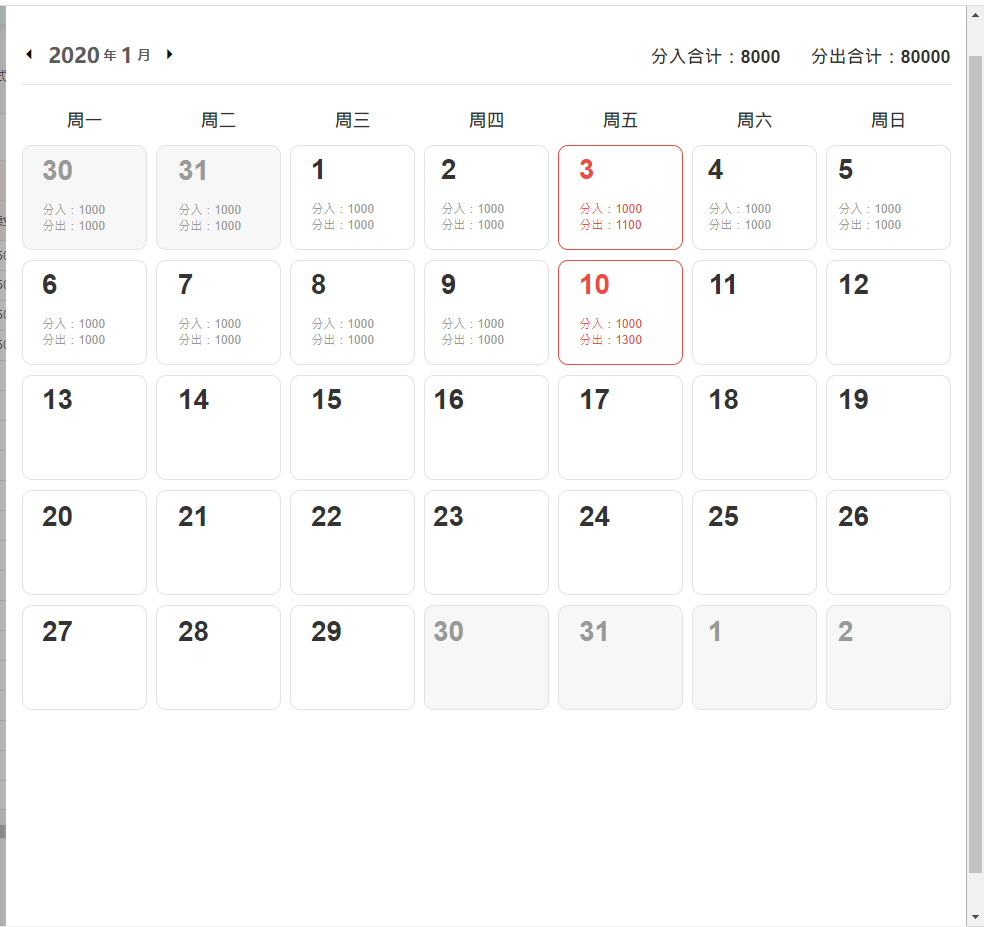
先上图:UI小哥哥的原型图。接下来的思路都是根据该图进行解说
逻辑
- 1.组件的拆分,分出哪些是业务,哪些是基础组件。
整体来说,这就是在日历的基础上添加业务,所以日历组件应该是基础组件,而业务应该是通过插槽插入进去的。那么,右上方的分入分出合计以及每个日历中的分入,分出都是需要插入的。其余的均是日历本身的功能。 - 2.那么接下来,我们先完成日历组件的封装,首先,我们要清楚,日历组件都需要完成哪些功能。功能如下
- 确定每个月1号对应的是周几,需要上个月补充几天,以及下个月补充几天。
- 当切换上个月,或者下个月的时候,日历面板能够重新渲染。
emmm...好像就没啥了 ,重点就是日期的渲染,没有很大的逻辑问题。也不知道为啥当初看到这个组件的时候 就是不太愿意✍
实现步骤
- 日历的头部渲染,即日历的周一-周日渲染出来。这里使用flex布局即可。
- 日历的内容渲染,一个面板上应该是42个元素,包括上个月部分数据,当月整月数据,以及下个月部分数据。需要确定当月1号所在的位置,这样子,才能知道上个月以及下个月需要补充的天数,
- 页面的还原
- 下面就需要对日历面板的数组进行操作了。年,月是从父组件传入的,当年,月发生改变的时候,日历面板的数据也随之发生改变。所以,日历面板的list通过计算属性来进行其变更以及页面的渲染。
totalDayList(val) {
let list = [];
// 定位找到选中月份初始的星期几
let {showMonth, showYear, daysInMonth} = val;
// 判断当前是否是闰年
if(showYear%4 ===0 && showYear %100 === 0|| showYear%400 ===0) {
this.daysInMonth[1] =29;
};
// 对月份赋值
let month = showMonth;
// 对年份赋值
let year = showYear;
// 将日期进行拼接,拼接成每月1号的数据
let dateValue = year + '-' + month + '-' + '1';
// 确定当前日期在周几-0代表的是周日,1代表的是周一。。。。
let currentWeek = new Date(Date.parse(dateValue.replace(/-/g, '/'))).getDay();
// 根据当前日期,判定需要在前面补充几个日期,在后面补充几个日期
// 目的是补位:将前一个月的数据进行填充
// 获取上一个月的天数
let preList = this.preData(month, year,list, currentWeek, daysInMonth);
// 将本月的数据进行渲染
let currentList = this.currentData(daysInMonth, year,month, list);
// 目的是补充后面的位置,保证当前面板的数据完整
let nextList = this.nextData(list, year, month);
list = [...nextList]
return list
}
- 上个月的数据的渲染
preData(month, year,list, currentWeek, daysInMonth) {
// 获取上一个月,存在跨年的情况,当当前月份是1月份的时候,上个月是去年的12月
let preMonth = month>1 ? month-1 :12;
// 获取年份
year = month>1?year:year-1;
// 获取上个月的天数
let preDays = daysInMonth[preMonth-1];
// 存放的每周对应需要补的天数
let fillNum = [6,0,1,2,3,4,5]
// currentWeek=0,代表是周日,需要上个月补6天
// currentWeek=1, 代表是周一,需要上个月补0天
// currentWeek=2, 代表是周二,需要上个月补1天
// currentWeek=3. 代表是周三,需要上个月补2天
// currentWeek=4, 代表是周四,需要上个月补3天
// currentWeek=5, 代表是周五,需要上个月补4天
// currentWeek=6, 代表是周六,需要上个月补5天
for(let i = preDays; i>preDays-fillNum[currentWeek]; i--) {
let obj = {
type: 'prev',
year,
month: preMonth,
day:i,
className: 'pre_day'
}
list.push(obj);
}
list =list.reverse();
return list;
},
- 当月的数据渲染
currentData(daysInMonth, year,month, list ) {
// 将本月的数据进行渲染
for(let i=0; i<daysInMonth[month-1];i++) {
let obj = {
year,
day:i+1,
type: 'current',
className: 'current_day',
month,
}
list.push(obj)
}
return list;
},
- 下个月的数据渲染
nextData(list, year, month) {
// 该日历面板又42个模块
let nextNum = 42-list.length;
if(nextNum>0) {
for(let i=0; i<nextNum;i++) {
let obj = {
year,
day: i+1,
type: 'next',
className: 'next_day',
month: month+1
}
list.push(obj)
}
}
return list
}
### 总结:
日历的逻辑需要注意确定当月1号的位置,以及填充上个月,下个月的数据。记录一下 自己的逻辑思路。