准备环境:
节点1:10.2.22.130 ubuntu-1
节点2:10.2.22.131 ubuntu-2(备注:关闭RabbitMQ服务后才能修改erlang.cookie,在启动服务加入集群)
HAProxy:10.2.22.132 ubuntu-3(备注:一开始将HAProxy组件和RabbitMQ组件装在一起,修改haproxy配置文件后无法启动,分开后正常)
各个服务器host中增加信息,保证可以互相ping通
1.安装RabbitMQ
sudo apt-get install erlang-nox
sudo apt-get install rabbitmq-server
rabbitmq-plugins enable rabbitmq_management # 安装网页插件
service rabbitmq-server restart# 重启服务
service rabbitmq-server start # 启动
service rabbitmq-server stop # 停止
service rabbitmq-server restart # 重启
rabbitmqctl add_user admin yourpassword # 增加普通用户
rabbitmqctl set_user_tags admin administrator # 给普通用户分配管理员角色
rabbitmqctl set_permissions -p /test admin '.*' '.*' '.*' ##给用户admin 赋权为全部权限
搭建集群,2台节点的.erlang.cookie 文件一致,
在/var/lib/rabbitmq中,文件名称为.erlang.cookie ,并赋予chmod 600 .erlang.cookie 权限
查看集群准备
rabbitmqctl cluster_status,如果有错误请重新开始
rabbitmqctl stop_app
rabbitmqctl join_cluster --ram rabbit@ubuntu-2
rabbitmqctl start_app

出现如下说明加入成功

rabbitmqctl set_policy ha-all "^" '{"ha-mode":"all"}' 高可用镜像模式设置

2.搭建HAProxy组件
sudo apt-get install haproxy
修改配置文件
/etc/haproxy/haproxy.cfg
global
log /dev/log local0
log /dev/log local1 notice
chroot /var/lib/haproxy
stats socket /run/haproxy/admin.sock mode 660 level admin expose-fd listeners
stats timeout 30s
user haproxy
group haproxy
daemon
# Default SSL material locations
ca-base /etc/ssl/certs
crt-base /etc/ssl/private
# Default ciphers to use on SSL-enabled listening sockets.
# For more information, see ciphers(1SSL). This list is from:
# https://hynek.me/articles/hardening-your-web-servers-ssl-ciphers/
# An alternative list with additional directives can be obtained from
# https://mozilla.github.io/server-side-tls/ssl-config-generator/?server=haproxy
ssl-default-bind-ciphers ECDH+AESGCM:DH+AESGCM:ECDH+AES256:DH+AES256:ECDH+AES128:DH+AES:RSA+AESGCM:RSA+AES:!aNULL:!MD5:!DSS
ssl-default-bind-options no-sslv3
defaults
log global
mode http
option httplog
option dontlognull
timeout connect 5000
timeout client 50000
timeout server 50000
errorfile 400 /etc/haproxy/errors/400.http
errorfile 403 /etc/haproxy/errors/403.http
errorfile 408 /etc/haproxy/errors/408.http
errorfile 500 /etc/haproxy/errors/500.http
errorfile 502 /etc/haproxy/errors/502.http
errorfile 503 /etc/haproxy/errors/503.http
errorfile 504 /etc/haproxy/errors/504.http
listen rabbitmq_local_cluster
bind 0.0.0.0:5672
#配置TCP模式
mode tcp
option tcplog
#简单的轮询
balance roundrobin
#rabbitmq集群节点配置
server ubuntu-1 10.2.22.130:5672 check inter 2s rise 2 fall 2
server ubuntu-2 10.2.22.131:5672 check inter 2s rise 2 fall 2
#配置haproxy web监控,查看统计信息
listen private_monitoring
bind :8100
mode http
option httplog
stats enable
#设置haproxy监控地址为http://localhost:8100/stats
stats uri /stats
stats refresh 30s
#添加用户名密码认证
stats auth admin:admin
listen rabbitmq_admin
bind 0.0.0.0:8004
mode http
option httplog
#简单的轮询
balance roundrobin
server ubuntu-1 10.2.22.130:15672 check inter 2s rise 2 fall 2
server ubuntu-2 10.2.22.131:15672 check inter 2s rise 2 fall 2
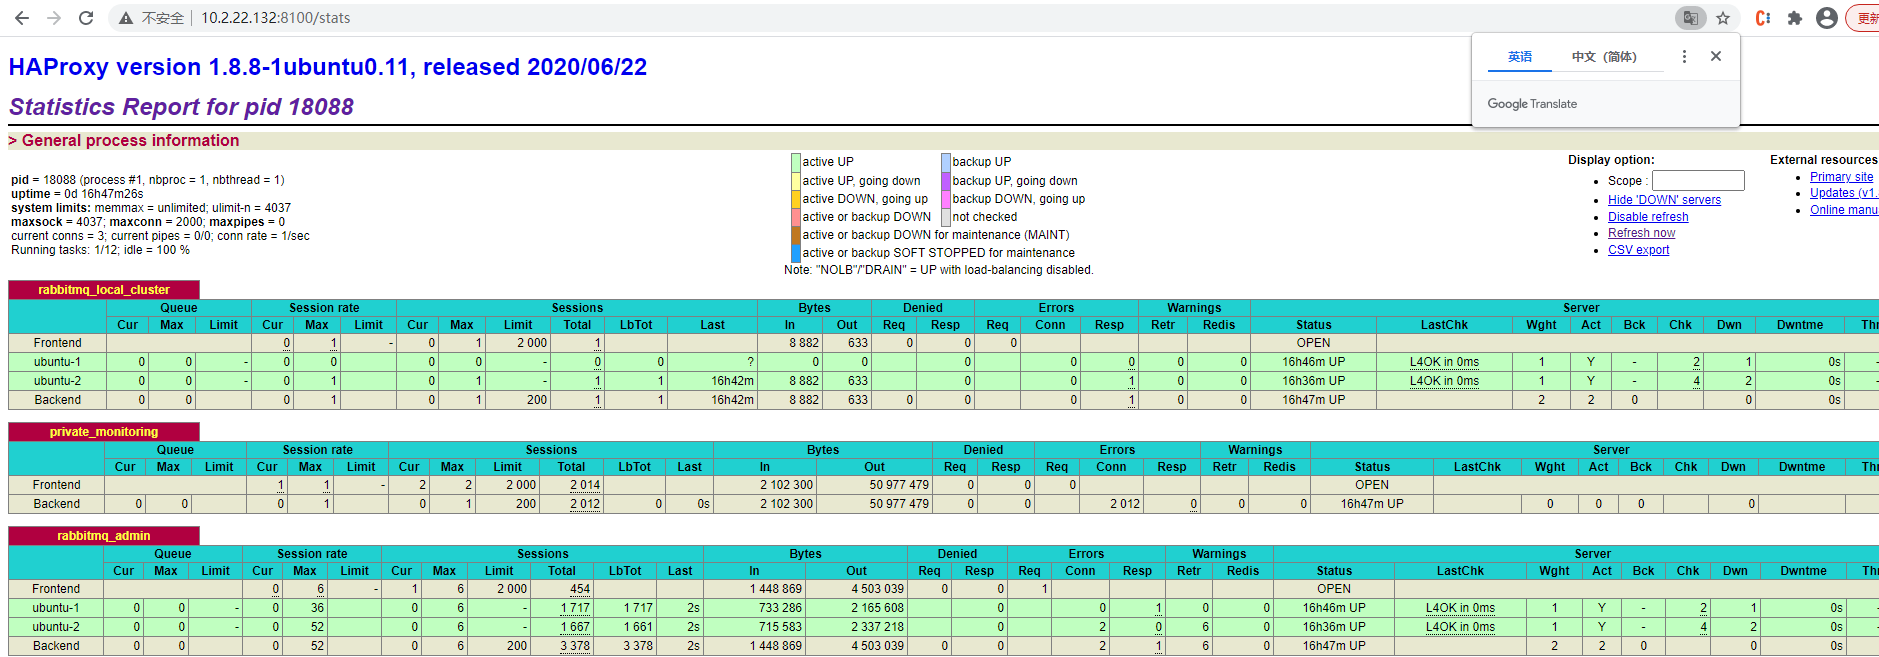
出现如下界面表示成功,可以看到2个节点已经加入看到心跳

测试故障转移:
将1个节点关掉,mq也可以正常打开,客户端停止2秒后自动转移到新节点发送数据
