正如VUE的文档所说
你不需要立马弄明白所有的东西,不过随着你的不断学习和使用,它的参考价值会越来越高。
下图展示实例的生命周期
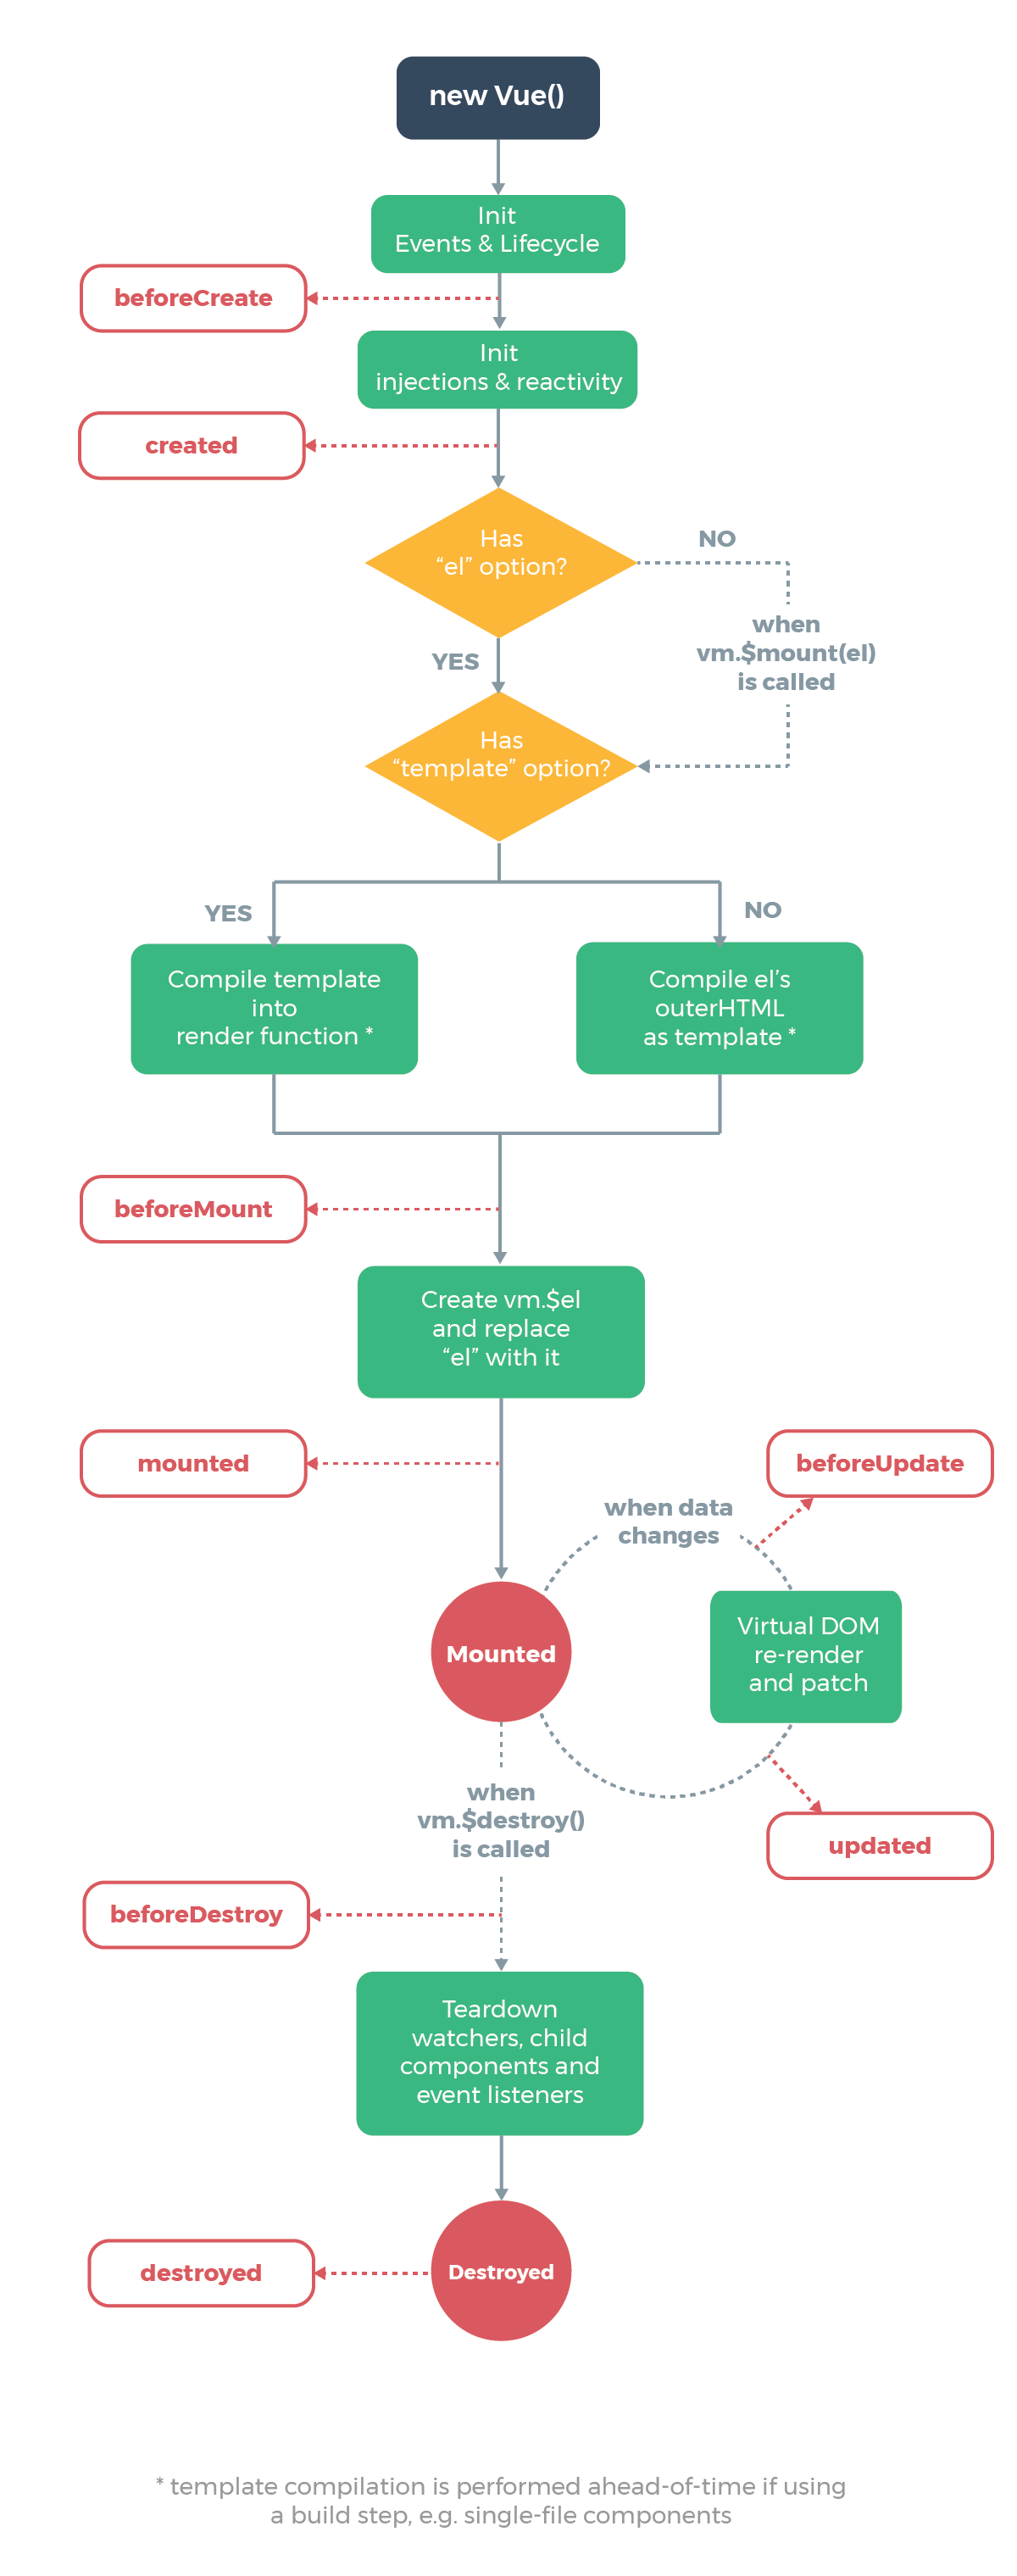
在beforeCreate和created钩子函数间的生命周期
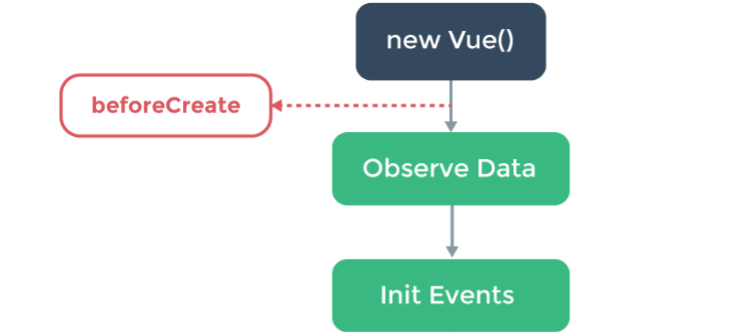
在beforeCreate和created之间,进行数据观测(data observer) ,
也就是在这个时候开始监控data中的数据变化了,同时初始化事件
created钩子函数和beforeMount间的生命周期
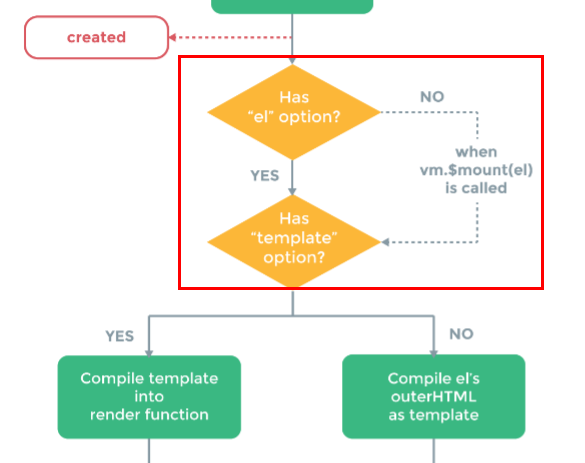
红框框住的部分需要理解一下
el选项的存在对整个生命周期的影响
在这里,系统首先会判断有没有el选项
如果有整个生命周期继续进行
如果没有,就停止了生命周期,直到vm.$mount(el),
展示一下:
当有el选项时
<!DOCTYPE html>
<html lang="en">

<head>
    <meta charset="UTF-8">
    <meta name="viewport" content="width=device-width, initial-scale=1.0">
    <meta http-equiv="X-UA-Compatible" content="ie=edge">
    <title>Document</title>
    <script src="https://cdn.jsdelivr.net/npm/vue@2.5.17/dist/vue.js"></script>
</head>

<body>
    <div id="app">

    </div>
</body>
<script>
    new Vue({
        // el: "#app",
        beforeCreate () {
            console.log('调用了beforeCreat钩子函数')
        },
        created () {
            console.log('调用了created钩子函数')
        },
        beforeMount () {
            console.log('调用了beforeMount钩子函数')
        },
        mounted () {
            console.log('调用了mounted钩子函数')
        }
    })
</script>

</html>
编译后我们能在控制台看到

当我再去掉el选项时
<!DOCTYPE html>
<html lang="en">

<head>
    <meta charset="UTF-8">
    <meta name="viewport" content="width=device-width, initial-scale=1.0">
    <meta http-equiv="X-UA-Compatible" content="ie=edge">
    <title>Document</title>
    <script src="https://cdn.jsdelivr.net/npm/vue@2.5.17/dist/vue.js"></script>
</head>

<body>
    <div id="app">

    </div>
</body>
<script>
    new Vue({
        // el: "#app",
        beforeCreate () {
            console.log('调用了beforeCreat钩子函数')
        },
        created () {
            console.log('调用了created钩子函数')
        },
        beforeMount () {
            console.log('调用了beforeMount钩子函数')
        },
        mounted () {
            console.log('调用了mounted钩子函数')
        }
    })
</script>

</html>
我们又能看到

可以看到,生命周期的钩子函数执行到created就结束了
而当我们不加el选项,但是手动执行vm.$mount(el)方法的话,也能够使暂停的生命周期进行下去
eg:
<!DOCTYPE html>
<html lang="en">

<head>
    <meta charset="UTF-8">
    <meta name="viewport" content="width=device-width, initial-scale=1.0">
    <meta http-equiv="X-UA-Compatible" content="ie=edge">
    <title>Document</title>
    <script src="https://cdn.jsdelivr.net/npm/vue@2.5.17/dist/vue.js"></script>
</head>

<body>
    <div id="app">

    </div>
</body>
<script>
    var vm = new Vue({
        // el: "#app",
        beforeCreate () {
            console.log('调用了beforeCreat钩子函数')
        },
        created () {
            console.log('调用了created钩子函数')
        },
        beforeMount () {
            console.log('调用了beforeMount钩子函数')
        },
        mounted () {
            console.log('调用了mounted钩子函数')
        }
    })
    vm.$mount('#app')
</script>

</html>
在控制台中就会出现

所以,就算是没有el选项,
但是通过vm.$mount('#app')动态添加的方式,还是能够使生命周期进行下去
beforeUpdate钩子函数和updated钩子函数间的生命周期

在Vue中,数据更改会导致虚拟 DOM 重新渲染,并先后调用beforeUpdate钩子函数和updated钩子函数
但是注意一点:重渲染的前提是更改的数据写入了Vue实例的模板中,
var vm = new Vue({
  el: '#app',
  data: {
    number: 1
  },
  template: '<div id="app"><p></p></div>',
  beforeUpdate: function () {
    console.log('调用了beforeUpdate钩子函数')
  },
  updated: function () {
    console.log('调用了updated钩子函数')
  }
})

vm.number = 2
但是控制台是空空如也啊
那我更改代码为
var vm = new Vue({
  el: '#app',
  data: {
    number: 1
  },
  // 在模板中使用number这个数据
  template: '<div id="app"><p>  {{ number }} </p></div>',
  beforeUpdate: function () {
    console.log('调用了beforeUpdate钩子函数')
  },
  updated: function () {
    console.log('调用了updated钩子函数')
  }
})

vm.number = 2
见证奇迹的时刻到了,当当当
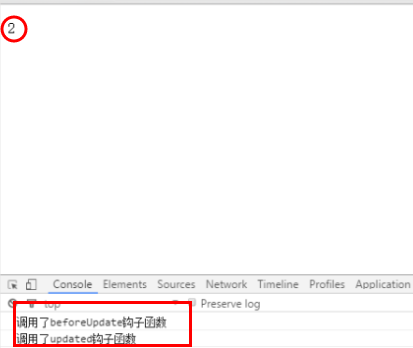
总之,只有Vue实例中的数据被“写入”到我们的模板中,它的改变才可以被Vue追踪,
重渲染从而调用 beforeUpdate钩子函数和updated钩子函数