# 搜索镜像
docker search nexus;
#拉取nexus镜像
docker pull sonatype/nexus;
#运行
-id 创建守护式容器
--privileged=true 授予root权限(挂载多级目录必须为true,否则容器访问宿主机权限不足)
--name=名字 给你的容器起个名字
-p 宿主机端口:容器端口映射
-v 宿主机目录:容器目录 目录挂载
docker run -d -p 8081:8081 --name nexus -v /root/nexus-data:/var/nexus-data --restart=always sonatype/nexus3
上面命令是指使用nexus3镜像创建并启动一个容器,然后指定暴露8081端口到对应主机的8081端口
将容器内部/var/nexus-data挂载到主机/root/nexus-data目录。
#查看日志
docker logs -f nexus
访问地址:http://虚拟机ip:8081/
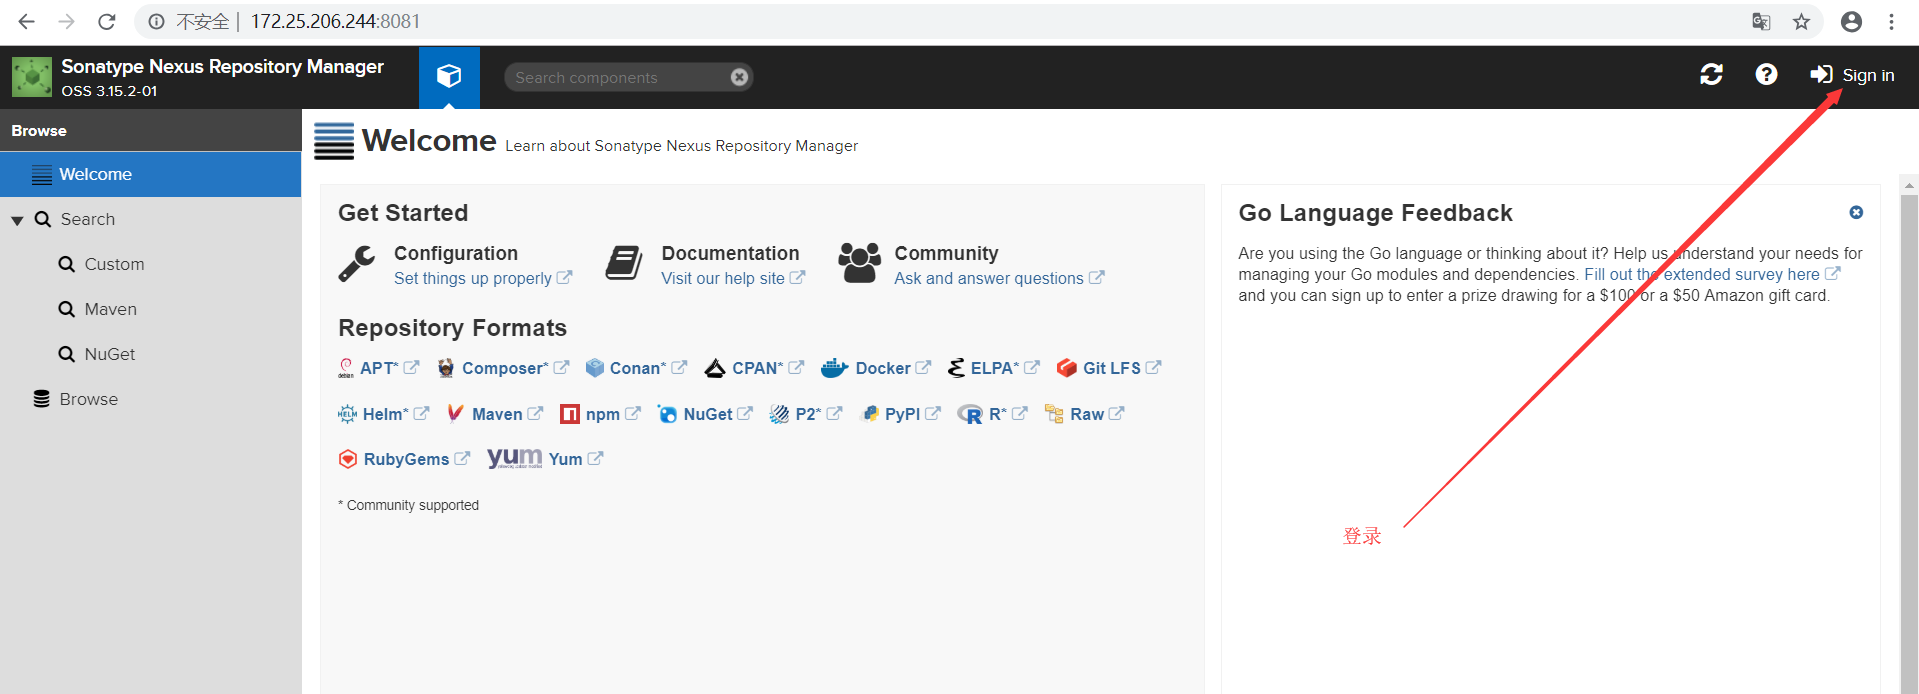
登陆密码:默认 admin/admin123
1. 创建自己的私服仓库

选择maven2(hosted)
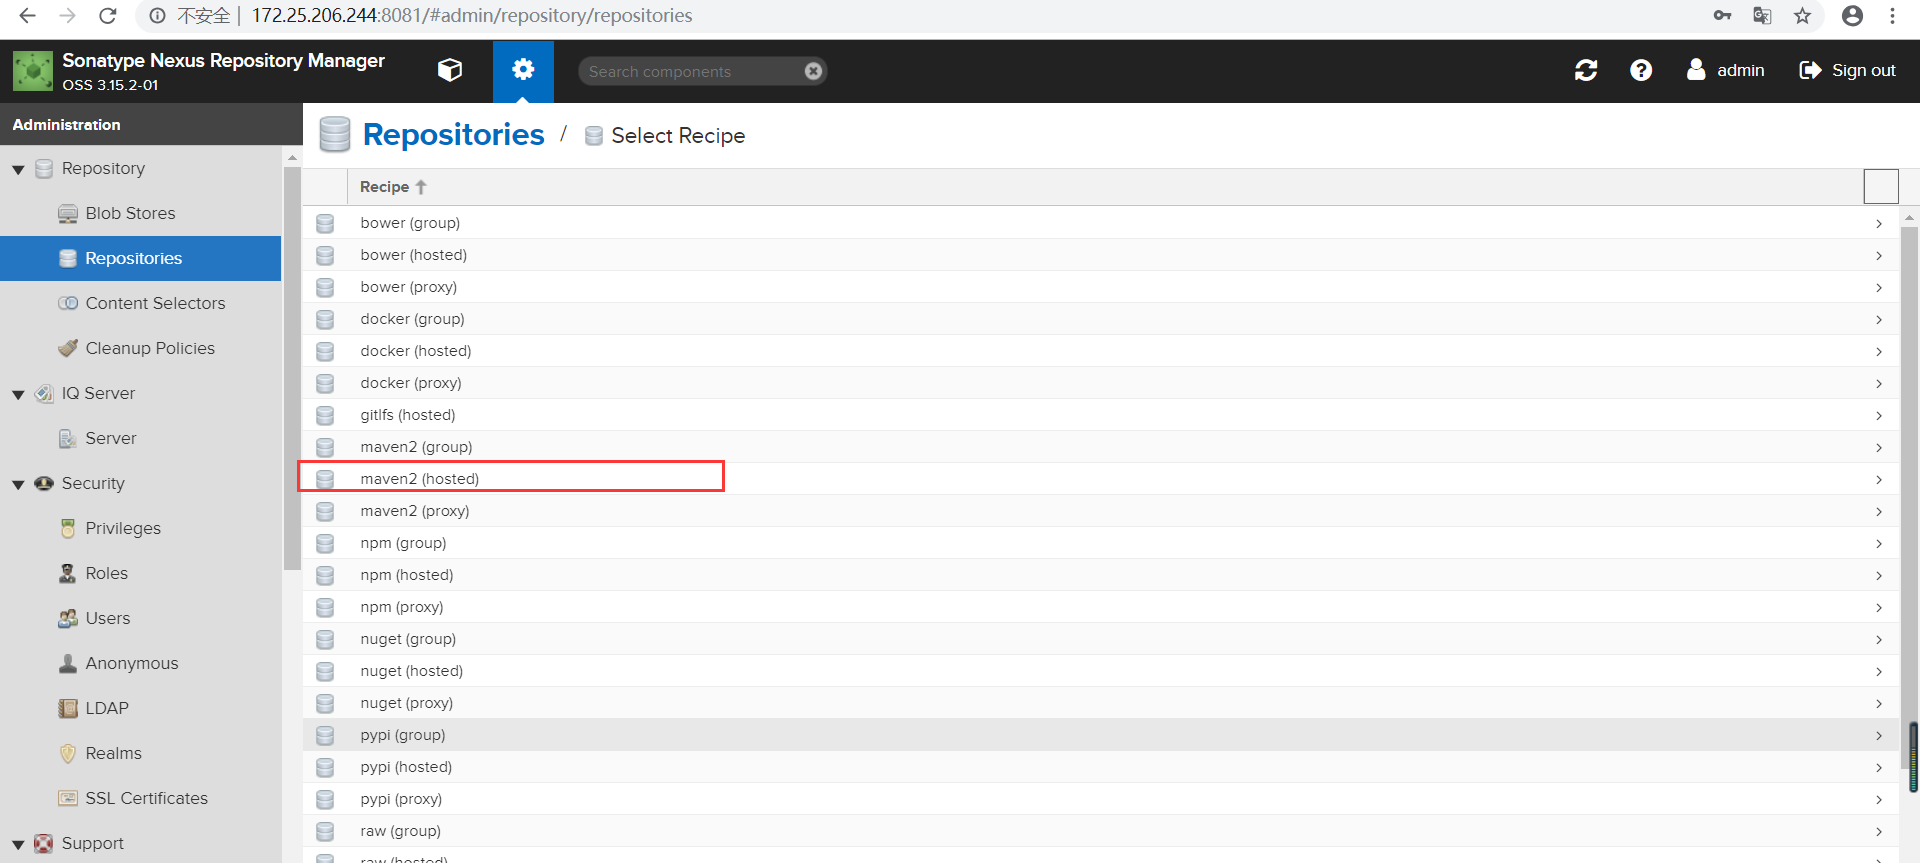


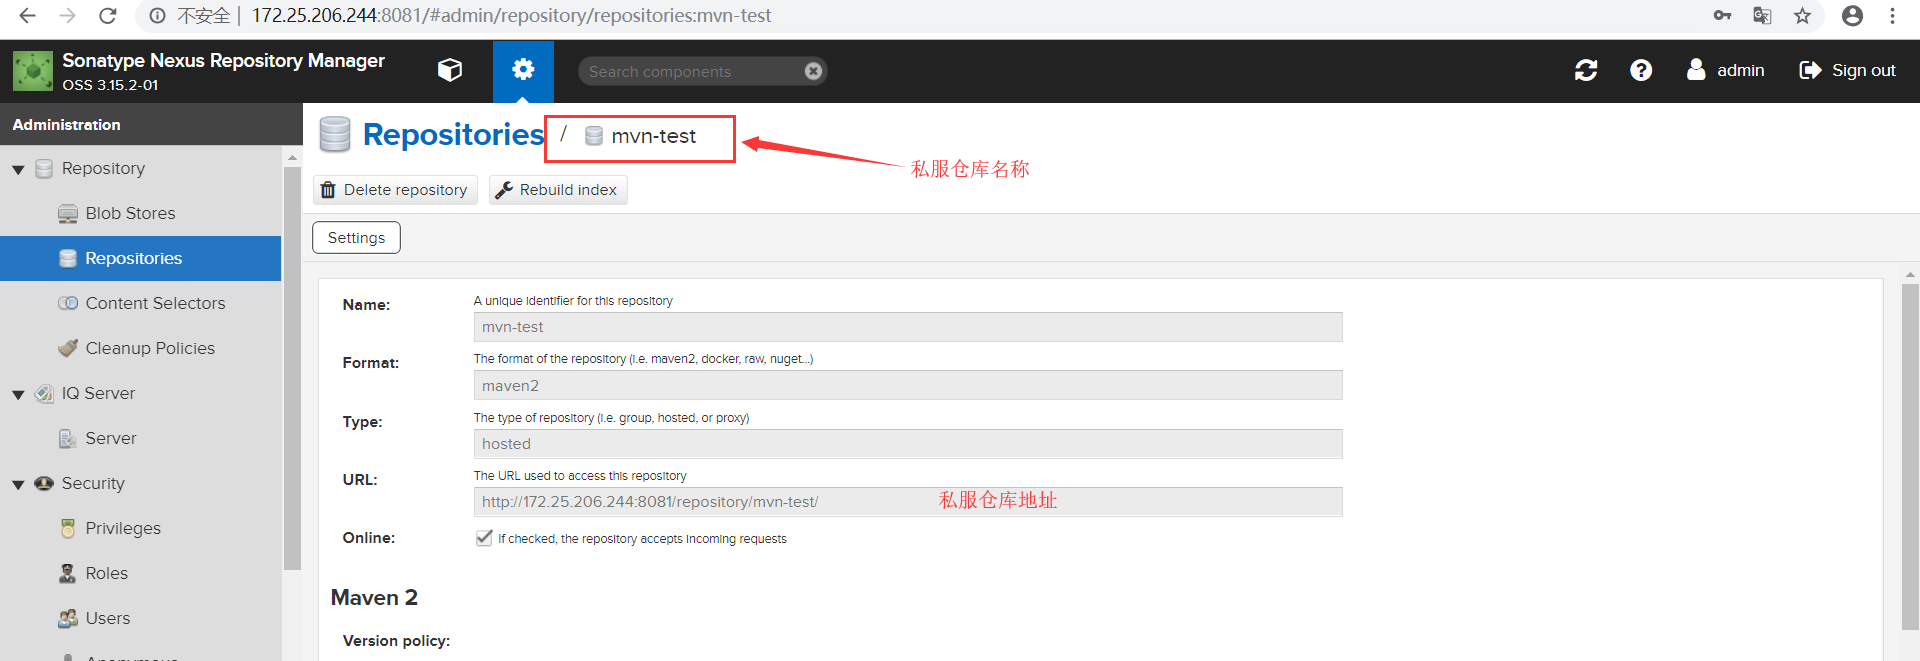
创建好之后,可以在仓库页面看到自己创建好的仓库名称,如下图。
2.创建用户


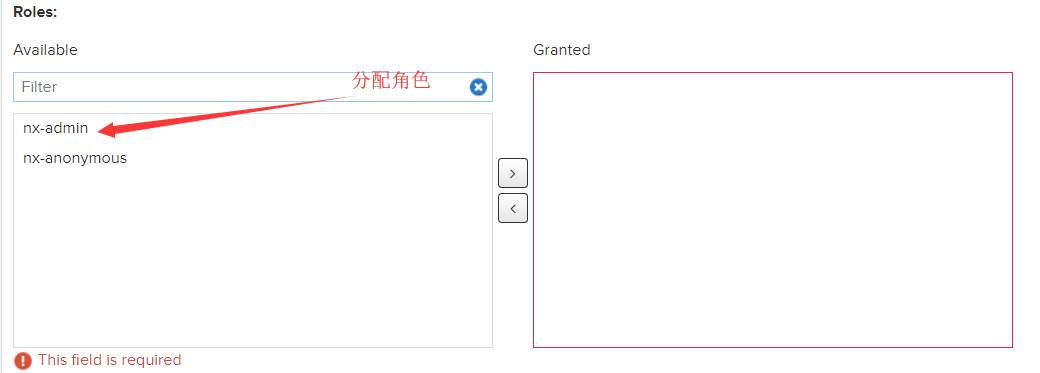
3.maven环境配置
接下来配置Maven 环境,在 D:maven estapache-maven-3.6.0conf 找到settings.xml文件
在servers 节点中,配置server,id 可以自己命名 后面需要与项目中保持一致。username 可以是admin,也可以是自己新创建的用户(需给权限),密码同上。
<server>
<id>test</id>
<username>ming</username>
<password>ming</password>
</server>
4.项目上传到私服
<?xml version="1.0" encoding="UTF-8"?>
<project xmlns="http://maven.apache.org/POM/4.0.0"
         xmlns:xsi="http://www.w3.org/2001/XMLSchema-instance"
         xsi:schemaLocation="http://maven.apache.org/POM/4.0.0 http://maven.apache.org/xsd/maven-4.0.0.xsd">
    <modelVersion>4.0.0</modelVersion>

    <groupId>com.example</groupId>
    <artifactId>test-maven</artifactId>
    <version>1.0-RELEASE</version>

    <!--注意限定版本一定为RELEASE,因为上传的对应仓库的存储类型为RELEASE-->
    <!-- 指定仓库名称 -->
    <distributionManagement>
        <repository>
            <id>test</id>  id与 maven settings.xml 中的id 文件保持一致
            <url>http://172.25.206.244:8081/repository/mvn-test/</url>   对应的私服仓库地址
        </repository>
    </distributionManagement>

    <build>
        <plugins>
            <!--发布代码Jar插件-->
            <plugin>
                <groupId>org.apache.maven.plugins</groupId>
                <artifactId>maven-deploy-plugin</artifactId>
                <version>2.7</version>
            </plugin>
            <!--发布源码插件-->
            <plugin>
                <groupId>org.apache.maven.plugins</groupId>
                <artifactId>maven-source-plugin</artifactId>
                <version>2.2.1</version>
                <executions>
                    <execution>
                        <phase>package</phase>
                        <goals>
                            <goal>jar</goal>
                        </goals>
                    </execution>
                </executions>
            </plugin>
        </plugins>
    </build>

</project>

在idea中使用maven命令 将项目上传到私服中。
mvn deploy

上传成功之后,在私服仓库中可以查看。

可以点进去,查看对应的jar包信息等。
5.从私服中拉取项目jar包
<?xml version="1.0" encoding="UTF-8"?>
<project xmlns="http://maven.apache.org/POM/4.0.0"
         xmlns:xsi="http://www.w3.org/2001/XMLSchema-instance"
         xsi:schemaLocation="http://maven.apache.org/POM/4.0.0 http://maven.apache.org/xsd/maven-4.0.0.xsd">
    <modelVersion>4.0.0</modelVersion>

    <groupId>com.example</groupId>
    <artifactId>test-maven1</artifactId>
    <version>1.0-RELEASE</version>

    <dependencies>
        <dependency>
            <groupId>com.example</groupId>
            <artifactId>test-maven</artifactId>
            <version>1.0-RELEASE</version>
        </dependency>
    </dependencies>

    <repositories>
        <repository>
            <id>test</id>
            <url>http://172.25.206.244:8081/repository/mvn-test/</url>  对应的私服仓库地址
        </repository>
    </repositories>
</project>
更新项目,可以看到jar 包已经下载成功了,如下图。
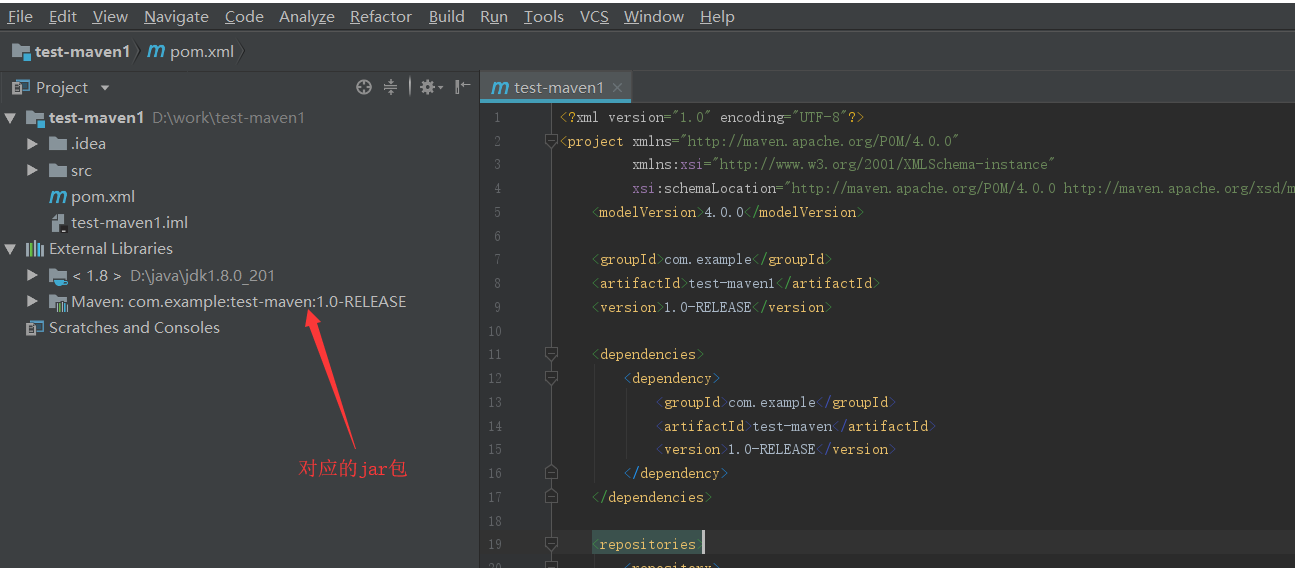
到此为止,maven私服的搭建,项目上传到私服,以及从私服下载项目已经结束,希望对大家有用。自己亲测有效,如有问题,可留言。
参考博客:https://blog.csdn.net/u012943767/article/details/79475718