Windows集群部署:
把包解压成三个节点 【kibana-7.16.3-windows-x86_64.zip】
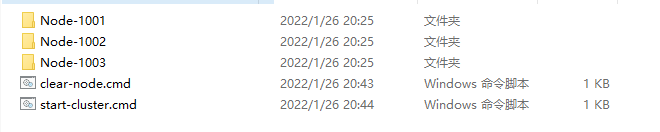
- Node-1001
- Node-1002
- Node-1003
修改集群的配置信息
- Node-1001\config\elasticsearch.yml
- Node-1002\config\elasticsearch.yml
- Node-1003\config\elasticsearch.yml
配置信息:
============================== Node-1001 ==========================
# 集群名称一致
cluster.name: Cloud9-WIN-ES-CAT

#节点名称,集群内要唯一
node.name: node-1001
node.master: true
node.data: true

# ip 地址
network.host: localhost
# http 端口
http.port: 1001
# tcp 监听端口
transport.tcp.port: 9301

# 跨域配置
http.cors.enabled: true
http.cors.allow-origin: "*"
============================== Node-1002 ==========================
# 集群名称一致
cluster.name: Cloud9-WIN-ES-CAT

#节点名称,集群内要唯一
node.name: node-1002
node.master: true
node.data: true

# 候选主节点
discovery.seed_hosts: ["localhost:9301"]
discovery.zen.fd.ping_timeout: 1m
discovery.zen.fd.ping_retries: 5

# ip 地址
network.host: localhost
# http 端口
http.port: 1002
# tcp 监听端口
transport.tcp.port: 9302

# 跨域配置
http.cors.enabled: true
http.cors.allow-origin: "*"
============================== Node-1003 ==========================
# 集群名称一致
cluster.name: Cloud9-WIN-ES-CAT

#节点名称,集群内要唯一
node.name: node-1003
node.master: true
node.data: true

#候选主节点的地址,在开启服务后可以被选为主节点
discovery.seed_hosts: ["localhost:9301", "localhost:9302"]
discovery.zen.fd.ping_timeout: 1m
discovery.zen.fd.ping_retries: 5

# ip 地址
network.host: localhost
# http 端口
http.port: 1003
# tcp 监听端口
transport.tcp.port: 9303

# 跨域配置
http.cors.enabled: true
http.cors.allow-origin: "*"
(可选)编写辅助启动脚本【start-cluster.cmd】:
@echo off
start %CD%\Node-1001\bin\elasticsearch.bat
start %CD%\Node-1002\bin\elasticsearch.bat
start %CD%\Node-1003\bin\elasticsearch.bat
(可选)编写辅助清除脚本【clear-nodes.cmd】:
@ECHO OFF
RD /S /Q %CD%\Node-1001\data\nodes
RD /S /Q %CD%\Node-1002\data\nodes
RD /S /Q %CD%\Node-1003\data\nodes
启动之前,删除data目录下的nodes目录
然后依次启动
bin\elasticsearch.bat
请求节点地址,查看节点运行状态【GET请求】
http://localhost:1001/_cluster/health
http://localhost:1002/_cluster/health
http://localhost:1003/_cluster/health
响应这些信息表示正常
{
    "cluster_name": "Cloud9-WIN-ES-CAT",
    "status": "green",
    "timed_out": false,
    "number_of_nodes": 1,
    "number_of_data_nodes": 1,
    "active_primary_shards": 3,
    "active_shards": 3,
    "relocating_shards": 0,
    "initializing_shards": 0,
    "unassigned_shards": 0,
    "delayed_unassigned_shards": 0,
    "number_of_pending_tasks": 0,
    "number_of_in_flight_fetch": 0,
    "task_max_waiting_in_queue_millis": 0,
    "active_shards_percent_as_number": 100.0
}
或者是查看cat/nodes?v查看集群状态
http://localhost:1001/_cat/nodes?v
http://localhost:1002/_cat/nodes?v
http://localhost:1003/_cat/nodes?v
响应的信息:
ip        heap.percent ram.percent cpu load_1m load_5m load_15m node.role   master name
127.0.0.1           20          97  19                          cdfhilmrstw -      node-1003
127.0.0.1           21          97  19                          cdfhilmrstw -      node-1002
127.0.0.1           16          97  19                          cdfhilmrstw *      node-1001
# 测试集群是否是相互通信的?
# 在1001节点创建一个sample索引
PUT http://localhost:1001/sample
# 然后去1002节点和1003节点上面查看sample索引信息
# 如果其他节点能够找到1001节点的索引,说明集群是相互通信的
GET http://localhost:1003/sample
GET http://localhost:1002/sample
Linux集群部署:
首先提供集群服务环境 (每台虚拟机最少提供2G内存,内存过低将导致服务无法集群通信)
192.168.177.128
192.168.177.129
192.168.177.130
每台机器都需要有ES的包
elasticsearch-7.16.0-linux-x86_64.tar.gz
解压包到/opt/module目录下面
mkdir -p /opt/module/
tar -zxvf elasticsearch-7.16.0-linux-x86_64.tar.gz -C /opt/module/
# (可选)变更目录名称
mv /opt/module/elasticsearch-7.16.0 /opt/module/es
# 创建elasticsearch用户, 设置密码123456
useradd user-es
passwd user-es
# 权限赋予
chown -R user-es:user-es /opt/module/elasticsearch-7.16.0/
# 编辑集群参数
mv /opt/module/elasticsearch-7.16.0/config/elasticsearch.yml /opt/module/elasticsearch-7.16.0/config/elasticsearch.yml.bak
vim /opt/module/elasticsearch-7.16.0/config/elasticsearch.yml

= = = = = 1号节点 192.168.177.128 = = = = =
# 集群名称
cluster.name: cluster-es

# 节点名称,每个节点的名称不能重复
node.name: node-1

# ip地址,每个节点的地址不能重复
network.host: 192.168.177.128

# 是否具有资格主节点
node.master: true
node.data: true
http.port: 9200

# head 插件需要这打开这两个配置
http.cors.allow-origin: "*"
http.cors.enabled: true
http.max_content_length: 200mb

# es7.x 之后新增的配置,初始化一个新的集群时需要此配置来选举 master
cluster.initial_master_nodes: ["node-1"]

# es7.x 之后新增的配置,节点发现
discovery.seed_hosts: ["192.168.177.128:9300","192.168.177.129:9300","192.168.177.130:9300"]
gateway.recover_after_nodes: 2
network.tcp.keep_alive: true
network.tcp.no_delay: true
transport.tcp.compress: true

# 集群内同时启动的数据任务个数,默认是 2 个
cluster.routing.allocation.cluster_concurrent_rebalance: 16
# 添加或删除节点及负载均衡时并发恢复的线程个数,默认 4 个
cluster.routing.allocation.node_concurrent_recoveries: 16
# 初始化数据恢复时,并发恢复线程的个数,默认 4 个
cluster.routing.allocation.node_initial_primaries_recoveries: 16

= = = = = 2号节点 192.168.177.129 = = = = =
# 集群名称
cluster.name: cluster-es

# 节点名称,每个节点的名称不能重复
node.name: node-2

# ip地址,每个节点的地址不能重复
network.host: 192.168.177.129

# 是否具有资格主节点
node.master: true
node.data: true
http.port: 9200

# head 插件需要这打开这两个配置
http.cors.allow-origin: "*"
http.cors.enabled: true
http.max_content_length: 200mb

# es7.x 之后新增的配置,初始化一个新的集群时需要此配置来选举 master
cluster.initial_master_nodes: ["node-1"]

# es7.x 之后新增的配置,节点发现
discovery.seed_hosts: ["192.168.177.128:9300","192.168.177.129:9300","192.168.177.130:9300"]
gateway.recover_after_nodes: 2
network.tcp.keep_alive: true
network.tcp.no_delay: true
transport.tcp.compress: true

# 集群内同时启动的数据任务个数,默认是 2 个
cluster.routing.allocation.cluster_concurrent_rebalance: 16
# 添加或删除节点及负载均衡时并发恢复的线程个数,默认 4 个
cluster.routing.allocation.node_concurrent_recoveries: 16
# 初始化数据恢复时,并发恢复线程的个数,默认 4 个
cluster.routing.allocation.node_initial_primaries_recoveries: 16

= = = = = 3号节点 192.168.177.130 = = = = =
# 集群名称
cluster.name: cluster-es

# 节点名称,每个节点的名称不能重复
node.name: node-3

# ip地址,每个节点的地址不能重复
network.host: 192.168.177.130

# 是否具有资格主节点
node.master: true
node.data: true
http.port: 9200

# head 插件需要这打开这两个配置
http.cors.allow-origin: "*"
http.cors.enabled: true
http.max_content_length: 200mb

# es7.x 之后新增的配置,初始化一个新的集群时需要此配置来选举 master
cluster.initial_master_nodes: ["node-1"]

# es7.x 之后新增的配置,节点发现
discovery.seed_hosts: ["192.168.177.128:9300","192.168.177.129:9300","192.168.177.130:9300"]
gateway.recover_after_nodes: 2
network.tcp.keep_alive: true
network.tcp.no_delay: true
transport.tcp.compress: true

# 集群内同时启动的数据任务个数,默认是 2 个
cluster.routing.allocation.cluster_concurrent_rebalance: 16
# 添加或删除节点及负载均衡时并发恢复的线程个数,默认 4 个
cluster.routing.allocation.node_concurrent_recoveries: 16
# 初始化数据恢复时,并发恢复线程的个数,默认 4 个
cluster.routing.allocation.node_initial_primaries_recoveries: 16
# 解除进程限制
vim /etc/security/limits.conf
= = = = = 配置参数 = = = =
# 每个进程可以打开的文件数的限制
user-es soft nofile 65536
user-es hard nofile 65536

vim /etc/security/limits.d/20-nproc.conf
= = = = = 配置参数 = = = =
# 每个进程可以打开的文件数的限制
user-es soft nofile 65536
user-es hard nofile 65536
# 操作系统级别对每个用户创建的进程数的限制
* hard nproc 4096
# 注:* 带表 Linux 所有用户名称

vim /etc/sysctl.conf
= = = = = 配置参数 = = = =
# 在文件中增加下面内容
# 一个进程可以拥有的 VMA(虚拟内存区域)的数量,默认值为 65536
vm.max_map_count=655360
# 重新加载
sysctl -p
# 关闭防火墙
systemctl stop firewalld
# 切换ES用户,启动elasticsearch集群
su user-es
# 清空遗留的节点数据
# 所有节点都执行一遍
rm -rf /opt/module/elasticsearch-7.16.0/data/nodes
# 启动elasticsearch
/opt/module/elasticsearch-7.16.0/bin/elasticsearch -d
# 访问
http://192.168.177.128:9200/_cat/nodes?v
http://192.168.177.129:9200/_cat/nodes?v
http://192.168.177.130:9200/_cat/nodes?v
# 如果每个地址访问都是下面一样的内容,则集群部署成功
ip              heap.percent ram.percent cpu load_1m load_5m load_15m node.role   master name
192.168.177.128           32          94   2    0.28    0.62     0.32 cdfhilmrstw *      node-1
192.168.177.129           25          95   7    0.19    0.65     0.37 cdfhilmrstw -      node-2
192.168.177.130           20          94   0    0.24    0.58     0.31 cdfhilmrstw -      node-3