今天正式开一本新书,《C# GDI+ 破镜之道》,同样是破镜之道系列丛书的一分子。
关于GDI+呢,官方的解释是这样的:
GDI+ 是 Microsoft Windows 操作系统的窗体子系统应用程序编程接口 (API)。 GDI+ 是负责在屏幕和打印机上显示的信息。 顾名思义,GDI+ 是包含 GDI 与早期版本的 Windows 图形设备接口的后续版本。
好,两个关键信息:
- 窗体子系统应用的编程接口
- 图形设备接口
充分说明了GDI+的应用场景与用途。需要了解更多呢,就去查阅一下吧。
本书的开始,不打算去解释一些枯燥的概念,比如什么是Graphics、Brush、Pen甚至是Color;第一境毕竟是基础,我打算先带大家玩儿,等玩儿开了、玩儿嗨了,咱们再来总结这些概念,就会相当好理解了。咱们就先从最基本的画元素开始吧:)
本节,主要是说道一下如何使用GDI+画直线。体育老师说了,两点确定一条直线,那么,画直线的关键呢,就是确定两个点了。音乐老师也说了,直线呢,是向两边无限延长的,木有尽头。那我们还是别挑战无极限了,所以,咱们在这里说的画直线呢,其实是画线段。

这是我建立的一个简单的WinForm窗体(FormDrawLines)。 摆了几个按钮,用来绘制各种不同的线条以及展示不同线条的特性。
两个辅助按钮,用来切换线条的颜色和窗体是否使用双缓冲。


 1 using System;
 2 using System.Collections.Generic;
 3 using System.Drawing;
 4 using System.Drawing.Drawing2D;
 5 using System.Windows.Forms;
 6
 7 public partial class FormDrawLines : Form
 8 {
 9     private Random random = null;
10     private Color penColor = Color.Transparent;
11     private Point lastMouseDownLocation = Point.Empty;
12     private bool startDrawPointToPointLine = false;
13     private bool startDrawFollowMouseLine = false;
14
15     public FormDrawLines()
16     {
17         InitializeComponent();
18         random = new Random(DateTime.Now.Millisecond);
19         penColor = Color.White;
20     }
21
22 ……
23
24 }
几个辅助方法,不是本节重点,这里简单说明一下用途,一笔带过:P
1、获取画布中的一个随机点
1 private Point GetRandomPoint()
2 {
3     return new Point(random.Next(0, ClientRectangle.Width), random.Next(0, ClientRectangle.Height - pnlToolbox.Height));
4 }
2、显示信息,其中,lblInformation为一个Label控件。
1 private void ShowInformation(string message)
2 {
3     lblInformation.Text = message;
4 }
3、切换线条颜色,其中,colors为ColorDialog组件。
1 private void btnChangePenColor_Click(object sender, EventArgs e)
2 {
3     if (colors.ShowDialog(this) == DialogResult.OK)
4     {
5         penColor = colors.Color;
6     }
7 }
4、切换是否使用双缓冲
1 private void btnSwitchDoubleBuffered_Click(object sender, EventArgs e)
2 {
3     DoubleBuffered = !DoubleBuffered;
4
5     ShowInformation($"二级缓冲:{DoubleBuffered}。");
6 }
下面是本节的重点:
1、随机画线
 1 private void btnDrawRandomLine_Click(object sender, EventArgs e)
 2 {
 3     var pointA = GetRandomPoint();
 4     var pointB = GetRandomPoint();
 5
 6     using (var g = CreateGraphics())
 7     using (var pen = new Pen(penColor, 2f))
 8     {
 9         g.Clear(SystemColors.AppWorkspace);
10         g.DrawLine(pen, pointA, pointB);
11     }
12
13     ShowInformation($"画随机线,{pointA}->{pointB}。");
14 }
g.Clear(SystemColors.AppWorkspace); 是用来清屏的。
关键方法是
//
// Summary:
//     Draws a line connecting two System.Drawing.Point structures.
//
// Parameters:
//   pen:
//     System.Drawing.Pen that determines the color, width, and style of the line.
//
//   pt1:
//     System.Drawing.Point structure that represents the first point to connect.
//
//   pt2:
//     System.Drawing.Point structure that represents the second point to connect.
//
// Exceptions:
//   T:System.ArgumentNullException:
//     pen is null.
public void DrawLine(Pen pen, Point pt1, Point pt2);
这是画线的最基础方法,给一根笔、两个点,就可以在画布上作画了:)
- 笔,决定了线的颜色及粗细;
- 两点,决定了线的位置及长度;
应该不难理解。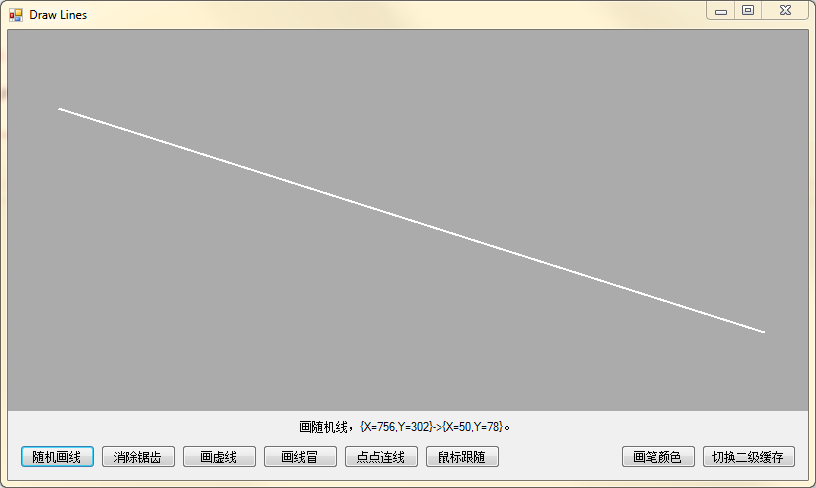
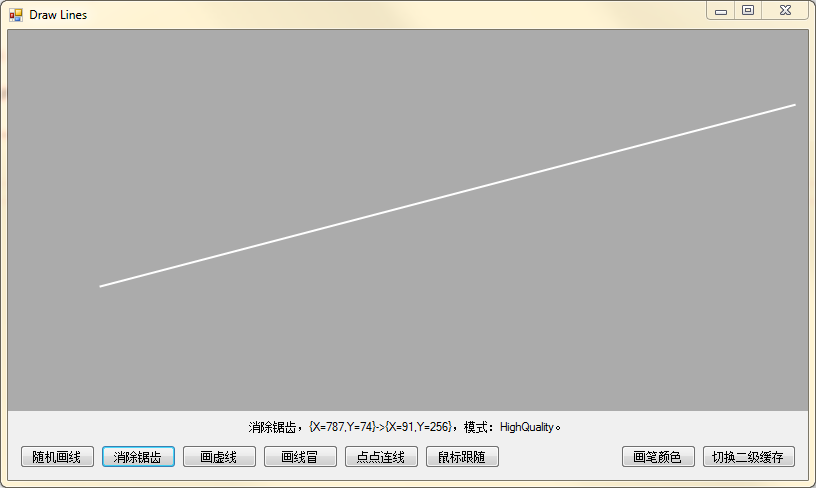
2、消除锯齿
通过“随机画线”,我们发现,画出的线边缘锯齿状严重,垂直和水平线还好,带点角度就惨不忍睹了。还好,GDI+为我们提供了一系列消除锯齿的选项,虽然有时也很难差强人意,不过总的来说还是可以接受的。
 1 private void btnDrawSmoothLine_Click(object sender, EventArgs e)
 2 {
 3     var pointA = GetRandomPoint();
 4     var pointB = GetRandomPoint();
 5     var mode = (SmoothingMode)(random.Next(0, 5));
 6
 7     using (var g = CreateGraphics())
 8     using (var pen = new Pen(penColor, 2f))
 9     {
10         g.Clear(SystemColors.AppWorkspace);
11         g.SmoothingMode = mode;
12         g.DrawLine(pen, pointA, pointB);
13     }
14
15     ShowInformation($"消除锯齿,{pointA}->{pointB},模式:{mode.ToString()}。");
16 }
关键点在于g.SmoothingMode = mode;为了尽量多的展示平滑模式带来的效果,mode来自于System.Drawing.Drawing2D.SmoothingMode的随机取值;
 1 //
 2 // Summary:
 3 //     Specifies whether smoothing (antialiasing) is applied to lines and curves and
 4 //     the edges of filled areas.
 5 public enum SmoothingMode
 6 {
 7     //
 8     // Summary:
 9     //     Specifies an invalid mode.
10     Invalid = -1,
11     //
12     // Summary:
13     //     Specifies no antialiasing.
14     Default = 0,
15     //
16     // Summary:
17     //     Specifies no antialiasing.
18     HighSpeed = 1,
19     //
20     // Summary:
21     //     Specifies antialiased rendering.
22     HighQuality = 2,
23     //
24     // Summary:
25     //     Specifies no antialiasing.
26     None = 3,
27     //
28     // Summary:
29     //     Specifies antialiased rendering.
30     AntiAlias = 4
31 }
严格来讲,消除锯齿并不属于画线的范畴,在画其他图形元素时同样有效,他归属于GDI+的2D渲染质量,指定是否将平滑(抗锯齿)应用于直线和曲线以及填充区域的边缘。这一点,需要明确。
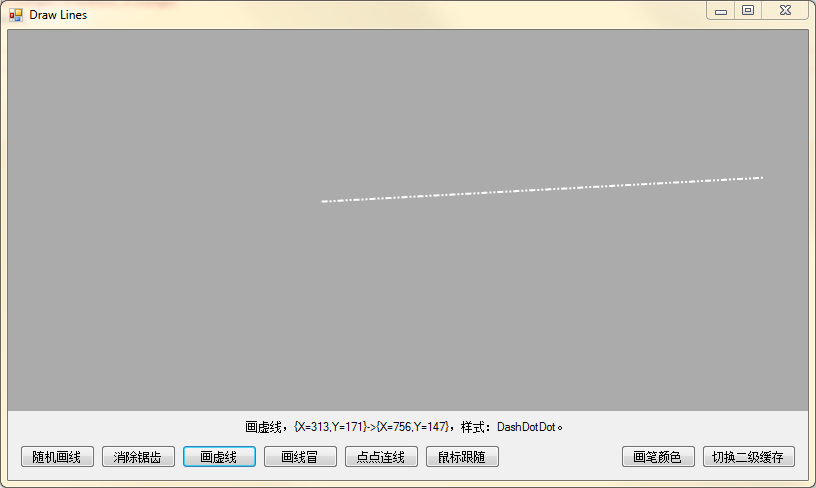
3、画虚线
 1 private void btnDrawDashLine_Click(object sender, EventArgs e)
 2 {
 3     var pointA = GetRandomPoint();
 4     var pointB = GetRandomPoint();
 5     var style = (DashStyle)(random.Next(1, 5));
 6
 7     using (var g = CreateGraphics())
 8     using (var pen = new Pen(penColor, 2f))
 9     {
10         g.Clear(SystemColors.AppWorkspace);
11         g.SmoothingMode = SmoothingMode.HighQuality;
12         pen.DashStyle = style;
13         g.DrawLine(pen, pointA, pointB);
14     }
15
16     ShowInformation($"画虚线,{pointA}->{pointB},样式:{style.ToString()}。");
17 }
画虚线的关键点在于制定笔的样式:pen.DashStyle = style;同样,为了多展示集中样式,style取了枚举的随机值;
//
// Summary:
//     Specifies the style of dashed lines drawn with a System.Drawing.Pen object.
public enum DashStyle
{
    //
    // Summary:
    //     Specifies a solid line.
    Solid = 0,
    //
    // Summary:
    //     Specifies a line consisting of dashes.
    Dash = 1,
    //
    // Summary:
    //     Specifies a line consisting of dots.
    Dot = 2,
    //
    // Summary:
    //     Specifies a line consisting of a repeating pattern of dash-dot.
    DashDot = 3,
    //
    // Summary:
    //     Specifies a line consisting of a repeating pattern of dash-dot-dot.
    DashDotDot = 4,
    //
    // Summary:
    //     Specifies a user-defined custom dash style.
    Custom = 5
}
没有取0和5,Solid = 0为实线,Custom = 5为自定义样式,我们在第一境里先不介绍这类自定义的用法,容易玩儿不嗨……
4、画线冒
这是一个很朴实的需求,比如我想画一个连接线,一头带箭头,或者两头都带箭头,又或者一头是圆点另一头是箭头等。经常被问到,其实在GDI+中,非常容易实现,甚至还可以指定虚线的线冒,可爱:)
 1 private void btnDrawLineCap_Click(object sender, EventArgs e)
 2 {
 3     var pointA = GetRandomPoint();
 4     var pointB = GetRandomPoint();
 5     var style = (DashStyle)(random.Next(0, 6));
 6     var lineCaps = new List<int> { 0, 1, 2, 3, 16, 17, 18, 19, 20, 240 };
 7     var dashCaps = new List<int> { 0, 2, 3 };
 8     var startCap = (LineCap)lineCaps[random.Next(0, 10)];
 9     var endCap = (LineCap)lineCaps[random.Next(0, 10)];
10     var dashCap = (DashCap)dashCaps[random.Next(0, 3)];
11
12     using (var g = CreateGraphics())
13     using (var pen = new Pen(penColor, 4f))
14     {
15         g.Clear(SystemColors.AppWorkspace);
16         g.SmoothingMode = SmoothingMode.HighQuality;
17         pen.DashStyle = style;
18         pen.SetLineCap(startCap, endCap, dashCap);
19         g.DrawLine(pen, pointA, pointB);
20     }
21
22     ShowInformation($"画线冒,{pointA}->{pointB},起点线冒:{startCap.ToString()},终点线冒:{endCap.ToString()},虚线冒:{dashCap.ToString()},线条样式:{style.ToString()}。");
23 }
关键点在于pen.SetLineCap(startCap, endCap, dashCap);同样,startCap, endCap分别取了System.Drawing.Drawing2D.LineCap的随机值;dashCap取了System.Drawing.Drawing2D.DashCap的随机值;
//
// Summary:
//     Specifies the available cap styles with which a System.Drawing.Pen object can
//     end a line.
public enum LineCap
{
    //
    // Summary:
    //     Specifies a flat line cap.
    Flat = 0,
    //
    // Summary:
    //     Specifies a square line cap.
    Square = 1,
    //
    // Summary:
    //     Specifies a round line cap.
    Round = 2,
    //
    // Summary:
    //     Specifies a triangular line cap.
    Triangle = 3,
    //
    // Summary:
    //     Specifies no anchor.
    NoAnchor = 16,
    //
    // Summary:
    //     Specifies a square anchor line cap.
    SquareAnchor = 17,
    //
    // Summary:
    //     Specifies a round anchor cap.
    RoundAnchor = 18,
    //
    // Summary:
    //     Specifies a diamond anchor cap.
    DiamondAnchor = 19,
    //
    // Summary:
    //     Specifies an arrow-shaped anchor cap.
    ArrowAnchor = 20,
    //
    // Summary:
    //     Specifies a mask used to check whether a line cap is an anchor cap.
    AnchorMask = 240,
    //
    // Summary:
    //     Specifies a custom line cap.
    Custom = 255
}
//
// Summary:
//     Specifies the type of graphic shape to use on both ends of each dash in a dashed
//     line.
public enum DashCap
{
    //
    // Summary:
    //     Specifies a square cap that squares off both ends of each dash.
    Flat = 0,
    //
    // Summary:
    //     Specifies a circular cap that rounds off both ends of each dash.
    Round = 2,
    //
    // Summary:
    //     Specifies a triangular cap that points both ends of each dash.
    Triangle = 3
}
同样,我们也可以通过分别设置pen的StartCap、EndCap、DashCap属性来达到相同目的;

好了,到这里呢,关于线的基本画法就已经全部介绍完了,感觉有点EZ? BORED?那么我们就来利用现有的知识,耍个花活?
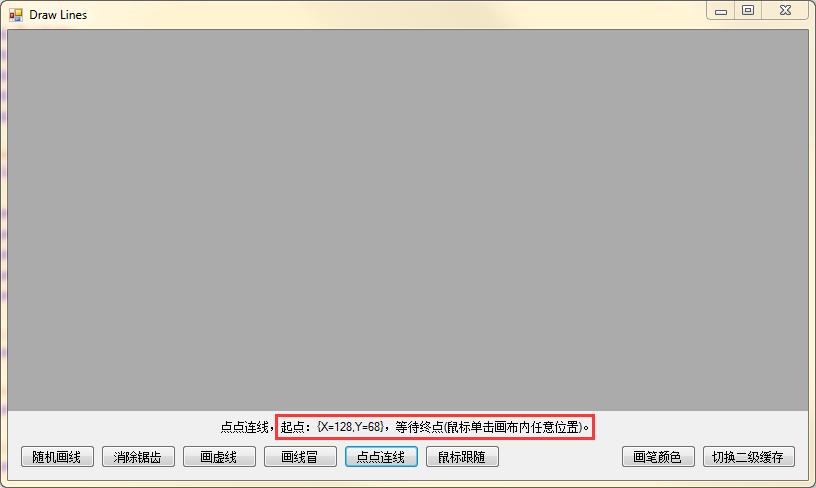
5、点点连线
这里比简单的画线,稍微复杂一点点,需要两个事件配合:
 1 private void btnDrawPointToPointLine_Click(object sender, EventArgs e)
 2 {
 3     startDrawPointToPointLine = true;
 4     lastMouseDownLocation = Point.Empty;
 5
 6     using (var g = CreateGraphics())
 7     {
 8         g.Clear(SystemColors.AppWorkspace);
 9     }
10
11     ShowInformation($"点点连线,等待起点(鼠标单击画布内任意位置)。");
12 }
 1 private void FormDrawLines_MouseDown(object sender, MouseEventArgs e)
 2 {
 3     if (startDrawPointToPointLine)
 4     {
 5         if (Point.Empty.Equals(lastMouseDownLocation))
 6         {
 7             lastMouseDownLocation = e.Location;
 8             ShowInformation($"点点连线,起点:{lastMouseDownLocation},等待终点(鼠标单击画布内任意位置)。");
 9         }
10         else
11         {
12             using (var g = CreateGraphics())
13             using (var pen = new Pen(penColor, 2f))
14             {
15                 g.Clear(SystemColors.AppWorkspace);
16                 g.SmoothingMode = SmoothingMode.HighQuality;
17                 g.DrawLine(pen, lastMouseDownLocation, e.Location);
18             }
19
20             ShowInformation($"点点连线,{lastMouseDownLocation}->{e.Location}。");
21
22             startDrawPointToPointLine = false;
23             lastMouseDownLocation = Point.Empty;
24         }
25     }
26 }
原理很简单,当我们点击“点点连线”按钮的时候,激活标记位startDrawPointToPointLine、归位lastMouseDownLocation,并提示需要鼠标操作,选择一个起始点;

当我们在画布区域内单击一个下,就触发了FormDrawLines_MouseDown事件, 它会判断,当startDrawPointToPointLine处于激活状态并且lastMouseDownLocation处于原位时,它就把鼠标的当前位置赋值给lastMouseDownLocation,作为线段的起始点位置,并提示需要鼠标操作,选择一个终点;
当我们再次在画布区域内单击一个下,就又触发了FormDrawLines_MouseDown事件, 它会判断,当startDrawPointToPointLine处于激活状态并且lastMouseDownLocation不处于原位时,它就把鼠标的当前位置作为线段的终点位置,并画出线段;然后就是恢复startDrawPointToPointLine为未激活状态,并归位 lastMouseDownLocation;

恐怕要非常适应这种多事件配合的方式了,因为鼠标跟随也是多事件配合一起玩儿的:P
6、鼠标跟随
在点点连线的基础上,我们把标记位换成了startDrawFollowMouseLine;同时,增加了FormDrawLines_MouseMove事件;
 1 private void FormDrawLines_MouseMove(object sender, MouseEventArgs e)
 2 {
 3     if (startDrawFollowMouseLine && !Point.Empty.Equals(lastMouseDownLocation))
 4     {
 5         using (var g = CreateGraphics())
 6         using (var pen = new Pen(penColor, 2f))
 7         {
 8             g.Clear(SystemColors.AppWorkspace);
 9             g.SmoothingMode = SmoothingMode.HighQuality;
10             g.DrawLine(pen, lastMouseDownLocation, e.Location);
11         }
12
13         ShowInformation($"鼠标跟随,{lastMouseDownLocation}->{e.Location}。");
14     }
15 }
原理也不难,就是在选了起点以后,鼠标的移动事件会把鼠标的当前位置作为终点,重绘线段,以达到跟随的效果;由于截图也看不出动态效果,就不上图了,有兴趣的童鞋可以Run代码看看效果:)
Okay,关于GDI+画线的部分,我们就到此告一段落了。
篇外话
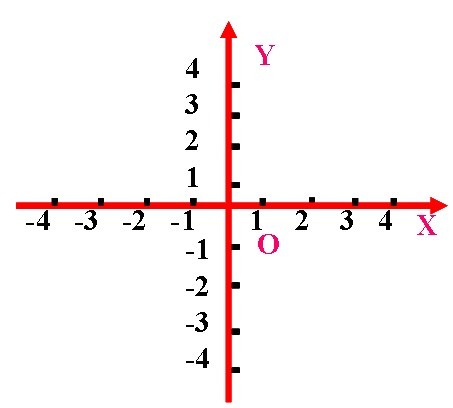
这里涉及了坐标系,美术老师说:
横坐标,坐标原点左为负,坐标原点右为正,从左到右越来越大;
纵坐标,坐标原点下为负,坐标原点上为正,从下到上越来越大;
但是在GDI+的世界坐标系里,纵坐标的描述正好相反;并且坐标原点初始时在画布的左上角,而不是画布的中央; 用心体会一下:)

喜欢本系列丛书的朋友,可以点击链接加入QQ交流群(994761602)【C# 破境之道】
方便各位在有疑问的时候可以及时给我个反馈。同时,也算是给各位志同道合的朋友提供一个交流的平台。
需要源码的童鞋,也可以在群文件中获取最新源代码。