图像的运算可以是十进制的值运算也可以是二进制的位逻辑运算
一、图像加法运算
1 import cv2
2 import numpy as np
3 img1 = np.random.randint(0,256, size = [3,3] , dtype = np.uint8)
4 img2 = np.random.randint(0,256, size = [3,3] , dtype = np.uint8)
5 img3 = cv2.add(img1,img2)
6 print("img1 =
" , img1)
7 print("img2 =
" , img2)
8 print("img1+img2 =
" , img1 + img2)
9 print("cv2.add(img1, img2) =
" , img3)
img1 =
 [[106  40 179]
 [171 138 207]
 [131  34  55]]
img2 =
 [[125  73 224]
 [132 229 201]
 [151  37  40]]
img1+img2 =
 [[231 113 147]
 [ 47 111 152]
 [ 26  71  95]]
cv2.add(img1, img2) =
 [[231 113 255]
 [255 255 255]
 [255  71  95]]
如上代码显示加法可以通过加法运算符和cv2.add()函数
加法运算符
两图相对应的像素值相加和小于等于255,即和对256取模
cv2.add()函数
会得到两图像像素值的饱和值(最大值),即当和大于255,则得到结果255.其他则为原和值。
函数参与运算的两个算子可以是两幅图像,也可以是一幅图像与一个数值
二、图像加权和
图像加权和即是将每幅图像的权重考虑进来,公式为:
dst = saturate( src1 * a + src2 * b)
结果取饱和值
1 import cv2
2 dog =cv2.imread("/home/miao/dog.jpg")
3 cat =cv2.imread("/home/miao/cat.jpg")
4 result = cv2.addWeighted(dog , 0.6 , cat , 0.4 , 0)
5 cv2.imshow("dog", dog)
6 cv2.imshow("cat" , cat)
7 cv2.imshow("result" , result)
8 cv2.waitKey()
9 cv2.destroyAllWindows()


三、按位逻辑运算
常见的位运算函数
| 函数名 | 基本含义 |
| cv2.bitwise_and() | 按位与 |
| cv2.bitwise_or() | 按位或 |
| cv2.bitwise_xor() | 按位异或 |
| cv2.bitwise_nor | 按位取反 |
这些函数可以在第三个参数加入掩模可以得到计算结果中掩模指定的部分
其运算即将图像数值转化为二进制进而计算,
按位与,任何数值与0按位于运算都是0
根据该特点构造掩模图像,该图像只有两种数值0和255
将图像与掩模图像按位与运算可以得到图像中被掩模图像指定的部分
 1 import cv2
 2 import numpy as np
 3 a = np.random.randint(0 , 255, (5,5) , dtype = np.uint8)
 4 b = np.zeros((5,5) , dtype = np.uint8)
 5 b[0 : 3 , 0 : 3] = 255
 6 b[4,4] = 255
 7 c = cv2.bitwise_and(a,b)
 8 print("a =
" , a)
 9 print("b =
" , b)
10 print("c =
" , c)
a =
 [[215 164  27 216  90]
 [184  33  40 101 247]
 [ 77 150 189  26 251]
 [101  30  32  49  86]
 [ 64  86 175  28 221]]
b =
 [[255 255 255   0   0]
 [255 255 255   0   0]
 [255 255 255   0   0]
 [  0   0   0   0   0]
 [  0   0   0   0 255]]
c =
 [[215 164  27   0   0]
 [184  33  40   0   0]
 [ 77 150 189   0   0]
 [  0   0   0   0   0]
 [  0   0   0   0 221]]
四、位平面分解
在8位灰度图中,每个像素使用8位二进制表示,可以用值表示
value = a7*2^7 + a6*2^6 + a5*2^5 + a4*2^4 + a3*2^3 + a2*2^2 + a1*2^1 + a0*2^0
每个ai的权重不同对图像的影响大小也不同
因此可以将原图分解位8个二进制图像,即8个位平面
a7的权重最高,与图像的相关性最大,与图像最为相似
0权重最小,构成的图像相关性最低,通常看起来杂乱无章
提取位平面是一个二值图像,将图像直接显示出来则是近似黑色的图像,这是因为地平面的像素值低,显示的图像近黑色,所以在提取位平面后将大于0的值处理位255,则将二值图像显示为黑白图像
 1 import cv2
 2 import numpy as np
 3 dog = cv2.imread("/home/miao/dog.jpg" , 0)
 4 cv2.imshow("dog" , dog)
 5 r,c = dog.shape
 6 x = np.zeros((r,c,8) , dtype = np.uint8)
 7 for i in range(8):
 8     x[:,:,i] = 2**i
 9 y = np.zeros((r,c,8) , dtype = np.uint8)
10 for i in range(8):
11     y[:,:,i] = cv2.bitwise_and(dog , x[:,:,i])
12     mask = y[:,:,i] > 0
13     y[mask] = 255
14     cv2.imshow(str(i) , y[:,:,i])
15 cv2.waitKey()
16 cv2.destroyAllWindows()
原图的灰度图像

a0:
a1
a2

a3
a4
a5

a6
a7
五、图像的加密和解密
通过按位异或则可以实现加密和解密
按异或运算规则假设:
xor(a,b) = c
得
xor(c,b) = a
xor(c,a) = b
可以得出其有如下关系
a:明文,原始数据
b:密匙
c:密文
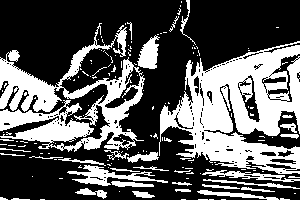
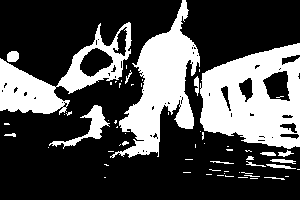
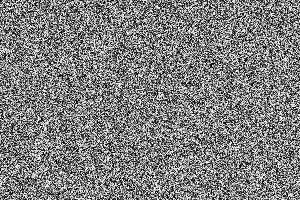
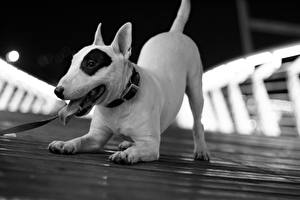
 1 import cv2
 2 import numpy as np
 3 dog = cv2.imread("/home/miao/dog.jpg" , 0)
 4 r,c = dog.shape
 5 key = np.random.randint(0 , 256 , size = [r,c] , dtype = np.uint8)
 6 encryption = cv2.bitwise_xor( dog , key)
 7 decryption = cv2.bitwise_xor( encryption , key)
 8 cv2.imshow("dog" , dog)
 9 cv2.imshow("key" , key)
10 cv2.imshow("encryption" , encryption)
11 cv2.imshow("decryption" , decryption)
12 cv2.waitKey()
13 cv2.destroyAllWindows()
原图dog

密匙图像key
加密图像encryption

解密图像decryption
六、数字水印
即将一个需要隐藏的二值图像信息嵌入载体图像
将需要隐藏的二值图像嵌入在载体图像的最低有效位(即相关性最低,对图像影响最小)
嵌入过程
建立与图像大小相同,元素值为254的提取矩阵即:1111 1110
将图像与其按位与运算则可以将最低有效位清0,保留图像的高7位
也可以对像素右移一位,再进行左移一位
将水印图像(二值图像)的像素值255转化为1(二进制二值图像),
然后将二进制二值水印图像与最低有效位被置零后得到的原始载体图像进行按位或运算
就可以将水印信息嵌入原始载体图像内
提取过程
建立与图像大小相同,元素值为1,即:0000 0001
将图像内每个像素,将其与数值为1进行按位与操作,即可将图像的最低有效位提取出来