生成网页
- 在RS1上生成一个网页
[root@RS1 ~]# cd /var/www/html
[root@RS1 html]# echo 'RS1' > index.html
[root@RS1 html]# systemctl enable --now httpd
Created symlink /etc/systemd/system/multi-user.target.wants/httpd.service → /usr/lib/systemd/system/httpd.service.
[root@RS1 html]# ss -antl
LISTEN 0       128               0.0.0.0:22             0.0.0.0:*
LISTEN 0       128                  [::]:22                [::]:*
LISTEN 0       128                     *:80                   *:*

[root@RS1 html]# systemctl stop firewalld

- 在RS2上生成网页
[root@RS2 ~]# cd /var/www/html
[root@RS2 html]# echo 'RS2' > index.html
[root@RS2 html]# systemctl enable --now httpd
Created symlink /etc/systemd/system/multi-user.target.wants/httpd.service → /usr/lib/systemd/system/httpd.service.
Job for httpd.service failed because the control process exited with error code.
See "systemctl status httpd.service" and "journalctl -xe" for details.
[root@RS2 html]# ss -antl
State   Recv-Q   Send-Q     Local Address:Port     Peer Address:Port
LISTEN  0        128              0.0.0.0:22            0.0.0.0:*
LISTEN  0        128              0.0.0.0:9000          0.0.0.0:*
LISTEN  0        128                 [::]:22               [::]:*
LISTEN  0        80                     *:3306                *:*
LISTEN  0        128                    *:80                  *:*
[root@RS2 html]# systemctl stop firewalld
[root@RS2 html]# setenforce 0
生成证书
- 两台服务器都要生成证书
[root@RS1 ~]# yum -y install mod_ssl
[root@RS2 ~]# yum -y install mod_ssl

[root@RS1 ~]# systemctl restart httpd
[root@RS1 ~]# ss -antl
LISTEN 0       128                     *:443                  *:*

[root@RS2 ~]# systemctl restart httpd
[root@RS2 ~]# ss -antl
LISTEN  0        128                    *:80                  *:*
配置httpd
- 在RS1上配置且生成证书
[root@RS1 ssl]# ls
cacert.pem  httpd.crt  httpd.csr  httpd.key
[root@RS1 ssl]# cd ..
[root@RS1 httpd]# ls
conf  conf.d  conf.modules.d  logs  modules  run  ssl  state
[root@RS1 httpd]# cd conf.d/
[root@RS1 conf.d]# ls
autoindex.conf  README    userdir.conf
php.conf        ssl.conf  welcome.conf
[root@RS1 conf.d]# vim ssl.conf
。。。。。。
DocumentRoot "/var/www/html"                  将这两行注释取消
ServerName www.example.com:443
。。。。。。
SSLCertificateFile /etc/httpd/ssl/httpd.crt            修改证书存放位置
SSLCertificateKeyFile /etc/httpd/ssl/httpd.key

//重启
[root@RS1 conf.d]# systemctl restart httpd
[root@RS1 conf.d]# ss -antl
LISTEN 0       128                     *:443                  *:*

- 在RS2上配置且生成证书
[root@RS2 ~]# cd /etc/httpd/ssl/
[root@RS2 ssl]# ls
cacert.pem  httpd.crt  httpd.key

[root@RS2 conf.d]# ls
autoindex.conf  README    userdir.conf
php.conf        ssl.conf  welcome.conf
[root@RS2 conf.d]# vim ssl.conf
。。。。。。
DocumentRoot "/var/www/html"
ServerName www.example.com:443
。。。。。。
SSLCertificateFile /etc/httpd/ssl/www.example.com.crt
SSLCertificateKeyFile /etc/httpd/ssl/www.example.com.key

//重启
[root@RS2 conf.d]# systemctl restart httpd
[root@RS2 conf.d]# ss -antl
State   Recv-Q   Send-Q     Local Address:Port     Peer Address:Port
LISTEN  0        128              0.0.0.0:9000          0.0.0.0:*
LISTEN  0        128              0.0.0.0:22            0.0.0.0:*
LISTEN  0        80                     *:3306                *:*
LISTEN  0        128                    *:80                  *:*
LISTEN  0        128                 [::]:22               [::]:*
LISTEN  0        128                    *:443                 *:*

配置负载均衡
haproxy安装
[root@LB ~]# yum -y install make gcc pcre-devel bzip2-devel openssl-devel systemd-devel

[root@LB ~]# useradd -r -M -s /sbin/nologin haproxy
[root@LB ~]# tar xf haproxy-2.3.10.tar.gz
[root@LB ~]# cd haproxy-2.3.10
[root@LB haproxy-2.3.10]# ls
BRANCHES      doc       INSTALL      README     src      VERSION
CHANGELOG     examples  LICENSE      reg-tests  SUBVERS
contrib       haproxy   MAINTAINERS  ROADMAP    tests
CONTRIBUTING  include   Makefile     scripts    VERDATE

//编译安装
[root@LB haproxy-2.3.10]# make -j $(grep 'processor' /proc/cpuinfo |wc -l)
> TARGET=linux-glibc
> USE_OPENSSL=1
> USE_ZLIB=1
> USE_PCRE=1
> USE_SYSTEMD=1

[root@LB haproxy-2.3.10]# make install PREFIX=/usr/local/haproxy

[root@LB haproxy-2.3.10]# cp haproxy /usr/sbin/
配置各个负载的内核参数
[root@LB ~]# echo 'net.ipv4.ip_nonlocal_bind = 1' >>  /etc/sysctl.conf
[root@LB ~]# echo 'net.ipv4.ip_forward = 1' >> /etc/sysctl.conf
[root@LB ~]# sysctl  -p
net.ipv4.ip_nonlocal_bind = 1
net.ipv4.ip_forward = 1
提供配置文件
[root@LB haproxy-2.3.10]# cat /etc/haproxy/haproxy.cfg
#--------------全局配置----------------
global
    log 127.0.0.1 local0  info
    #log loghost local0 info
    maxconn 20480
#chroot /usr/local/haproxy
    pidfile /var/run/haproxy.pid
    #maxconn 4000
    user haproxy
    group haproxy
    daemon
#---------------------------------------------------------------------
#common defaults that all the 'listen' and 'backend' sections will
#use if not designated in their block
#---------------------------------------------------------------------
defaults
    mode http
    log global
    option dontlognull
    option httpclose
    option httplog
    #option forwardfor
    option redispatch
    balance roundrobin
    timeout connect 10s
    timeout client 10s
    timeout server 10s
    timeout check 10s
    maxconn 60000
    retries 3
#--------------统计页面配置------------------
listen admin_stats
    bind 0.0.0.0:8189
    stats enable
    mode http
    log global
    stats uri /haproxy_stats
    stats realm Haproxy Statistics
    stats auth admin:admin
    #stats hide-version
    stats admin if TRUE
    stats refresh 30s
#---------------web设置-----------------------
listen webcluster
    bind 0.0.0.0:80
    mode http
    #option httpchk GET /index.html
    log global
    maxconn 3000
    balance roundrobin
#    cookie SESSION_COOKIE insert indirect nocache
    server web01 192.168.186.130:80 check inter 2000 fall 5
    server web01 192.168.186.132:80 check inter 2000 fall 5
    #server web01 192.168.80.102:80 cookie web01 check inter 2000 fall 5
haproxy.service文件编写
[root@LB systemd]# vim haproxy.service

[Unit]
Description=HAProxy Load Balancer
After=syslog.target network.target

[Service]
ExecStartPre=/usr/sbin/haproxy -f /etc/haproxy/haproxy.cfg   -c -q
ExecStart=/usr/sbin/haproxy -Ws -f /etc/haproxy/haproxy.cfg  -p /var/run/haproxy.pid
ExecReload=/bin/kill -USR2 $MAINPID

[Install]
WantedBy=multi-user.target

//重新加载一下
[root@LB ~]# systemctl daemon-reload
启用日志
[root@LB ~]# vim /etc/rsyslog.conf
。。。。。。
# Save boot messages also to boot.log
local0.*                        /var/log/haproxy.log      添加此行
local7.*                                                /var/log/boot.log

//重启一下
[root@LB ~]# systemctl restart rsyslog
启动服务
[root@LB haproxy]# systemctl restart haproxy
[root@LB haproxy]# ss -antl
State  Recv-Q  Send-Q      Local Address:Port     Peer Address:Port
LISTEN 0       128               0.0.0.0:22            0.0.0.0:*
LISTEN 0       128               0.0.0.0:8189          0.0.0.0:*
LISTEN 0       128               0.0.0.0:9000          0.0.0.0:*
LISTEN 0       128               0.0.0.0:80            0.0.0.0:*
LISTEN 0       128                  [::]:22               [::]:*
验证-实现http负载均衡


实现https负载均衡
- 修改配置文件
[root@LB ~]# cat /etc/haproxy/haproxy.cfg
#--------------全局配置----------------
global
    log 127.0.0.1 local0  info
    #log loghost local0 info
    maxconn 20480
#chroot /usr/local/haproxy
    pidfile /var/run/haproxy.pid
    #maxconn 4000
    user haproxy
    group haproxy
    daemon
#---------------------------------------------------------------------
#common defaults that all the 'listen' and 'backend' sections will
#use if not designated in their block
#---------------------------------------------------------------------
defaults
    mode tcp                     //将此处改成tcp协议
    log global
    option dontlognull
    option httpclose
    option httplog
    #option forwardfor
    option redispatch
    balance roundrobin
    timeout connect 10s
    timeout client 10s
    timeout server 10s
    timeout check 10s
    maxconn 60000
    retries 3
#--------------统计页面配置------------------
listen admin_stats
    bind 0.0.0.0:8189
    stats enable
    mode http
    log global
    stats uri /haproxy_stats
    stats realm Haproxy Statistics
    stats auth admin:admin
    #stats hide-version
    stats admin if TRUE
    stats refresh 30s
#---------------web设置-----------------------
listen webcluster
    bind 0.0.0.0:443                //将端口改成443
    mode tcp                          //使用tcp协议
    #option httpchk GET /index.html
    log global
    maxconn 3000
    balance roundrobin
    cookie SESSION_COOKIE insert indirect nocache
    server web01 192.168.186.130:80 check inter 2000 fall 5
    server web02 192.168.186.132:80 check inter 2000 fall 5
    #server web01 192.168.80.102:80 cookie web01 check inter 2000 fall 5
- 重启
[root@LB ~]# systemctl restart haproxy
[root@LB ~]# ss -antl
State  Recv-Q  Send-Q      Local Address:Port     Peer Address:Port
LISTEN 0       128               0.0.0.0:22            0.0.0.0:*
LISTEN 0       128               0.0.0.0:443           0.0.0.0:*
LISTEN 0       128               0.0.0.0:8189          0.0.0.0:*
LISTEN 0       128               0.0.0.0:9000          0.0.0.0:*
LISTEN 0       128                  [::]:22               [::]:*
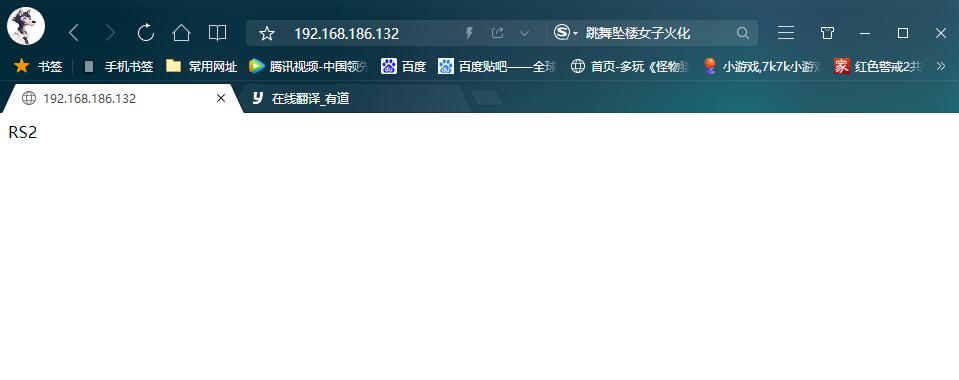
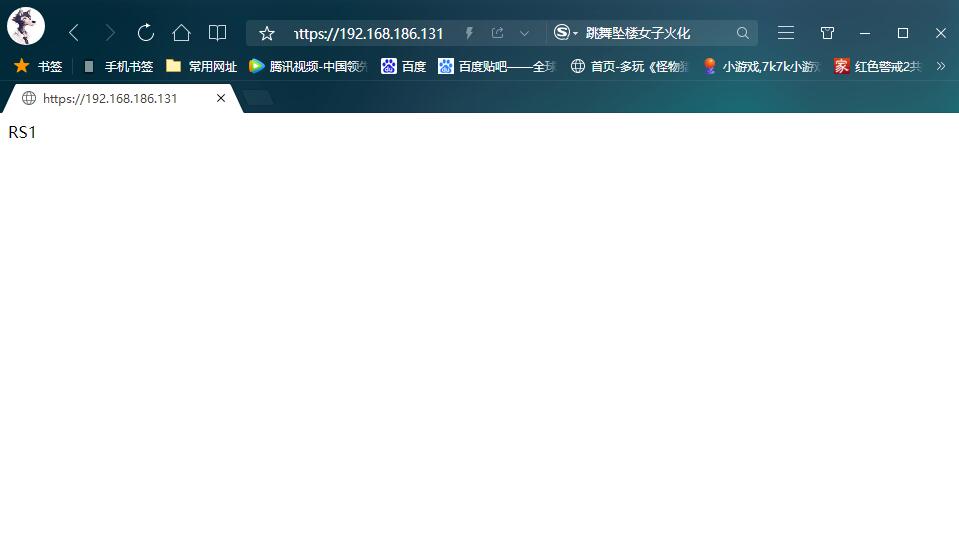
验证
用https://192.168.186.131(调度器)来访问网页,能访问到RS1和RS2


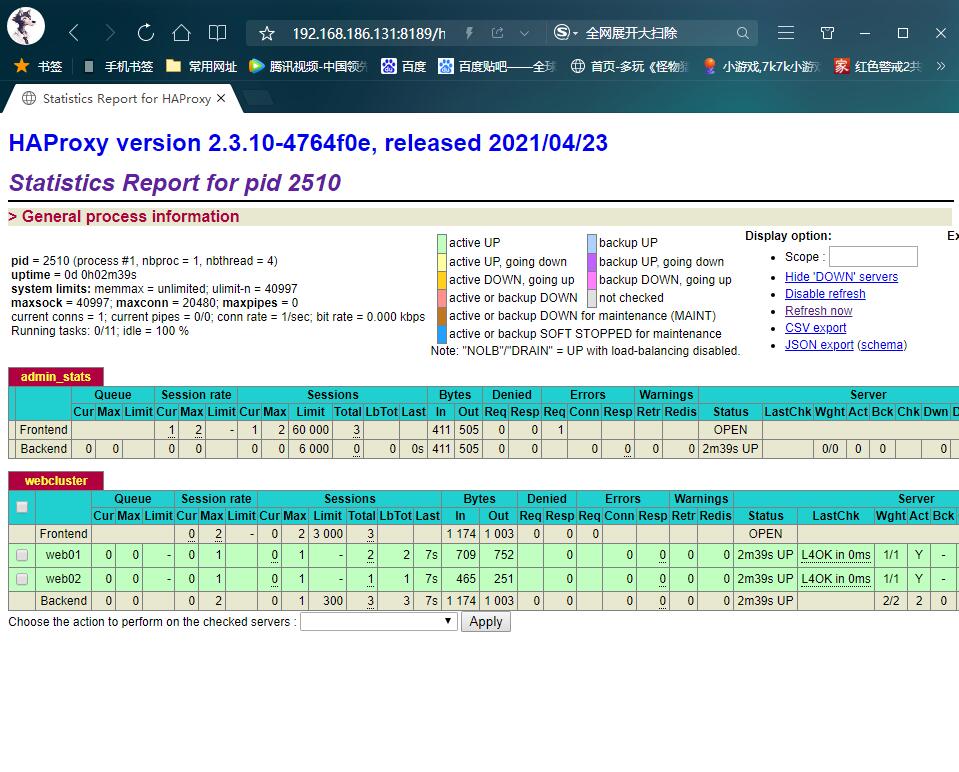
访问haproxy网页界面
//修改文件
[root@LB ~]# cat /etc/haproxy/haproxy.cfg
#--------------全局配置----------------
global
    log 127.0.0.1 local0  info
    #log loghost local0 info
    maxconn 20480
#chroot /usr/local/haproxy
    pidfile /var/run/haproxy.pid
    #maxconn 4000
    user haproxy
    group haproxy
    daemon
#---------------------------------------------------------------------
#common defaults that all the 'listen' and 'backend' sections will
#use if not designated in their block
#---------------------------------------------------------------------
defaults
    mode http
    log global
    option dontlognull
    option httpclose
    option httplog
    #option forwardfor
    option redispatch
    balance roundrobin
    timeout connect 10s
    timeout client 10s
    timeout server 10s
    timeout check 10s
    maxconn 60000
    retries 3

#--------------统计页面配置------------------
listen admin_stats
    bind 0.0.0.0:8189
    stats enable
    mode http
    log global
    stats uri /haproxy_stats
    stats realm Haproxy Statistics
    stats auth admin:admin
    #stats hide-version
    stats admin if TRUE
    stats refresh 30s
#---------------web设置-----------------------
listen webcluster
    bind 0.0.0.0:80
    mode http
    #option httpchk GET /index.html
    log global
    maxconn 3000
    balance roundrobin
    cookie SESSION_COOKIE insert indirect nocache
    server web01 192.168.186.130:80 check inter 2000 fall 5
    server web02 192.168.186.132:80 check inter 2000 fall 5
    #server web01 192.168.80.102:80 cookie web01 check inter 2000 fall 5

//重启服务
[root@LB ~]# systemctl restart haproxy
[root@LB ~]# ss -antl
State  Recv-Q  Send-Q      Local Address:Port     Peer Address:Port
LISTEN 0       128               0.0.0.0:22            0.0.0.0:*
LISTEN 0       128               0.0.0.0:8189          0.0.0.0:*
LISTEN 0       128               0.0.0.0:9000          0.0.0.0:*
LISTEN 0       128               0.0.0.0:80            0.0.0.0:*
LISTEN 0       128                  [::]:22               [::]:*
访问登录
访问 192.168.186.131:8189/haproxy_stats
用户名/密码都为admin