Flash Builder 4.5已经支持直接创建Flex Mobile Project,写一个最简单的例子
1、建立工程
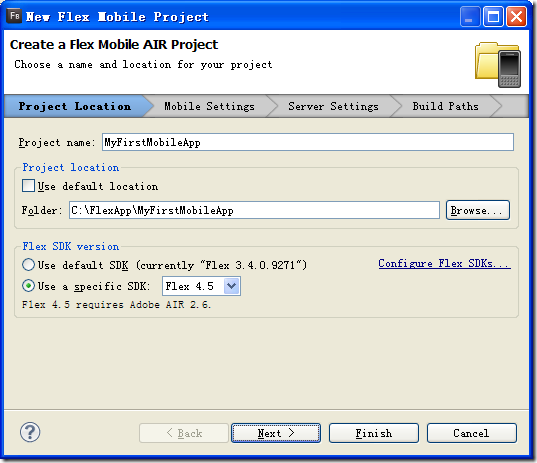
右击--》新建--》输入工程名“MyFirstMobileApp”
点击“Next”进入下一步
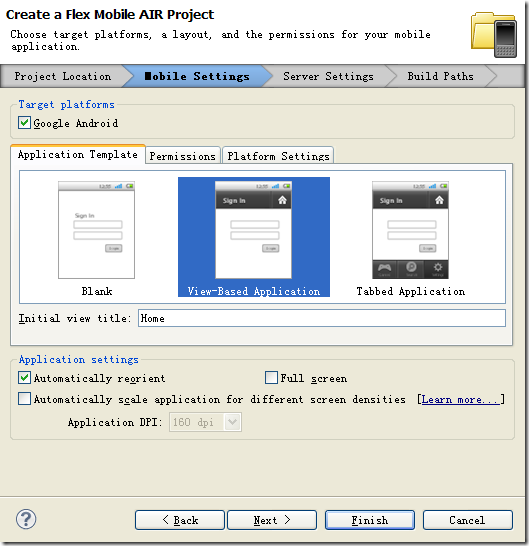
修改初始化的标题文本信息为“Home”(默认为HomeView),勾选“Google Android”、“Automatically reorient”(默认这些已经都勾选了),然后点击“Finish”
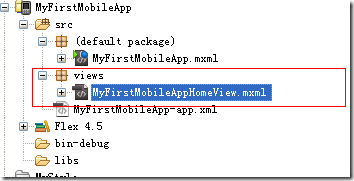
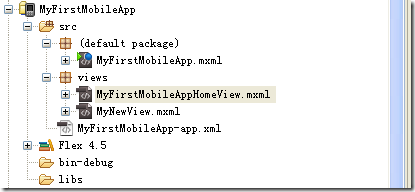
系统将自动生成一个views包,如下图所示:
2、编写代码
双击“MyFirstMobileAppHomeView.mxml”,拖拽一个VGroup组件,然后删除x、y属性,修改width、height均为100%,添加horizontalAlign=”center” verticalAlign=”middle”,让其内容水平、垂直居中
在里面放置一个Label和一个Button,然后再给Button添加一个事件,完整的代码:
<?xml version="1.0" encoding="utf-8"?>
<s:View xmlns:fx="http://ns.adobe.com/mxml/2009"
        xmlns:s="library://ns.adobe.com/flex/spark" title="HomeView">
    <fx:Declarations>
        <!-- Place non-visual elements (e.g., services, value objects) here -->
    </fx:Declarations>

    <fx:Script>
        <![CDATA[
            private function button1_clickHandler(evt:MouseEvent):void {
                navigator.pushView(MyNewView);
            }
        ]]>
    </fx:Script>

    <s:VGroup width="100%" height="100%" horizontalAlign="center" verticalAlign="middle">
        <s:Label text="Hello,World!"/>
        <s:Button label="Continue" click="button1_clickHandler(event)" />
    </s:VGroup>
</s:View>
事件中navigator.pushView的参数MyNewView为接下来准备创建的Component(组件)
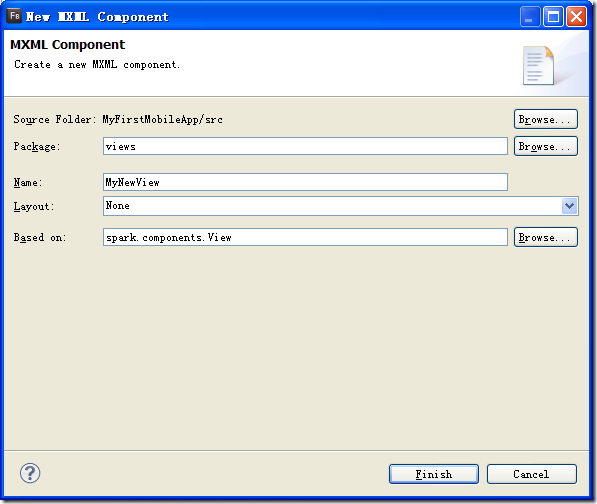
在views包中添加一个组件,命名为“MyNewView”
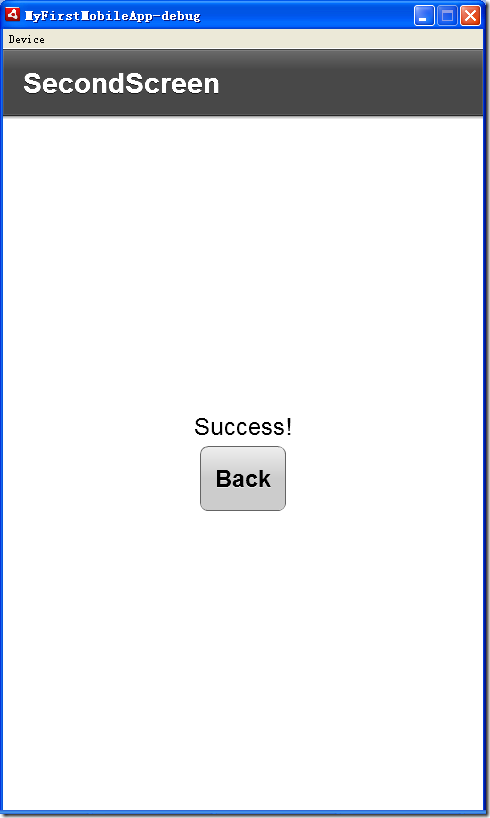
同MyFirstMobileAppHomeView.mxml一样,在MyNewView.mxml也同样放置一个Label和一个Button组件,然后给它的Button添加一个事件,点击后让它回到Home(主页),完整的代码:
<?xml version="1.0" encoding="utf-8"?>
<s:View xmlns:fx="http://ns.adobe.com/mxml/2009"
        xmlns:s="library://ns.adobe.com/flex/spark" title="SecondScreen">
    <fx:Declarations>
        <!-- Place non-visual elements (e.g., services, value objects) here -->
    </fx:Declarations>

    <fx:Script>
        <![CDATA[
            protected function button1_clickHandler(event:MouseEvent):void
            {
                navigator.popView();
            }
        ]]>
    </fx:Script>

    <s:VGroup width="100%" height="100%" horizontalAlign="center" verticalAlign="middle">
        <s:Label text="Success!"/>
        <s:Button label="Back" click="button1_clickHandler(event)"/>
    </s:VGroup>

</s:View>
现在工程的目录结构:
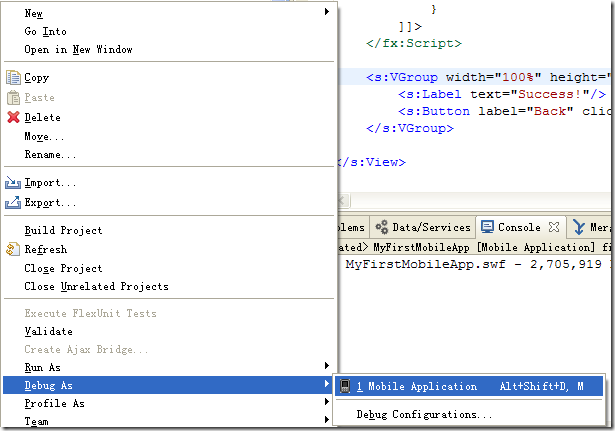
右击工程,选择Debug AS –> Mobile Application
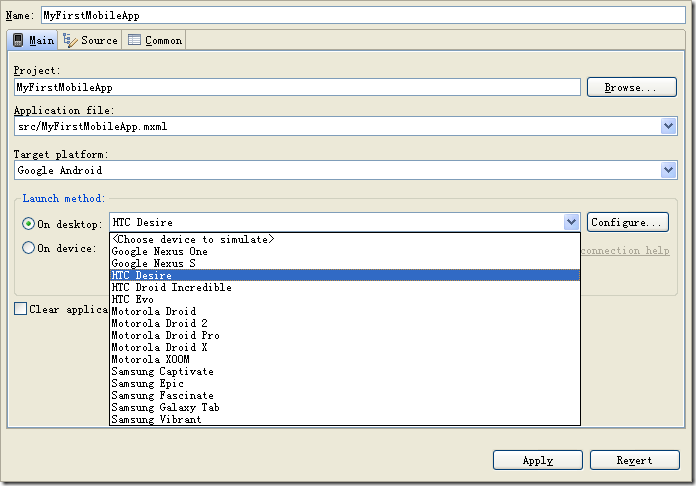
在弹出的面板中,选中“Launch method”的第一项“On deskop”,然后在下拉框中选择“HTC Desire”
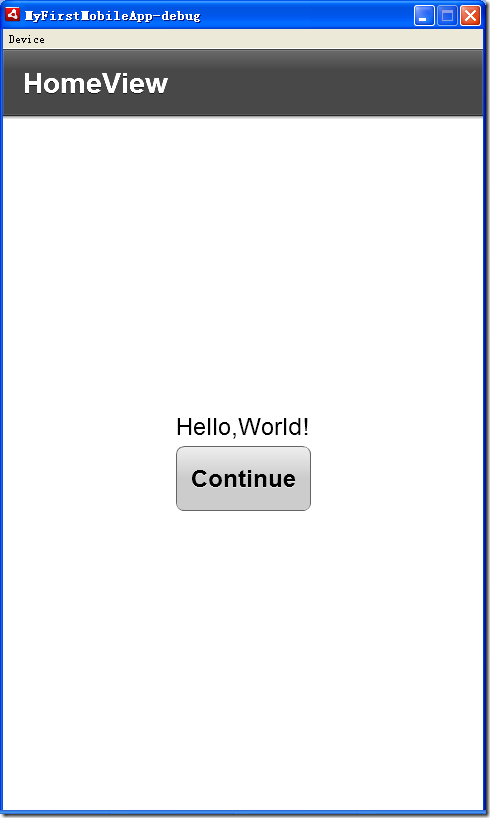
应用并调试(Debug),这里因为没有应用任何的样式所以外观看上去有些粗糙 :(
应用样式后,看上去就不一样了,看上去很Nice..

