spring-mvc实现模拟数据到网页展示过程代码
先看看我们的3种模拟数据到网页展示的思路图:

1.当mybatis的环境配置完成。一个动态Web项目建立好。开始导入jar包。
-spring的aop,aspects,context,beans,core,expression,jdbc,tx,web,webmvc jar包导入
-log4j 核心包2个
-aopjar包:aopaliance-1.0jar,aspectjweaver-1.8.10jar
-jstl.jar,standard.jar
16个jar以及 jdk jar导入
一个项目的开始就是环境的配置与你所要使用的jar包的导入。
2.然后我们开始配置web.xml文件。(web.xml配置等于注解)
<!-- 配置一个servlet -->
    <servlet>
        <servlet-name>show</servlet-name>
        <servlet-class>org.springframework.web.servlet.DispatcherServlet</servlet-class>
        <!-- 因为前端控制器DispatcherServlet需要与处理器映射器,处理器配饰器,视图解析器进行信息交互, 需要知道这些对象在哪里配置,
        由spring进行管理 ,于是指定 spring-mvc.xml文件
         如果不指定,核心配置器会在Servlet-name/Servlet.xml其他对象。
        也就是回到springmvc/servlet.xml找
        。 -->
        <init-param>
            <param-name>contextConfigLocation</param-name>
            <param-value>classpath:spring/spring-mvc.xml</param-value>
        </init-param>
    </servlet>
    <servlet-mapping>
        <servlet-name>show</servlet-name>
     <!-- url -->
        <url-pattern>*.action</url-pattern>
    </servlet-mapping>
方法1:1)spring-mvc.xml配置(Controller)通过bean的name属性值查找bean
<?xml version="1.0" encoding="UTF-8"?>
<beans xmlns="http://www.springframework.org/schema/beans"
    xmlns:aop="http://www.springframework.org/schema/aop" xmlns:context="http://www.springframework.org/schema/context"
    xmlns:tx="http://www.springframework.org/schema/tx" xmlns:xsd="http://www.w3.org/2001/XMLSchema"
    xmlns:xsi="http://www.w3.org/2001/XMLSchema-instance" xmlns:mvc="http://www.springframework.org/schema/mvc"
    xsi:schemaLocation="http://www.springframework.org/schema/beans
    http://www.springframework.org/schema/beans/spring-beans.xsd
    http://www.springframework.org/schema/aop
    http://www.springframework.org/schema/aop/spring-aop.xsd
    http://www.springframework.org/schema/context
    http://www.springframework.org/schema/context/spring-context.xsd
     http://www.springframework.org/schema/tx
     http://www.springframework.org/schema/tx/spring-tx.xsd
     http://www.springframework.org/schema/mvc
     http://www.springframework.org/schema/mvc/spring-mvc.xsd ">
    <!--开启类自动扫描配置-->
    <context:component-scan base-package="com.Controller" />
    <!-- (前端控制器自动配置,不需要id调用)
    配置处理器适配器 :HandlerAdapter SimpleControllerHandlerAdapter:该适配器只能处理实现Controller的对象 -->
  <bean
      class="org.springframework.web.servlet.handler.BeanNameUrlHandlerMapping" />
<!-- 处理器映射器 HandlerMapping BeanNameUrlHandlerMapping映射器:只能通过bean的name属性值查找bean,也就是url一定是某个 -->
<bean
class="org.springframework.web.servlet.mvc.SimpleControllerHandlerAdapter" />
 <!-- 视图解析器 View Resolver -->
    <bean
        class="org.springframework.web.servlet.view.InternalResourceViewResolver" />

    <!-- 处理器Handler/Controller -->
    <!-- HandlerMapping BeanNameUrlHandlerMapping映射器 :-->
    <bean name="/userss.action" class="com.Controller.UsersController"></bean>
</beans>
2)bean:UsersBean,Controler:UsersController;
package com.bean;

public class UsersBean {

    private int uid;
    private String uname;
    private String upwd;

    public UsersBean(int uid, String uname, String upwd) {
        super();
        this.uid = uid;
        this.uname = uname;
        this.upwd = upwd;
    }

    public UsersBean() {
        super();
        // TODO Auto-generated constructor stub
    }

    public int getUid() {
        return uid;
    }

    public void setUid(int uid) {
        this.uid = uid;
    }

    public String getUname() {
        return uname;
    }

    public void setUname(String uname) {
        this.uname = uname;
    }

    public String getUpwd() {
        return upwd;
    }

    public void setUpwd(String upwd) {
        this.upwd = upwd;
    }

}
package com.Controller;

import java.util.ArrayList;
import java.util.List;

import javax.servlet.http.HttpServletRequest;
import javax.servlet.http.HttpServletResponse;

import org.springframework.web.servlet.ModelAndView;
import org.springframework.web.servlet.mvc.Controller;

import com.bean.UsersBean;

public class UsersController implements Controller {

    @Override
    public ModelAndView handleRequest(HttpServletRequest arg0, HttpServletResponse arg1) throws Exception {
        // 模拟业务层返回数据
        List<UsersBean> list = new ArrayList<>();
        UsersBean u1 = new UsersBean(1, "hehe", "123");
        UsersBean u2 = new UsersBean(1, "haha", "123");
        UsersBean u3 = new UsersBean(1, "xixi", "123");
        list.add(u1);
        list.add(u2);
        list.add(u3);
        ModelAndView mav = new ModelAndView();
        mav.addObject("USERS", list);
        mav.setViewName("page/showAllUsers.jsp");
        return mav;
    }

}
方法2: 1)HttpController:根据httpResquetHandler适配器,spring-mvc.xml配置
<?xml version="1.0" encoding="UTF-8"?>
<beans xmlns="http://www.springframework.org/schema/beans"
    xmlns:aop="http://www.springframework.org/schema/aop" xmlns:context="http://www.springframework.org/schema/context"
    xmlns:tx="http://www.springframework.org/schema/tx" xmlns:xsd="http://www.w3.org/2001/XMLSchema"
    xmlns:xsi="http://www.w3.org/2001/XMLSchema-instance" xmlns:mvc="http://www.springframework.org/schema/mvc"
    xsi:schemaLocation="http://www.springframework.org/schema/beans
    http://www.springframework.org/schema/beans/spring-beans.xsd
    http://www.springframework.org/schema/aop
    http://www.springframework.org/schema/aop/spring-aop.xsd
    http://www.springframework.org/schema/context
    http://www.springframework.org/schema/context/spring-context.xsd
     http://www.springframework.org/schema/tx
     http://www.springframework.org/schema/tx/spring-tx.xsd
     http://www.springframework.org/schema/mvc
     http://www.springframework.org/schema/mvc/spring-mvc.xsd ">
    <!--开启类自动扫描配置-->
    <context:component-scan base-package="com.Controller" />
    <!-- (前端控制器自动配置,不需要id调用)
    配置处理器适配器:
    -->
<bean class="org.springframework.web.servlet.mvc.HttpRequestHandlerAdapter"></bean>
<!-- handler.SimpleUrlHandlerMapping:实现多个url对应同一个controller,但是不能处理不同的业务 --> <bean class="org.springframework.web.servlet.handler.SimpleUrlHandlerMapping"> <property name="mappings"> <props> <prop key="/users.action">https</prop> <prop key="/user.action">https</prop> </props> </property> </bean> <!-- 视图解析器 View Resolver --> <bean class="org.springframework.web.servlet.view.InternalResourceViewResolver" /> <!-- 处理器Handler/Controller --> <!-- handler.SimpleUrlHandlerMapping映射器 --> <bean id="https" class="com.Controller.HttpController"></bean> </beans>
2)httpController:
package com.Controller;

import java.io.IOException;
import java.util.ArrayList;
import java.util.List;

import javax.servlet.*;
import javax.servlet.http.HttpServletRequest;
import javax.servlet.http.HttpServletResponse;

import org.springframework.web.HttpRequestHandler;

import com.bean.UsersBean;

public class HttpController implements HttpRequestHandler {

    @Override
    public void handleRequest(HttpServletRequest request, HttpServletResponse response)
            throws ServletException, IOException {
        // TODO Auto-generated method stub
        List<UsersBean> list = new ArrayList<>();

        UsersBean u1 = new UsersBean(1, "aaaa", "222");
        UsersBean u2 = new UsersBean(2, "aadaa", "2");
        UsersBean u3 = new UsersBean(3, "da", "333");
        list.add(u1);
        list.add(u2);
        list.add(u3);
        // 数据存入request
        request.setAttribute("USERS", list);
        request.getRequestDispatcher("page/showAllUsers.jsp").forward(request, response);
    }

}
方法3:1)注解:Annotation,spring-mvc.xml配置
<?xml version="1.0" encoding="UTF-8"?>
<beans xmlns="http://www.springframework.org/schema/beans"
    xmlns:aop="http://www.springframework.org/schema/aop" xmlns:context="http://www.springframework.org/schema/context"
    xmlns:tx="http://www.springframework.org/schema/tx" xmlns:xsd="http://www.w3.org/2001/XMLSchema"
    xmlns:xsi="http://www.w3.org/2001/XMLSchema-instance" xmlns:mvc="http://www.springframework.org/schema/mvc"
    xsi:schemaLocation="http://www.springframework.org/schema/beans
    http://www.springframework.org/schema/beans/spring-beans.xsd
    http://www.springframework.org/schema/aop
    http://www.springframework.org/schema/aop/spring-aop.xsd
    http://www.springframework.org/schema/context
    http://www.springframework.org/schema/context/spring-context.xsd
     http://www.springframework.org/schema/tx
     http://www.springframework.org/schema/tx/spring-tx.xsd
     http://www.springframework.org/schema/mvc
     http://www.springframework.org/schema/mvc/spring-mvc.xsd ">
    <!--开启类自动扫描配置-->
    <context:component-scan base-package="com.Controller" />
    <!--开启注解自动扫描配置 -->
    <mvc:annotation-driven />
    <!-- 视图解析器 View Resolver -->
    <bean
        class="org.springframework.web.servlet.view.InternalResourceViewResolver" />
</beans>
2)UsersAnnotation:class类
package com.Controller;

import java.util.ArrayList;
import java.util.List;

import org.springframework.stereotype.Controller;
import org.springframework.web.bind.annotation.RequestMapping;
import org.springframework.web.servlet.ModelAndView;

import com.bean.UsersBean;

//处理器
@Controller
public class AnnotionUsers {

  //请求转发地址 value=“”
    @RequestMapping("/all.action")
    public ModelAndView queryAll() {

        List<UsersBean> list = new ArrayList<>();
        UsersBean u1 = new UsersBean(1, "hehe", "222");
        UsersBean u2 = new UsersBean(2, "aadaa", "2");
        UsersBean u3 = new UsersBean(3, "da", "333");
        list.add(u1);
        list.add(u2);
        list.add(u3);
        ModelAndView mav = new ModelAndView();
        mav.addObject("USERS", list);
        mav.setViewName("page/showAllUsers.jsp");
        return mav;
    }

    @RequestMapping("/hehe.action")
    public ModelAndView modify() {
        ModelAndView mav = new ModelAndView();
        mav.addObject("USERS", "修改页面");
        mav.setViewName("page/haha.jsp");
        return mav;
    }

}
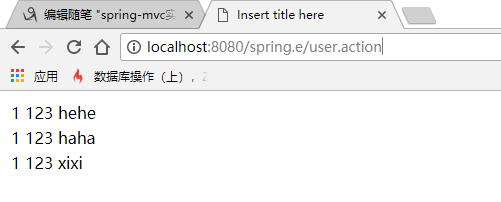
3)在浏览器种测试:

现在我们来总结一下我写的一群代码:
主要分为3点,3种方法实现从模拟数据dao网页页面展示。
1.使用bean的Name属性传递请求转发的Url;
适配器:SimpleControllerHandlerAdapter
映射器:BeanNameUrlHandlerMapping
试图解析器:InternalResourceViewResolver
处理器(自己手动写Controller):UsersController
2.使用该适配器只能处理实现HttpRequestHandler接口的对象 所以在controller中科院使用请求和响应对象,于是可以通过ajax返回json对象
适配器:HttpRequestHandlerAdapter
映射器:SimpleUrlHandlerMapping (设置属性mappings)
试图解析器:InternalResourceViewResolver
处理器(自己手动写HttpController):HttpController
3.注解 (@Controller,@ResquestMapping(value="URL"))
开启注解扫描:<mvc:annotation-driven />
试图解析器:InternalResourceViewResolver
处理器(自己手动写HttpController):Annotation
三种方式实现数据到页面的加载方式,完成了。
有问题请留言!!!