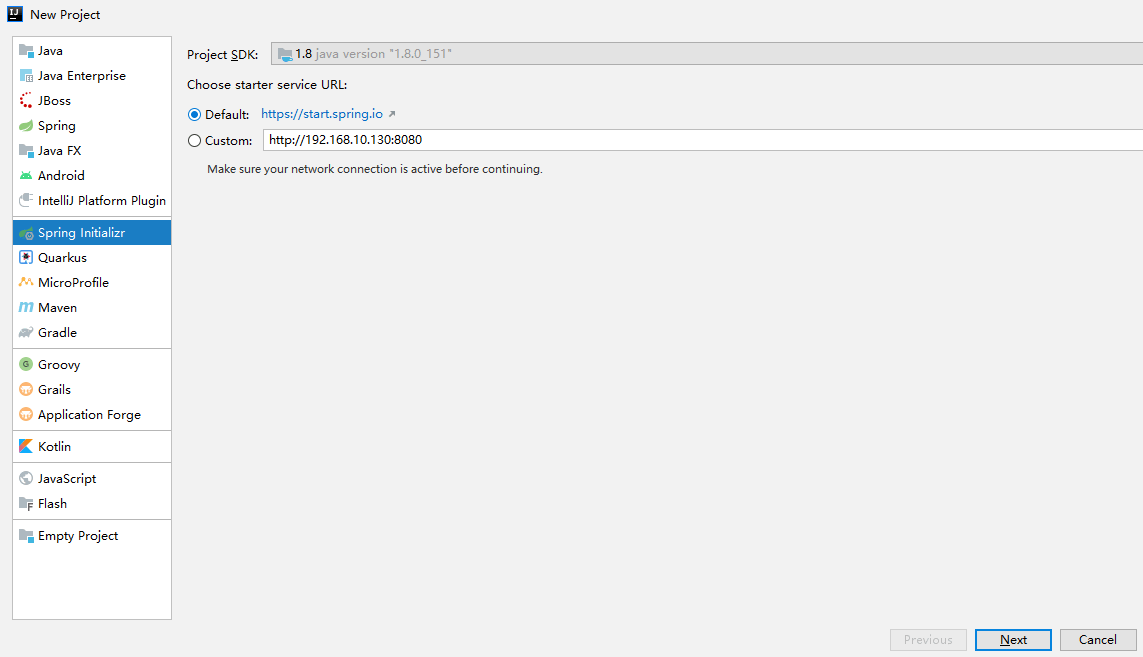
idea创建springboot项目时,一般使用默认的start.spring.io来初始化项目,为了能直接生成带有自己版本信息的项目,就想搭一个本地的spring-initializr。
参考
访问start.spring.io可以获取到源码地址spring-io/start.spring.io: https://start.spring.io。

本文使用的spring-initializr源码版本是spring-io/start.spring.io at 8ddc6a9ab0c1f62c524571f1ab8dc0ee8b45a63f
IDE直接启动
通过idea直接启动后台,无页面,但是能用,这个是比较简单的。

打包后启动
打包后启动,这个比较适合部署在服务器上,并且是有前端页面的。
步骤
- 配置jdk
- 配置maven
- 配置git
- 拉取源码,安装
- 遇到问题解决问题。根据报错提示,找解决办法,一般解决问题的根源就在于找控制台首次出现
Error的地方
安装maven并配置环境变量后,刷新环境变量
wget https://mirrors.tuna.tsinghua.edu.cn/apache/maven/maven-3/3.6.3/binaries/apache-maven-3.6.3-bin.tar.gz
tar zxvf apache-maven-3.6.3-bin.tar.gz -C /opt/module
mv /opt/module/apache-maven-3.6.3/ /opt/module/maven/

#添加环境变量
vi /etc/profile.d/maven-env.sh
# 里面输入内容
export PATH=$PATH:/opt/module/maven/bin
# ----

# 刷新环境变量
source /etc/profile
配置阿里镜像
<mirror>
    <id>nexus-aliyun</id>
    <mirrorOf>central</mirrorOf>
    <name>Nexus aliyun</name>
    <url>http://maven.aliyun.com/nexus/content/groups/public</url>
</mirror>
检验是否成功
[root@iZp62wy25rtcetZ ~]# mvn -v
Apache Maven 3.6.3 (cecedd343002696d0abb50b32b541b8a6ba2883f)
Maven home: /opt/module/maven
Java version: 1.8.0_301, vendor: Oracle Corporation, runtime: /opt/module/jdk1.8.0_301/jre
Default locale: en_US, platform encoding: UTF-8
OS name: "linux", version: "4.18.0-193.28.1.el8_2.x86_64", arch: "amd64", family: "unix"
安装git
yum -y install git
[root@iZp62wy25rtcetZ ~]# git --version
git version 2.27.0
拉取源码
wget https://github.com/spring-io/start.spring.io/archive/8ddc6a9ab0c1f62c524571f1ab8dc0ee8b45a63f.zip
unzip 8ddc6a9ab0c1f62c524571f1ab8dc0ee8b45a63f.zip
cd start.spring.io-8ddc6a9ab0c1f62c524571f1ab8dc0ee8b45a63f/
mvn clean package -Dmaven.test.skip=true
在安装过程中,可能会比较慢,比如install node and yarn的时候,耐心一点即可。
错误一
[INFO] ------------------------------------------------------------------------
[INFO] Reactor Summary for start.spring.io 0.0.1-SNAPSHOT:
[INFO]
[INFO] start.spring.io .................................... SUCCESS [ 17.975 s]
[INFO] start.spring.io client ............................. SUCCESS [05:40 min]
[INFO] start.spring.io website ............................ FAILURE [04:43 min]
[INFO] ------------------------------------------------------------------------
[INFO] BUILD FAILURE
[INFO] ------------------------------------------------------------------------
[INFO] Total time:  11:30 min
[INFO] Finished at: 2021-10-12T13:54:27+08:00
[INFO] ------------------------------------------------------------------------
[ERROR] Failed to execute goal pl.project13.maven:git-commit-id-plugin:4.0.5:revision (default) on project start-site: .git directory is not found! Please specify a valid [dotGitDirectory] in your pom.xml -> [Help 1]
[ERROR]
[ERROR] To see the full stack trace of the errors, re-run Maven with the -e switch.
[ERROR] Re-run Maven using the -X switch to enable full debug logging.
[ERROR]
[ERROR] For more information about the errors and possible solutions, please read the following articles:
[ERROR] [Help 1] http://cwiki.apache.org/confluence/display/MAVEN/MojoExecutionException
[ERROR]
[ERROR] After correcting the problems, you can resume the build with the command
[ERROR]   mvn <args> -rf :start-site
解决方法:找到你想项目-> github源码根目录start-sitepom.xml -->编辑此文件 -->搜索“git-commit-id-plugin” -->新增configuration部分代码
<plugin>
    <groupId>pl.project13.maven</groupId>
    <artifactId>git-commit-id-plugin</artifactId>
    <configuration>
        <!--".git"文件夹未找到时,构建是否失败;若设置true,则构建失败;若设置false,则跳过执行该目标;默认值:true;-->
        <failOnNoGitDirectory>false</failOnNoGitDirectory>
    </configuration>
</plugin>
重新进行安装
mvn clean package -Dmaven.test.skip=true
安装成功

启动项目
cd start-site/target/
nohup java -jar start-site-exec.jar
访问8080端口

错误
错误一:nodejs命令找不到
# 首先要添加 Nodejs 14.x 存储库(root 用户执行)
curl -sL https://rpm.nodesource.com/setup_14.x | bash -

# 开始安装 Nodejs
yum -y install nodejs

# 安装 gcc-c++ 以便从 npm 构建原生插件
yum install gcc-c++ make

# 检查 node、npm 安装是否成功
node --version // v14.15.4
npm --version // 6.14.10
错误二:报错node-gyp
sudo npm install -g node-gyp
yum install gcc-c++
yum groupinstall 'Development Tools'
错误三:找不到python
yum -y install python3
# 测试安装成功
[root@localhost ~]# python
Python 2.7.5 (default, Oct 14 2020, 14:45:30)
[GCC 4.8.5 20150623 (Red Hat 4.8.5-44)] on linux2
Type "help", "copyright", "credits" or "license" for more information.
>>> exit
Use exit() or Ctrl-D (i.e. EOF) to exit
>>>
配置自定义信息
修改start-site下面的application.yml
initializr:
  version:
    value: 1.0.0
  group-id:
    value: top.meethigher
    description: chenchuancheng's demo
  description:
    value: chenchuancheng's demo
  package-name:
    value: top.meethigher
  types:
    - name: Maven Project
      id: maven-project
      description: Generate a Maven based project archive.
      tags:
        build: maven
        format: project
      default: true
      action: /starter.zip
    - name: Maven POM
      id: maven-build
      description: Generate a Maven pom.xml.
      tags:
        build: maven
        format: build
      default: false
      action: /pom.xml
    - name: Gradle Project
      id: gradle-project
      description: Generate a Gradle based project archive.
      tags:
        build: gradle
        format: project
      default: false
      action: /starter.zip
    - name: Gradle Config
      id: gradle-build
      description: Generate a Gradle build file.
      tags:
        build: gradle
        format: build
      default: false
      action: /build.gradle
  packagings:
    - name: Jar
      id: jar
      default: true
    - name: War
      id: war
      default: false
  javaVersions:
    - id: 17
      default: false
    - id: 11
      default: false
    - id: 1.8
      name: 8
      default: true
  languages:
    - name: Java
      id: java
      default: true
    - name: Kotlin
      id: kotlin
      default: false
    - name: Groovy
      id: groovy
      default: false
最后的效果,看图。
