用flask快速写了2个接口,以供在本地调用:
from flask import Flask
from flask import request

app = Flask(__name__)


@app.route('/')
def hello_world():
    return 'Hello World!'


@app.route('/getUserName', methods=['GET'])
def get_user_name():
    if request.method == 'GET':
        return {
            "username": "wesson",
            "age": "27",
            "from": "China",
        }


@app.route('/joinStr', methods=['GET'])
def str_join():
    if request.method == 'GET':
        str1 = request.args.get("str1")
        str2 = request.args.get("str2")
        after_join = str1 + " " + str2
        return {
            "result": after_join
        }


if __name__ == '__main__':
    app.run()
一共有2个接口:
- /getUserName,查询用户名,返回是写死的字典。
- /joinStr,两个字符串拼接,返回的是拼接后的结果。
运行后可在浏览器查看:


一、编写测试用例
因为这个接口没有传参,cookie之类的,就省掉了,只是demo用。
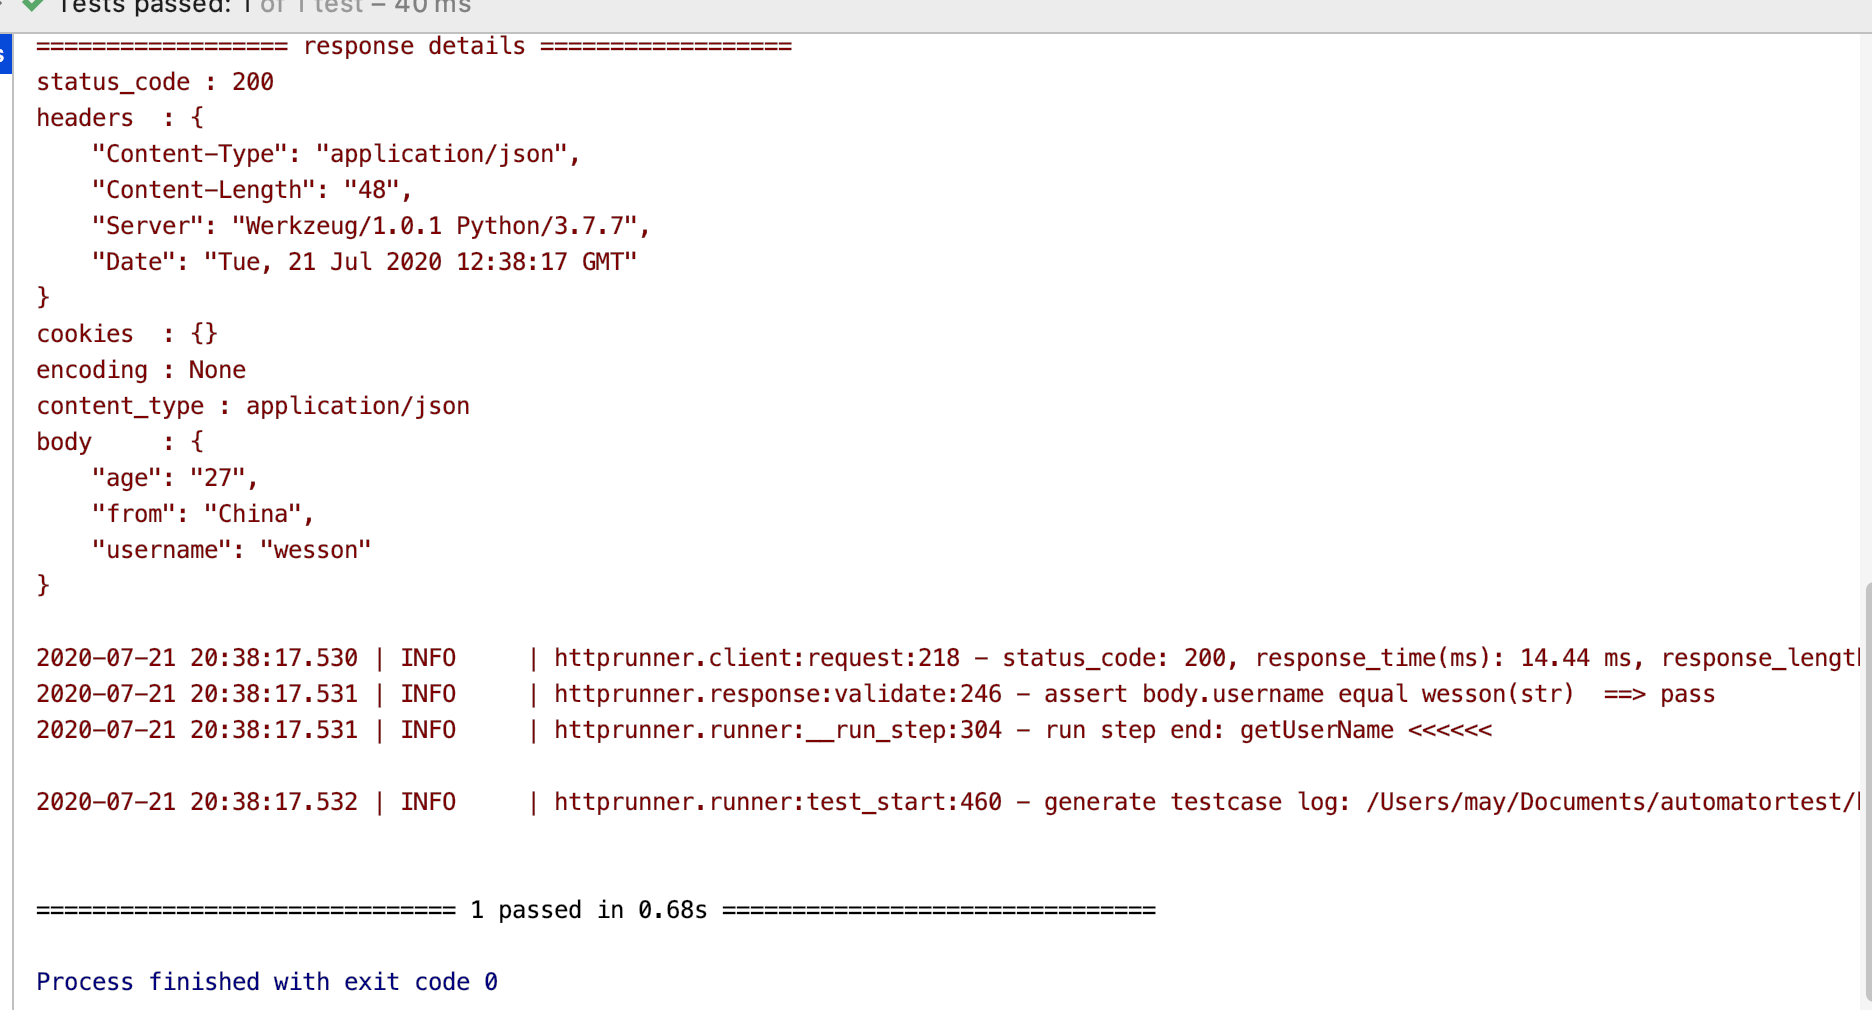
1. 接口:/getUserName
from httprunner import HttpRunner, Config, Step, RunRequest, RunTestCase


class TestCaseRequestWithGetUserName(HttpRunner):
    config = (
        Config("test /getUserName")
        .base_url("http://localhost:5000")
        .verify(False)
    )

    teststeps = [
        Step(
            RunRequest("getUserName")
            .get("/getUserName")
            .validate()
            .assert_equal("body.username", "wesson")
        ),

    ]


if __name__ == "__main__":
    TestCaseRequestWithGetUserName().test_start()
断言是验证返回的username字段值是不是“wesson”,运行一下,可以看到测试通过
若报错:pytest运行报错nknown hook 'pytest_namespace' in plugin <module 'allure.pytest_plugin'
若报错:httprunner 3运行报错AttributeError: module 'allure' has no attribute 'severity_level'
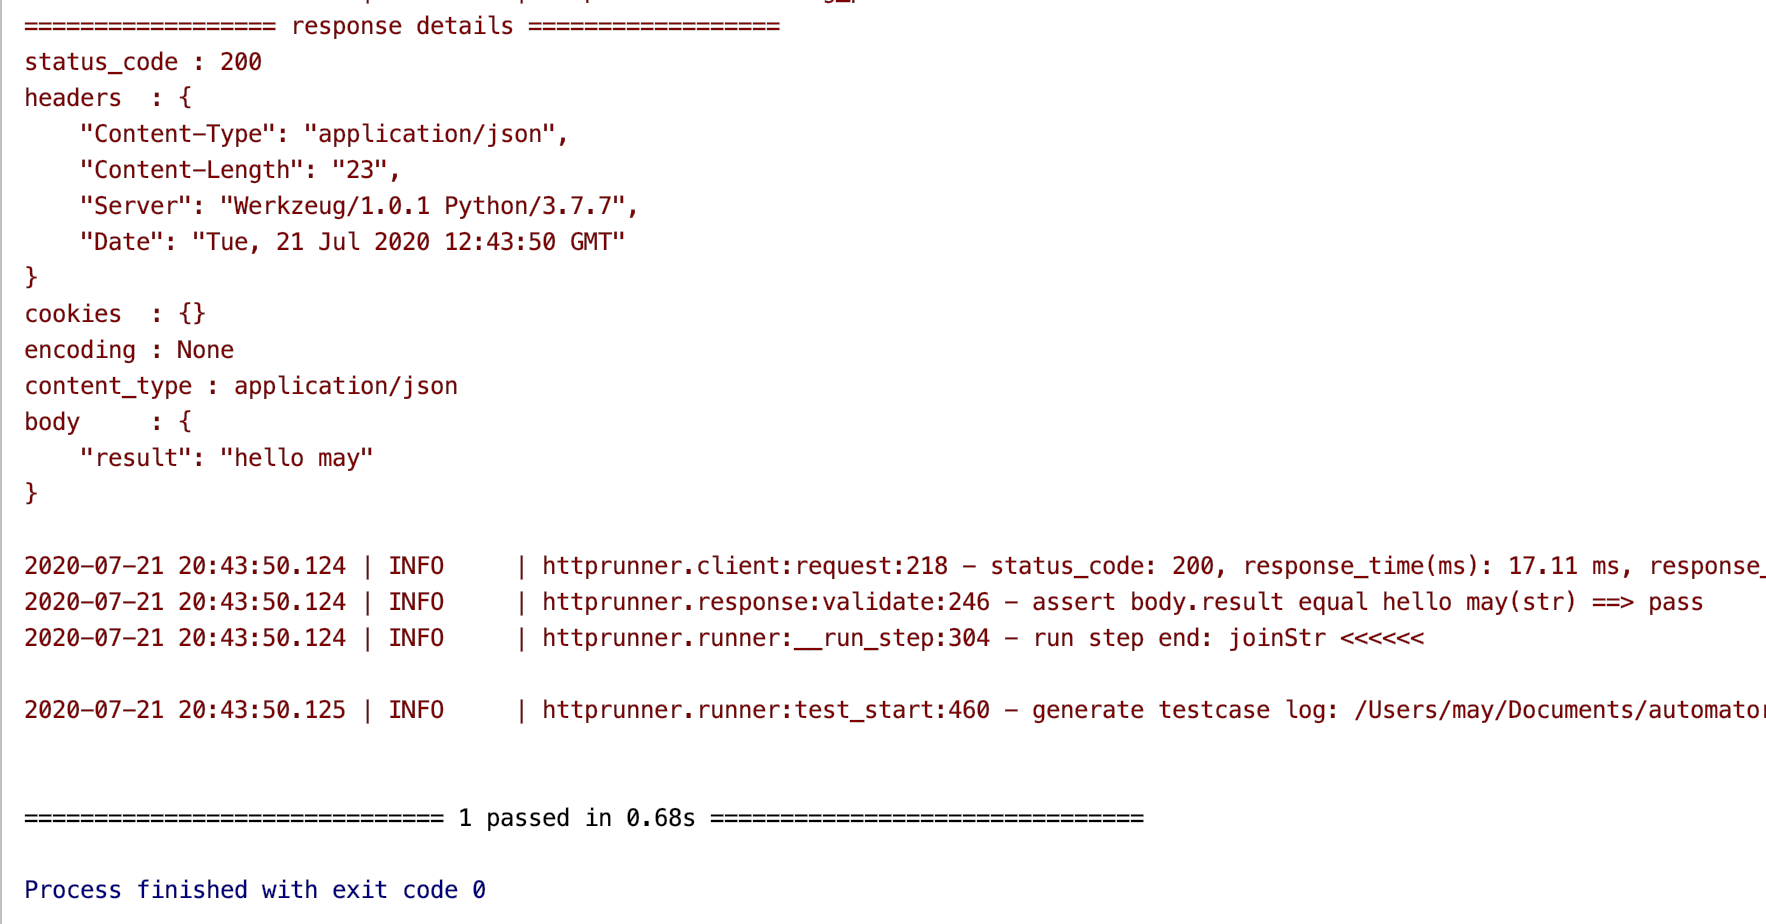
2. 接口:/joinStr
这个接口就需要2个传参了,那么在Step里通过.with_params()来传参。
from httprunner import HttpRunner, Config, Step, RunRequest


class TestCaseRequestWithJoinStr(HttpRunner):
    config = (
        Config("test /joinStr")
        .base_url("http://localhost:5000")
        .verify(False)
    )

    teststeps = [
        Step(
            RunRequest("joinStr")
            .get("/joinStr")
            .with_params(**{"str1": "hello", "str2": "may"})
            .validate()
            .assert_equal("body.result", "hello may")
        ),

    ]


if __name__ == "__main__":
    TestCaseRequestWithJoinStr().test_start()
传入的参数分别是“hello”、“may”,接口写的这个字符串在拼接的时候是加了一个空格的,所以断言的时候预期的值是"hello may"。
运行测试,可以看的测试通过。
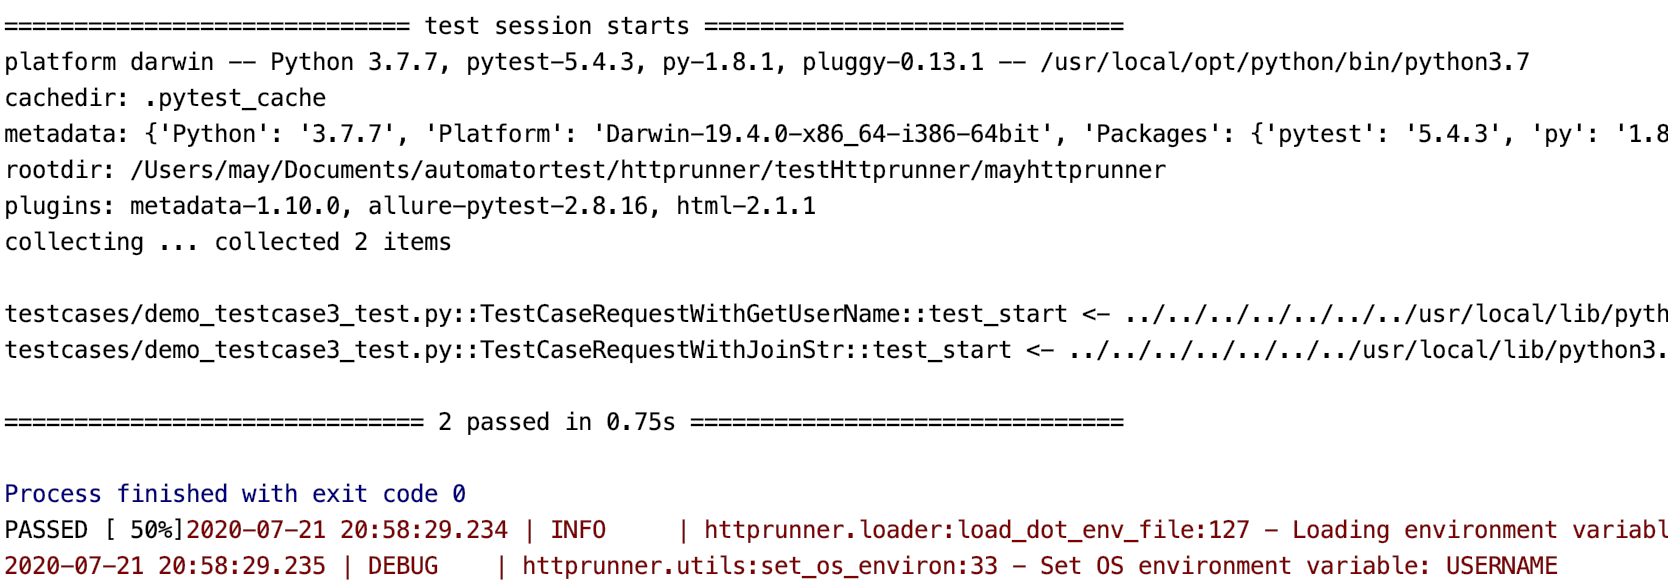
二、testcase引用&变量传递
以上是2个分开的case,都可以分别正常运行。
假设,/joinStr接口的第二个参数,是依赖/getUserName接口的返回,那么现在这2个testcase之间就有了依赖关系。
那么在写/getUserName接口用例的时候,就需要去引用/joinStr的测试用例了,并且需要把/getUserName用例的变量导出来,/joinStr的测试用例传参时候使用。
1. 首先,先修改/getUserName接口的case:
from httprunner import HttpRunner, Config, Step, RunRequest


class TestCaseRequestWithGetUserName(HttpRunner):
    config = (
        Config("test /getUserName")
        .base_url("http://localhost:5000")
        .verify(False)
        .export(*["username"])  # 这里定义出要导出的变量

    )

    teststeps = [
        Step(
            RunRequest("getUserName")
            .get("/getUserName")
            .extract()
            .with_jmespath("body.username", "username")  # 提取出目标值,赋值给username变量
            .validate()
            .assert_equal("body.username", "wesson")
        ),

    ]


if __name__ == "__main__":
    TestCaseRequestWithGetUserName().test_start()
注释部分的代码,一个是config里定义了这个要导出的变量,另一个是在Step中,讲目标值提取出来,赋值给变量username
2. 接下来,修改/joinStr接口的测试用例:调用上一个接口
from httprunner import HttpRunner, Config, Step, RunRequest, RunTestCase
from .demo_testcase2_test import TestCaseRequestWithGetUserName  # 导入要引用的类


class TestCaseRequestWithJoinStr(HttpRunner):
    config = (
        Config("test /joinStr")
        .base_url("http://localhost:5000")
        .verify(False)
    )

    teststeps = [
        Step(
            RunTestCase("setUp getUserName")
            .call(TestCaseRequestWithGetUserName)  # 导入后就可以调用了
            .export(*["username"])  # 在RunTestCase步骤中定义这个变量的导出
        ),
        Step(
            RunRequest("joinStr")
            .get("/joinStr")
            .with_params(**{"str1": "hello", "str2": "$username"})  # 在第二个传参中引用导出的变量
            .validate()
            .assert_equal("body.result", "hello $username")  # 断言的预期值也引用变量
        ),

    ]


if __name__ == "__main__":
    TestCaseRequestWithJoinStr().test_start()
运行/joinStr接口的测试用例,可以看到运行通过
来源 https://www.cnblogs.com/pingguo-softwaretesting/p/13215627.html