Zabbix for centos7
服务端安装
环境准备
安装MySQL
安装zabbix软件
rpm -i https://repo.zabbix.com/zabbix/4.0/rhel/7/x86_64/zabbix-release-4.0-1.el7.noarch.rpm
yum install zabbix-server-mysql zabbix-web-mysql zabbix-agent
创建zabbix 的MySQL数据库
# mysql -uroot -p
password
mysql> create database zabbix character set utf8 collate utf8_bin;
mysql> grant all privileges on zabbix.* to zabbix@localhost identified by 'password';
mysql> quit;
执行sql语句创建表
zcat /usr/share/doc/zabbix-server-mysql*/create.sql.gz | mysql -uzabbix -p zabbix
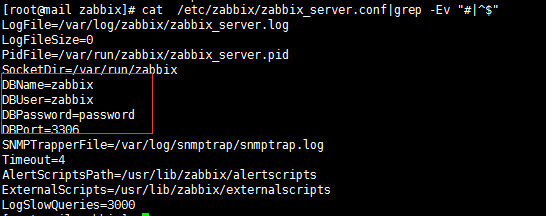
编辑zabbix 配置文件
vi /etc/zabbix/zabbix_server.conf
下载源码包
复制zabbix-4.0.1/frontends/php 里的文件到/var/www/html/zabbix
浏览器访问http://ip/zabbix/index.php
编辑php.ini配置文件
vi /usr/local/php/etc/php.ini
post_max_size
max_execution_time
max_input_time
date.timezone =Asia/Shanghai
always_populate_raw_post_data
php与MySQL驱动问题需要重新编译php
./configure --prefix=/usr/local/php --with-fpm-group=www --with-fpm-user=www --with-config-file-path=/usr/local/php/etc --with-png-dir=/usr/local/libpng --with-jpeg-dir=/usr/local/jpeg --with-freetype-dir=/usr/local/freetype --with-zlib-dir=/usr/local/zlib --with-mcrypt=/usr/local/libmcrypt --with-libxml-dir=/usr/local/libxml2/ --with-iconv-dir=/usr/local/libiconv --enable-libxml --enable-xml --enable-bcmath --enable-shmop --enable-sysvsem --enable-inline-optimization --enable-opcache --enable-mbregex --enable-fpm --enable-mbstring=all --enable-gd-native-ttf --with-openssl --enable-pcntl --enable-sockets --with-xmlrpc --enable-zip --enable-soap --without-pear --with-gettext --enable-session --with-curl --enable-ctype --enable-shared --with-gd --with-mysql=mysqlnd --with-mysqli=mysqlnd --with-pdo-mysql=mysqlnd
客户端安装
rpm -i https://repo.zabbix.com/zabbix/4.0/rhel/7/x86_64/zabbix-release-4.0-1.el7.noarch.rpm
yum install zabbix-agent
vi /etc/zabbix/zabbix_agentd.conf
Server=172.16.16.10
ServerActive=172.16.16.10
Hostname=Agent_T3 需要和zabbix配置名称一样
服务端监控配置
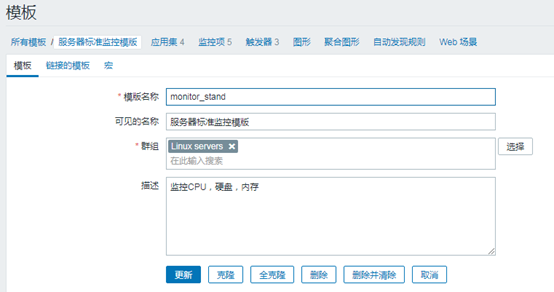
创建模板



监控配置
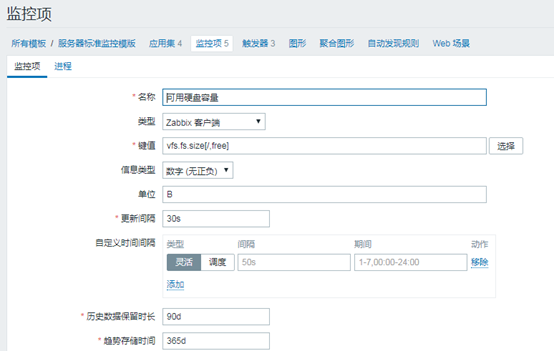
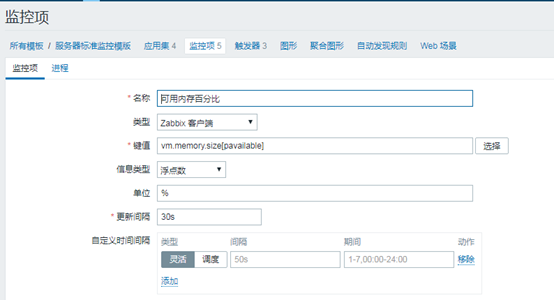

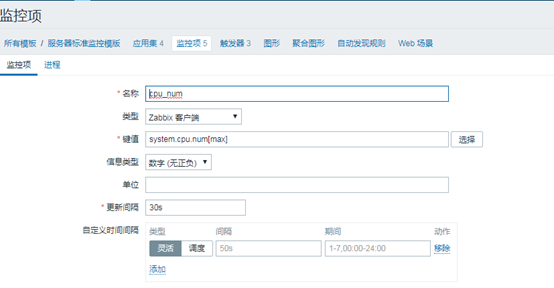
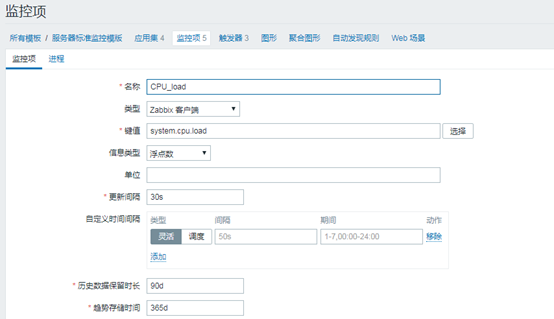
详细参数配置参考
https://www.zabbix.com/documentation/current/manual/appendix/items/supported_by_platform
触发器配置
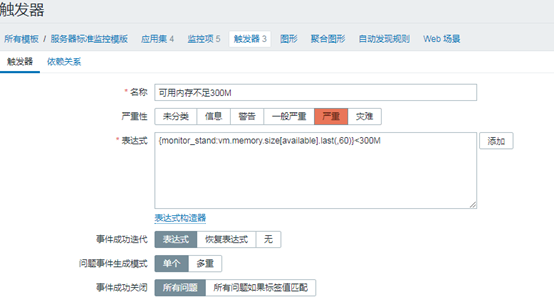
动作(触发器执行后触发动作发送信息)

邮件报警
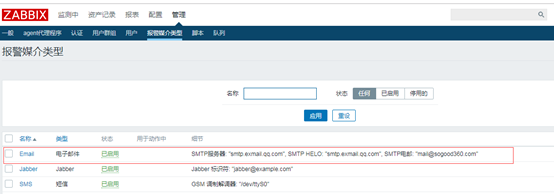

使用客户端的特定密码
报警通知人
