目 录
Centos7 IP地址的配置
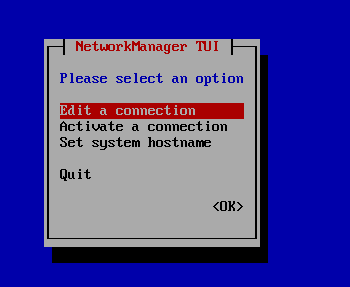
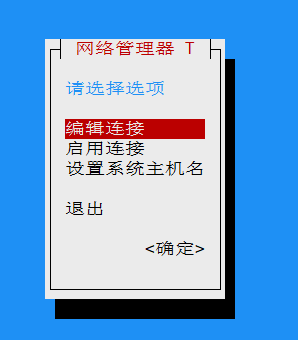
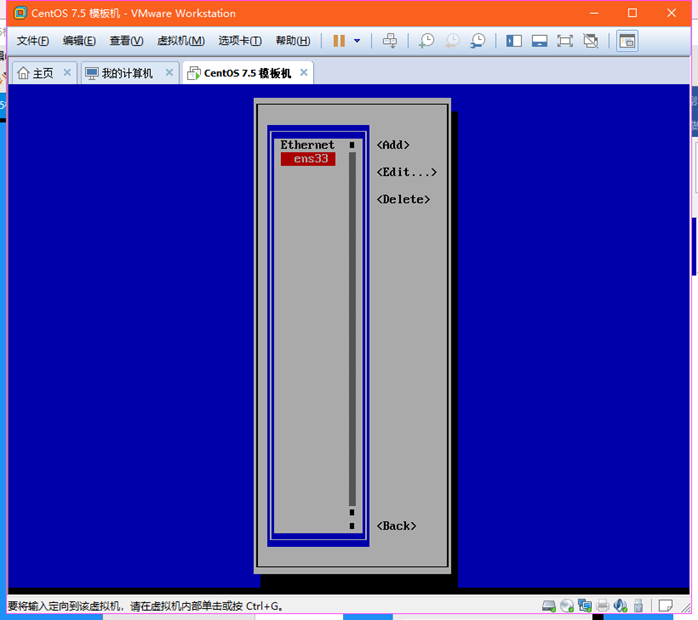
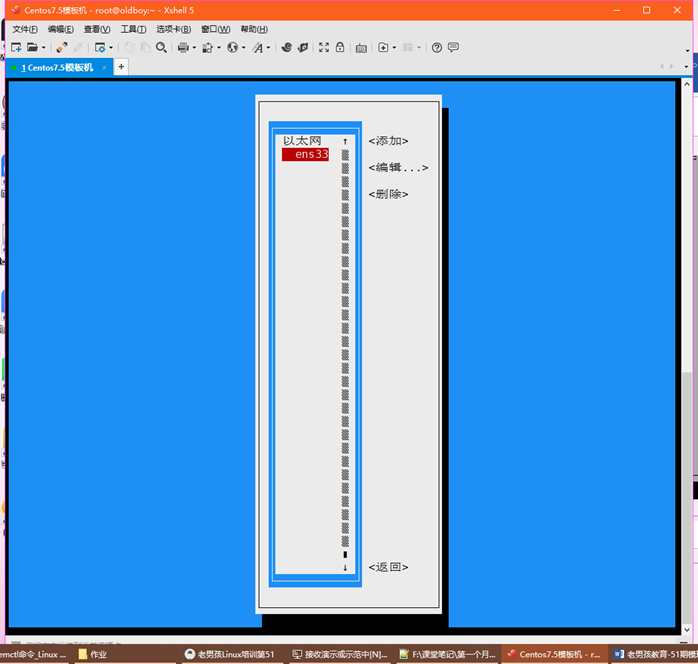
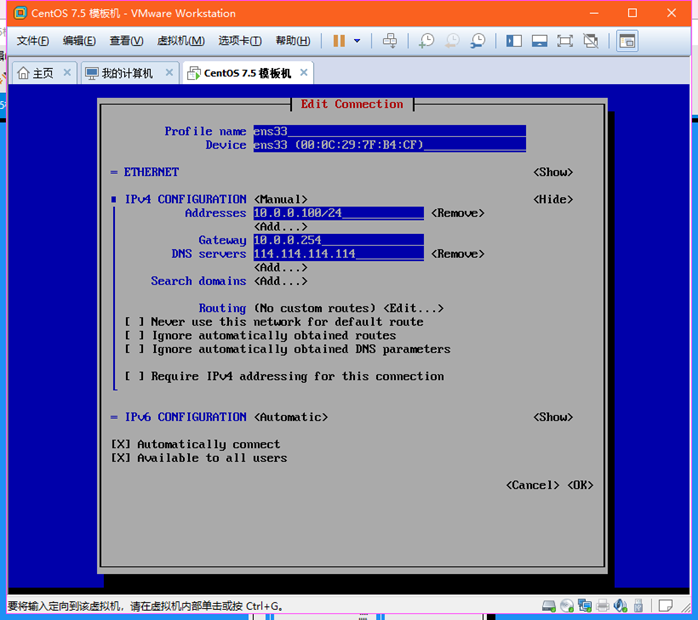
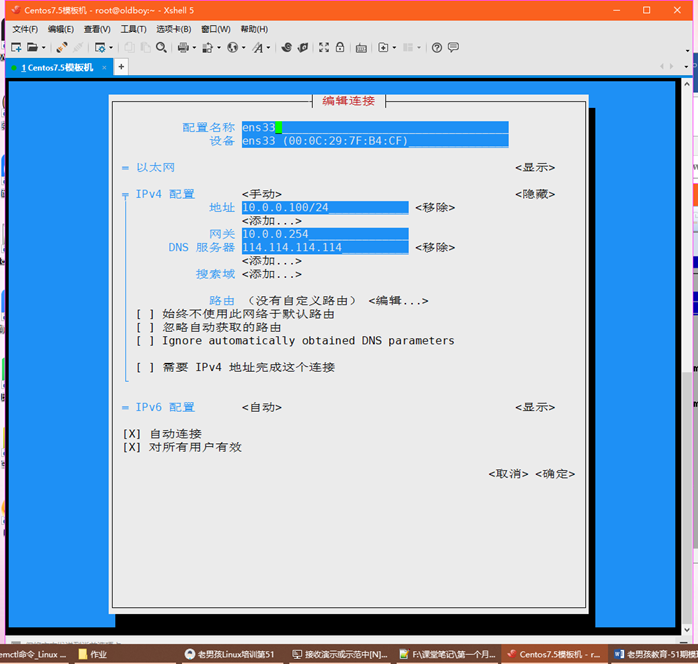
第一种配置ip方法(nmtui)
nmtui 
使用方向键、tab、空格、回车操作
第二种 修改网卡配置文件
使用cat查看配置文件
cat /etc/sysconfig/network-scripts/ifcfg-ens33
[root@majinhai ~]# cat /etc/sysconfig/network-scripts/ifcfg-ens33
TYPE=Ethernet
PROXY_METHOD=none
BROWSER_ONLY=no
BOOTPROTO=none
DEFROUTE=yes
IPV4_FAILURE_FATAL=no
IPV6INIT=yes
IPV6_AUTOCONF=yes
IPV6_DEFROUTE=yes
IPV6_FAILURE_FATAL=no
IPV6_ADDR_GEN_MODE=stable-privacy
NAME=ens33
UUID=c32bc0de-5592-4f17-89b9-51ead27064c9
DEVICE=ens33
ONBOOT=yes
IPADDR=10.0.0.200
PREFIX=24
GATEWAY=10.0.0.254
DNS1=114.114.114.114
IPV6_PRIVACY=no
[root@majinhai ~]#
BOOTPROTO=none/start/dhcp #网卡获取ip地址的方式
none/start 手动配置ip
dhcp 自动获取ip
ONBOOT=yes/no
yes 是开机启动状态
no 开启禁用状态
IPADDR=10.0.0.100 #配置IP地址
PREFIX=24 或者 NETMASK=255.255.255.0 #子网掩码
GATEWAY=10.0.0.254 #网关
DNS1=114.114.114.114 #配置DNS 可以写三个
使用sed命令更改IP地址
sed -i 's/IPADDR=10.0.0.200/IPADDR=10.0.0.100/g' /etc/sysconfig/network-scripts/ifcfg-ens33
[root@majinhai ~]# sed -i 's/IPADDR=10.0.0.200/IPADDR=10.0.0.100/g' /etc/sysconfig/network-scripts/ifcfg-ens33
[root@majinhai ~]# cat /etc/sysconfig/network-scripts/ifcfg-ens33
TYPE=Ethernet
PROXY_METHOD=none
BROWSER_ONLY=no
BOOTPROTO=none
DEFROUTE=yes
IPV4_FAILURE_FATAL=no
IPV6INIT=yes
IPV6_AUTOCONF=yes
IPV6_DEFROUTE=yes
IPV6_FAILURE_FATAL=no
IPV6_ADDR_GEN_MODE=stable-privacy
NAME=ens33
UUID=c32bc0de-5592-4f17-89b9-51ead27064c9
DEVICE=ens33
ONBOOT=yes
IPADDR=10.0.0.100
PREFIX=24
GATEWAY=10.0.0.254
DNS1=114.114.114.114
IPV6_PRIVACY=no
修改开机启动sed –i 's/ONBOOT=no/ONBOOT=yes/g' /etc/sysconfig/netowek-script/ifcfg-ens33
[root@majinhai ~]# sed -i 's/ONBOOT=no/ONBOOT=yes/g' /etc/sysconfig/network-scripts/ifcfg-ens33
[root@majinhai ~]# cat /etc/sysconfig/network-scripts/ifcfg-ens33
TYPE=Ethernet
PROXY_METHOD=none
BROWSER_ONLY=no
BOOTPROTO=none
DEFROUTE=yes
IPV4_FAILURE_FATAL=no
IPV6INIT=yes
IPV6_AUTOCONF=yes
IPV6_DEFROUTE=yes
IPV6_FAILURE_FATAL=no
IPV6_ADDR_GEN_MODE=stable-privacy
NAME=ens33
UUID=c32bc0de-5592-4f17-89b9-51ead27064c9
DEVICE=ens33
ONBOOT=yes
IPADDR=10.0.0.100
PREFIX=24
GATEWAY=10.0.0.254
DNS1=114.114.114.114
IPV6_PRIVACY=no
sed –i 's/BOOTPROTO=dhcp/BOOTPROTO=none/g' /etc/sysconfig/network-scripts/ifcfg-ens33
[root@majinhai ~]# sed -i 's/BOOTPROTO=dhcp/BOOTPROTO=none/g' /etc/sysconfig/network-scripts/ifcfg-ens33
[root@majinhai ~]# cat /etc/sysconfig/network-scripts/ifcfg-ens33
TYPE=Ethernet
PROXY_METHOD=none
BROWSER_ONLY=no
BOOTPROTO=none
DEFROUTE=yes
IPV4_FAILURE_FATAL=no
IPV6INIT=yes
IPV6_AUTOCONF=yes
IPV6_DEFROUTE=yes
IPV6_FAILURE_FATAL=no
IPV6_ADDR_GEN_MODE=stable-privacy
NAME=ens33
UUID=c32bc0de-5592-4f17-89b9-51ead27064c9
DEVICE=ens33
ONBOOT=yes
IPADDR=10.0.0.100
PREFIX=24
GATEWAY=10.0.0.254
DNS1=114.114.114.114
IPV6_PRIVACY=no
修改完之后,使用systemctl restart network重启网络服务,让配置生效
Xshell连接Cenos7.5
xshell连接失败、排错思路
- ping虚拟机,如果ping不通,检查VMware8网卡的ip地址
B、关闭selinux
- 查看selinux配置文件 cat /etc/selinux/config
[root@majinhai ~]# cat /etc/selinux/config
# This file controls the state of SELinux on the system.
# SELINUX= can take one of these three values:
# enforcing - SELinux security policy is enforced.
# permissive - SELinux prints warnings instead of enforcing.
# disabled - No SELinux policy is loaded.
SELINUX=enforcing
# SELINUXTYPE= can take one of three two values:
# targeted - Targeted processes are protected,
# minimum - Modification of targeted policy. Only selected processes are protected.
# mls - Multi Level Security protection.
SELINUXTYPE=targeted
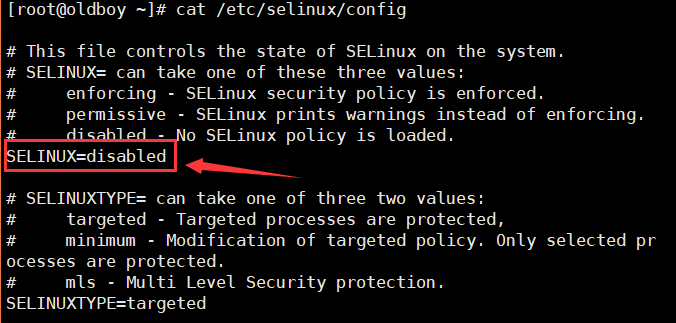
- 修改配置文件关闭selinux
sed –i 's/SELINUX=enforcing/SELINUX=disable/g' /etc/selinux/config
[root@majinhai ~]# sed -i 's/SELINUX=enforcing/SELINUX=disabled/g' /etc/selinux/config
[root@majinhai ~]# cat /etc/selinux/config
# This file controls the state of SELinux on the system.
# SELINUX= can take one of these three values:
# enforcing - SELinux security policy is enforced.
# permissive - SELinux prints warnings instead of enforcing.
# disabled - No SELinux policy is loaded.
SELINUX=disabled
# SELINUXTYPE= can take one of three two values:
# targeted - Targeted processes are protected,
# minimum - Modification of targeted policy. Only selected processes are protected.
# mls - Multi Level Security protection.
SELINUXTYPE=targeted
- 修改完以后重启服务器配置才能生效
- setenforce 0 #临时关闭selinux
[root@majinhai ~]# setenforce 0
- 关闭firewalld(防火墙)
systemctl stop firewalld #临时关闭防火墙
systemctl disable firewalld 永久关闭防火墙
[root@majinhai ~]# systemctl stop firewalld
[root@majinhai ~]# systemctl disable firewalld
Removed symlink /etc/systemd/system/multi-user.target.wants/firewalld.service.
Removed symlink /etc/systemd/system/dbus-org.fedoraproject.FirewallD1.service.
[root@majinhai ~]#
CentosOS7.5 修改语言支持
查看当前系统语言支持
echo $LANG
英文:LANG=en_US.UTF-8
中文:LANG=zh_CN.UTF-8
清屏
clear
ctrl+l
虚拟机通过net网络模式上网,排错思路
- ping www.baidu.com
- 检查网关
- 检查VMware的虚拟网络编辑器—>服务
- 检查windows系统服务
- 右键此电脑——》管理——》服务和应用程序——》服务
- win+r 键入services.msc
- 任务管理器——》服务
yum
yum
yum是linux系统下的软件包管理器(仓库、库管、菜单)
路径:/etc/yum.repos.d/*.repo
/etc/yum.repos.d/*.repo
[base] #仓库名称
name= #仓库描述
mirrorlist= #仓库镜像路径
baseurl= #仓库url路径 http://www.baidu.com
enabled= #仓库是否启用 1表示启用,0表示关闭
gpgcheck= #密钥检测 1表示开启,0表示关闭
Sentos7.5构建国内yum源
- 下载国内的yum源(aliyun)
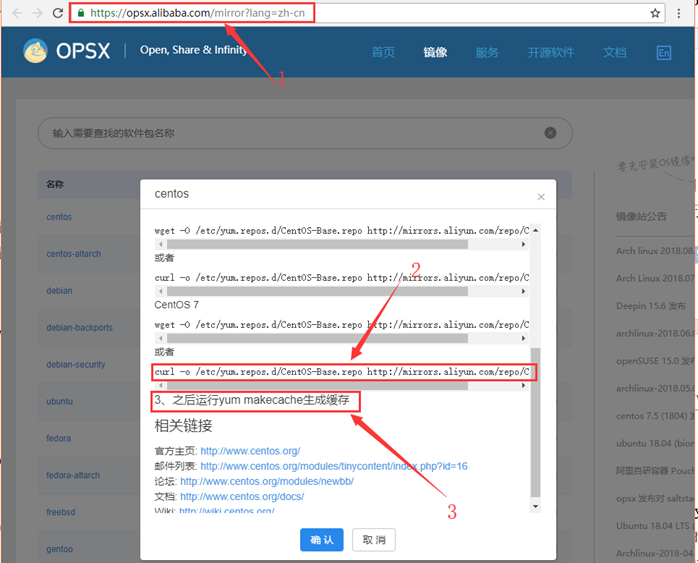
wget -O /etc/yum.repos.d/CentOS-Base.repo http://mirrors.aliyun.com/repo/Centos-7.repo
# 如果是最小安装,系统里没有wget命令,就使用下面的命令来实现
curl -o /etc/yum.repos.d/CentOS-Base.repo http://mirrors.aliyun.com/repo/Centos-7.repo
[root@majinhai ~]# curl -o /etc/yum.repos.d/CentOS-Base.repo http://mirrors.aliyun.com/repo/Centos-7.repo
% Total % Received % Xferd Average Speed Time Time Time Current
Dload Upload Total Spent Left Speed
100 2523 100 2523 0 0 31511 0 --:--:-- --:--:-- --:--:-- 31537
- 下载成功后,使用yum makecache,生成缓存
[root@majinhai ~]# yum makecache
已加载插件:fastestmirror
Determining fastest mirrors
* base: mirrors.aliyun.com
* extras: mirrors.aliyun.com
* updates: mirrors.aliyun.com
base | 3.6 kB 00:00:00
extras | 3.4 kB 00:00:00
updates | 3.4 kB 00:00:00
(1/12): base/7/x86_64/group_gz | 166 kB 00:00:00
base/7/x86_64/primary_db FAILED
http://mirrors.cloud.aliyuncs.com/centos/7/os/x86_64/repodata/03d0a660eb33174331aee3e077e11d4c017412d761b7f2eaa8555e7898e701e0-primary.sqlite.bz2: [Errno 14] curl#6 - "Could not resolve host: mirrors.cloud.aliyuncs.com; Unknown error"
正在尝试其它镜像。
(2/12): extras/7/x86_64/primary_db | 172 kB 00:00:00
(3/12): extras/7/x86_64/other_db | 110 kB 00:00:00
(4/12): extras/7/x86_64/filelists_db | 588 kB 00:00:00
(5/12): base/7/x86_64/other_db | 2.5 MB 00:00:00
(6/12): updates/7/x86_64/filelists_db | 2.4 MB 00:00:00
(7/12): updates/7/x86_64/other_db | 373 kB 00:00:00
(8/12): updates/7/x86_64/primary_db | 4.3 MB 00:00:00
(9/12): base/7/x86_64/primary_db | 5.9 MB 00:00:00
base/7/x86_64/filelists_db FAILED
http://mirrors.aliyuncs.com/centos/7/os/x86_64/repodata/f35d0029ad59e9fca0823be708150f5ee28ee1707cdc9bdaf420da676daafe28-filelists.sqlite.bz2: [Errno 14] curl#7 - "Failed connect to mirrors.aliyuncs.com:80; Connection refused"
正在尝试其它镜像。
extras/7/x86_64/prestodelta FAILED
http://mirrors.aliyuncs.com/centos/7/extras/x86_64/repodata/6c971648c41e83b5a7036ff70e79fee7f28c3b480d2f76001e6df8cfde507ab2-prestodelta.xml.gz: [Errno 14] curl#7 - "Failed connect to mirrors.aliyuncs.com:80; Connection refused"
正在尝试其它镜像。
(10/12): base/7/x86_64/filelists_db | 6.9 MB 00:00:00
(11/12): extras/7/x86_64/prestodelta | 68 kB 00:00:00
updates/7/x86_64/prestodelta FAILED
http://mirrors.aliyuncs.com/centos/7/updates/x86_64/repodata/78b732b6beb1c39406c440264f8bc168484b4600e3a418d0b6919dad291f7037-prestodelta.xml.gz: [Errno 14] curl#7 - "Failed connect to mirrors.aliyuncs.com:80; Connection refused"
正在尝试其它镜像。
(12/12): updates/7/x86_64/prestodelta | 400 kB 00:00:00
元数据缓存已建立
- 注意:
如果有报错需要关闭yum源验证

sed –i 's/gpgcheck=1/gpgcheck=0/g' /etc/yum.repos.d/CentOS-Base.repo
[root@majinhai ~]# sed -i 's/gpgcheck=1/gpgcheck=0/g' /etc/yum.repos.d/CentOS-Base.repo
[root@majinhai ~]# cat /etc/yum.repos.d/CentOS-Base.repo
# CentOS-Base.repo
#
# The mirror system uses the connecting IP address of the client and the
# update status of each mirror to pick mirrors that are updated to and
# geographically close to the client. You should use this for CentOS updates
# unless you are manually picking other mirrors.
#
# If the mirrorlist= does not work for you, as a fall back you can try the
# remarked out baseurl= line instead.
#
#
[base]
name=CentOS-$releasever - Base - mirrors.aliyun.com
failovermethod=priority
baseurl=http://mirrors.aliyun.com/centos/$releasever/os/$basearch/
http://mirrors.aliyuncs.com/centos/$releasever/os/$basearch/
http://mirrors.cloud.aliyuncs.com/centos/$releasever/os/$basearch/
gpgcheck=0
gpgkey=http://mirrors.aliyun.com/centos/RPM-GPG-KEY-CentOS-7
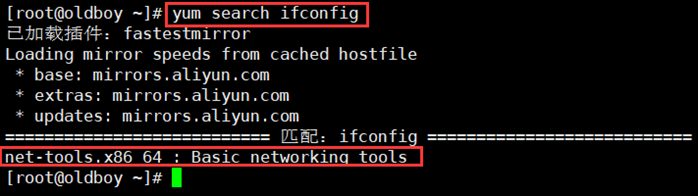
- yum的常用命令:安装常用的工具ifconfig
查找哪个包包含了ifconfig
[root@majinhai ~]# yum search ifconfig
已加载插件:fastestmirror
Loading mirror speeds from cached hostfile
* base: mirrors.aliyun.com
* extras: mirrors.aliyun.com
* updates: mirrors.aliyun.com
===================================== 匹配:ifconfig ======================================
net-tools.x86_64 : Basic networking tools
[root@majinhai ~]#
安装net-tools
[root@majinhai ~]# yum install -y net-tools
已加载插件:fastestmirror
Loading mirror speeds from cached hostfile
* base: mirrors.aliyun.com
* extras: mirrors.aliyun.com
* updates: mirrors.aliyun.com
正在解决依赖关系
--> 正在检查事务
---> 软件包 net-tools.x86_64.0.2.0-0.22.20131004git.el7 将被 安装
--> 解决依赖关系完成
依赖关系解决
===========================================================================================
Package 架构 版本 源 大小
===========================================================================================
正在安装:
net-tools x86_64 2.0-0.22.20131004git.el7 base 305 k
事务概要
===========================================================================================
安装 1 软件包
总下载量:305 k
安装大小:917 k
Downloading packages:
net-tools-2.0-0.22.20131004git.el7.x86_64.rpm | 305 kB 00:00:00
Running transaction check
Running transaction test
Transaction test succeeded
Running transaction
正在安装 : net-tools-2.0-0.22.20131004git.el7.x86_64 1/1
验证中 : net-tools-2.0-0.22.20131004git.el7.x86_64 1/1
已安装:
net-tools.x86_64 0:2.0-0.22.20131004git.el7
完毕!
输入ifconfig
[root@majinhai ~]# ifconfig
ens33: flags=4163<UP,BROADCAST,RUNNING,MULTICAST> mtu 1500
inet 10.0.0.100 netmask 255.255.255.0 broadcast 10.0.0.255
inet6 fe80::6d25:5198:5939:f0c1 prefixlen 64 scopeid 0x20<link>
ether 00:0c:29:89:21:4f txqueuelen 1000 (Ethernet)
RX packets 19634 bytes 26554679 (25.3 MiB)
RX errors 0 dropped 0 overruns 0 frame 0
TX packets 2521 bytes 253823 (247.8 KiB)
TX errors 0 dropped 0 overruns 0 carrier 0 collisions 0
lo: flags=73<UP,LOOPBACK,RUNNING> mtu 65536
inet 127.0.0.1 netmask 255.0.0.0
inet6 ::1 prefixlen 128 scopeid 0x10<host>
loop txqueuelen 1000 (Local Loopback)
RX packets 0 bytes 0 (0.0 B)
RX errors 0 dropped 0 overruns 0 frame 0
TX packets 0 bytes 0 (0.0 B)
TX errors 0 dropped 0 overruns 0 carrier 0 collisions 0
yum list 列表
yum search 搜索
install 安装
yum install –y net-tools
remove 卸载
yum remove –y 软件名
- yum grouplist
yum groupstall
yum groupmove
yum updata(更新linux内核)
虚拟机的快照以及克隆
虚拟机的快照
- 建议在关机状态下进行
- 虚拟机——》快照——》拍摄快照(备注当前要做快照的虚拟机当前配置状态)
虚拟机的克隆
- 必须在关机状态下进行
- 建议使用快照克隆
- 建议使用链接克隆
- 克隆完后,需要进入虚拟机修改相应的参数
- 修改/etc/sysconfig/network-scripts/ifcfg-ens33,修改IP地址,并删除UUID