//
// ToolBarViewController.swift
// UIControlDemo
//
// Created by on 14/12/3.
// Copyright (c) 2014年 马大哈. All rights reserved.
//
import UIKit
class ToolBarViewController: BaseViewController ,UIAlertViewDelegate ,UIActionSheetDelegate{
var toolBar: UIToolbar?
var popOver: UIPopoverController?
override func viewDidLoad() {
super.viewDidLoad()
// Do any additional setup after loading the view, typically from a nib.
let alert1BarButton = UIBarButtonItem(title: "提示8.0之前", style: UIBarButtonItemStyle.Plain, target: self, action: "alert1Method")
let flexLeftBarButton = UIBarButtonItem(barButtonSystemItem: UIBarButtonSystemItem.FlexibleSpace, target: self, action: nil)
let alert2BarButton = UIBarButtonItem(title: "提示8.0之后", style: UIBarButtonItemStyle.Plain, target: self, action: "alert2Method")
let flexMiddleBarButton = UIBarButtonItem(barButtonSystemItem: UIBarButtonSystemItem.FlexibleSpace, target: self, action: nil)
let shareBarButton = UIBarButtonItem(barButtonSystemItem: UIBarButtonSystemItem.Action, target: self, action: "ShareMethod:")
let flexRightBarButton = UIBarButtonItem(barButtonSystemItem: UIBarButtonSystemItem.FlexibleSpace, target: self, action: nil)
let actionBarButton = UIBarButtonItem(barButtonSystemItem: UIBarButtonSystemItem.Compose, target: self, action: "ActionSheetMethod")
let itemArray = [alert1BarButton,flexLeftBarButton,alert2BarButton,flexMiddleBarButton,shareBarButton,flexRightBarButton,actionBarButton]
toolBar = UIToolbar(frame: CGRectMake(0, self.view.frame.size.height-40, self.view.frame.size.width,40))
toolBar?.items = itemArray
self.view.addSubview(toolBar!)
}
// 提示1方法
func alert1Method(){
/*
version < 8.0,可以使用提示
并且执行Delegate (要写UIAlertViewDelegate)
然后写出协议方法 func alertView(alertView: UIAlertView, clickedButtonAtIndex buttonIndex: Int) {}
*/
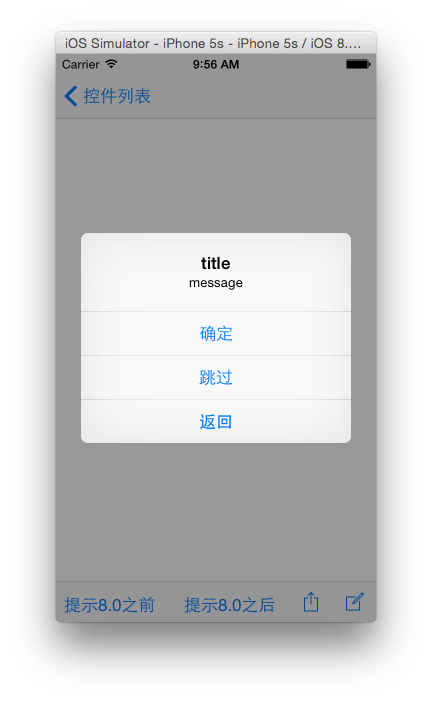
var alertView = UIAlertView(title: "title", message: "message", delegate: self, cancelButtonTitle: "返回", otherButtonTitles: "确定","跳过")
alertView.show()
}
func alertView(alertView: UIAlertView, clickedButtonAtIndex buttonIndex: Int) {
println("(buttonIndex) cancle=0,其他依次索引")
}
// 提示2方法
func alert2Method(){
/*
version >= 8.0.0 使用此提示
直接在action操作后追加执行方法即可
*/
var touchAlertController = UIAlertController(title: "点击提示", message: "alert提示", preferredStyle: UIAlertControllerStyle.Alert)
touchAlertController.addAction(UIAlertAction(title: "确认", style: UIAlertActionStyle.Default, handler: { (action: UIAlertAction!) in
println("确认,在这里直接写执行的方法即可")
}))
touchAlertController.addAction(UIAlertAction(title: "返回", style: UIAlertActionStyle.Cancel, handler: { (action: UIAlertAction!) in
println("返回")
}))
self.presentViewController(touchAlertController, animated: true, completion: nil)
}
// 分享方法 此时参数类型AnyObject相当于OC中的id(不明确具体传过来的参数是什么控件,目的在于判断是否buttton或barbuttonitem)
func ShareMethod(control:AnyObject){
// 定义一个任意类型的数组(存放string image等)
var shareContent = [AnyObject]()
shareContent.append("控件类别App测试")
shareContent.append(UIImage(named: "test_DiamondInlay_goods_0.jpg")!)//这个图片资源必须存在,否则会crash
let activityViewController = UIActivityViewController(activityItems: shareContent, applicationActivities: nil)
if UIDevice.currentDevice().userInterfaceIdiom == .Phone {
presentViewController(activityViewController, animated: true, completion: nil)
} else if UIDevice.currentDevice().userInterfaceIdiom == .Pad {
if (popOver?.popoverVisible != nil){
popOver?.dismissPopoverAnimated(true)
}else{
popOver = UIPopoverController(contentViewController: activityViewController)
if control is UIBarButtonItem {
popOver?.presentPopoverFromBarButtonItem(control as UIBarButtonItem, permittedArrowDirections: .Any, animated: true)
} else {
var button = control as UIButton
popOver?.presentPopoverFromRect(button.frame, inView: self.view, permittedArrowDirections:.Any, animated:true)
}
}
}
}
func ActionSheetMethod(){
if UIDevice.currentDevice().userInterfaceIdiom == .Phone {
//destructiveButtonTitle 显示红色字体,实际使用中可以不写这个
var actSheet = UIActionSheet(title: "title", delegate: self, cancelButtonTitle: "返回", destructiveButtonTitle: nil, otherButtonTitles: "跳过1","跳过2","跳过3")
actSheet.showInView(self.view)
}
}
func actionSheet(actionSheet: UIActionSheet, clickedButtonAtIndex buttonIndex: Int) {
println("(buttonIndex) cancle=0,其他依次索引")
}
override func didReceiveMemoryWarning() {
super.didReceiveMemoryWarning()
// Dispose of any resources that can be recreated.
}
}