刚才安装了Nginx, 命令需要去sbin目录执行,比较麻烦,设置下全局命令,就无需进入nginx的sbin目录执行nginx命令了,过程如下:
1.创建文件
vim /etc/init.d/nginx
2.把下面的代码粘贴进去
#!/bin/sh
# nginx - this script starts and stops the nginx daemin
#
# chkconfig:   - 85 15

# description:  Nginx is an HTTP(S) server, HTTP(S) reverse
#               proxy and IMAP/POP3 proxy server

# processname: nginx
# config:      /usr/local/nginx/conf/nginx.conf
# pidfile:     /usr/local/nginx/logs/nginx.pid

# Source function library.

. /etc/rc.d/init.d/functions

# Source networking configuration.

. /etc/sysconfig/network

# Check that networking is up.

[ "$NETWORKING" = "no" ] && exit 0

nginx="/usr/local/nginx/sbin/nginx"

prog=$(basename $nginx)

NGINX_CONF_FILE="/usr/local/nginx/conf/nginx.conf"

lockfile=/var/lock/subsys/nginx

start() {

    [ -x $nginx ] || exit 5

    [ -f $NGINX_CONF_FILE ] || exit 6

    echo -n $"Starting $prog: "

    daemon $nginx -c $NGINX_CONF_FILE

    retval=$?

    echo

    [ $retval -eq 0 ] && touch $lockfile

    return $retval

}


stop() {

    echo -n $"Stopping $prog: "

    killproc $prog -QUIT

    retval=$?

    echo

    [ $retval -eq 0 ] && rm -f $lockfile

    return $retval

}


restart() {

    configtest || return $?

    stop

    start

}


reload() {

    configtest || return $?

    echo -n $"Reloading $prog: "

    killproc $nginx -HUP

    RETVAL=$?

    echo

}

force_reload() {

    restart

}


configtest() {

  $nginx -t -c $NGINX_CONF_FILE

}


rh_status() {

    status $prog

}


rh_status_q() {

    rh_status >/dev/null 2>&1

}

case "$1" in

    start)

        rh_status_q && exit 0
        $1
        ;;

    stop)


        rh_status_q || exit 0
        $1
        ;;

    restart|configtest)
        $1
        ;;

    reload)
        rh_status_q || exit 7
        $1
        ;;


    force-reload)
        force_reload
        ;;
    status)
        rh_status
        ;;


    condrestart|try-restart)

        rh_status_q || exit 0
            ;;

    *)

        echo $"Usage: $0 {start|stop|status|restart|condrestart|try-restart|reload|force-reload|configtest}"
        exit 2

esac
3.进入目录
cd /etc/init.d
执行
chmod 755 /etc/init.d/nginx
chkconfig --add nginx
4. 错误处理

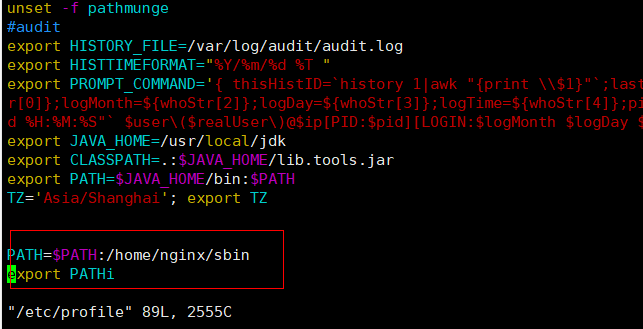
vim /etc/profile,如下所述
PATH=$PATH:/home/nginx/sbin
export PATHi

执行:source /etc/profile 让配置文件重新生效一下即可
解决办法:/home/nginx/sbin/nginx -c /home/nginx/conf/nginx.conf

已解决,命令ok
也可以使用:ln -s /home/nginx/sbin/nginx /usr/local/bin/nginx
5. 全局命令
查看版本:nginx -v
[root@ibk_187 sbin]# nginx -v
nginx version: nginx/1.13.4
检查配置是否正确:nginx -t
[root@ibk_187 sbin]# nginx -t
nginx: the configuration file /home/nginx/conf/nginx.conf syntax is ok
nginx: configuration file /home/nginx/conf/nginx.conf test is successful
关闭:nginx -s quit
nginx -s stop
启动
[root@ibk_187 sbin]# cd /home/nginx/sbin/
[root@ibk_187 sbin]# ./nginx
重启服务器,发现此错误
nginx -s reload
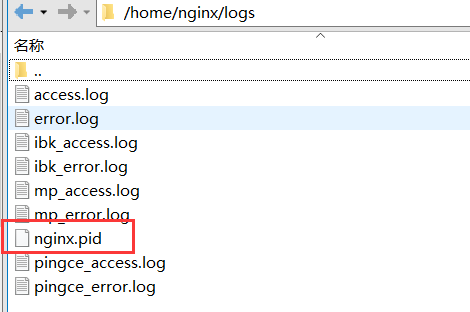
nginx: [error] open() "/home/nginx/logs/nginx.pid" failed (2: No such file or directory)
解决方法:
[root@localhost nginx]# /usr/local/nginx/sbin/nginx -c /usr/local/nginx/conf/nginx.conf
使用nginx -c的参数指定nginx.conf文件的位置
[root@localhost nginx]# cd logs/
[root@localhost logs]# ll

看nginx.pid文件已经有了。
