微软动态CRM专家罗勇 ,回复332或者20190505可方便获取本文,同时可以在第一间得到我发布的最新博文信息,follow me!
本文很多内容来自 John Towgood 撰写的 Dynamics 365 Online Authenticate with Client Credentials ,也着重参考了官方的 Use Single-Tenant server-to-server authentication ,我根据新的Azure Portal界面做了一些操作上的变化,并且改了一些代码,还使用ADAL来简化代码。
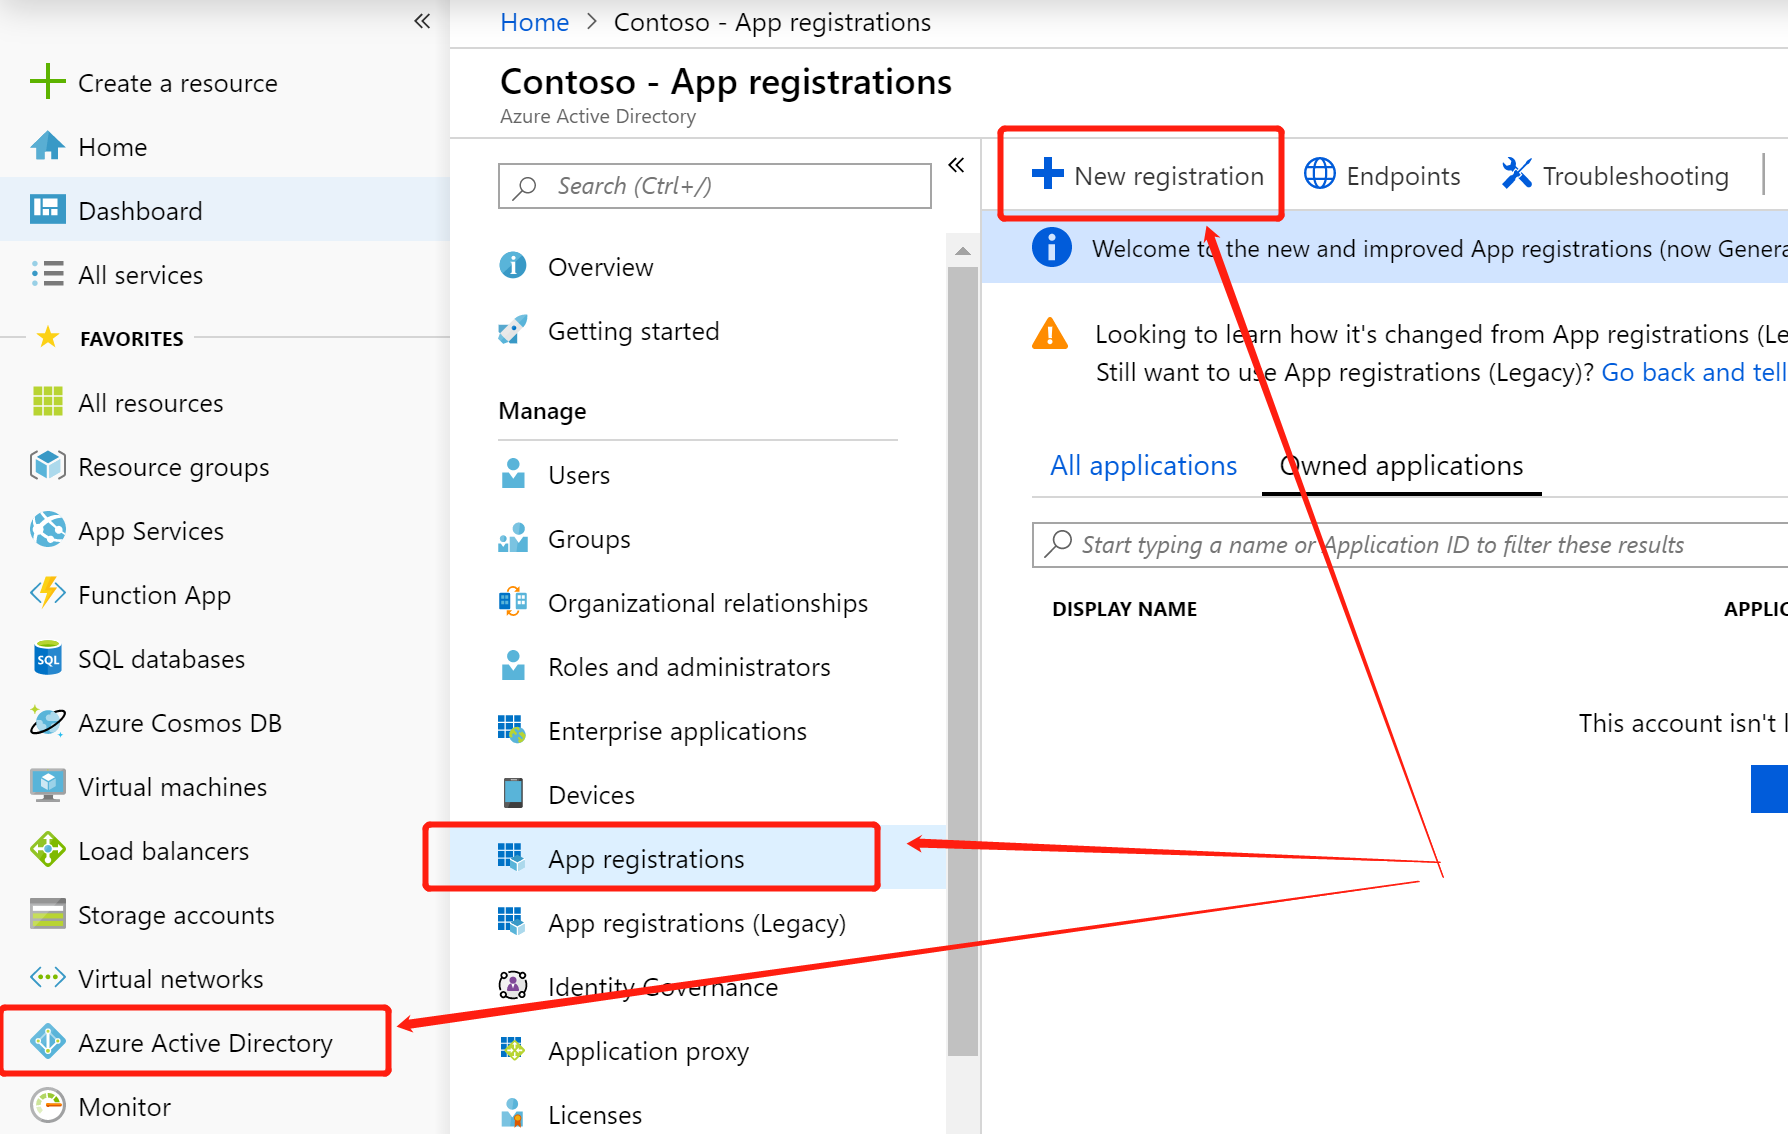
登录 https://portal.azure.com ,点击左边的 【Azure Active Directory】 ,然后再点击 【App registrations】 ,再点击【New registration】
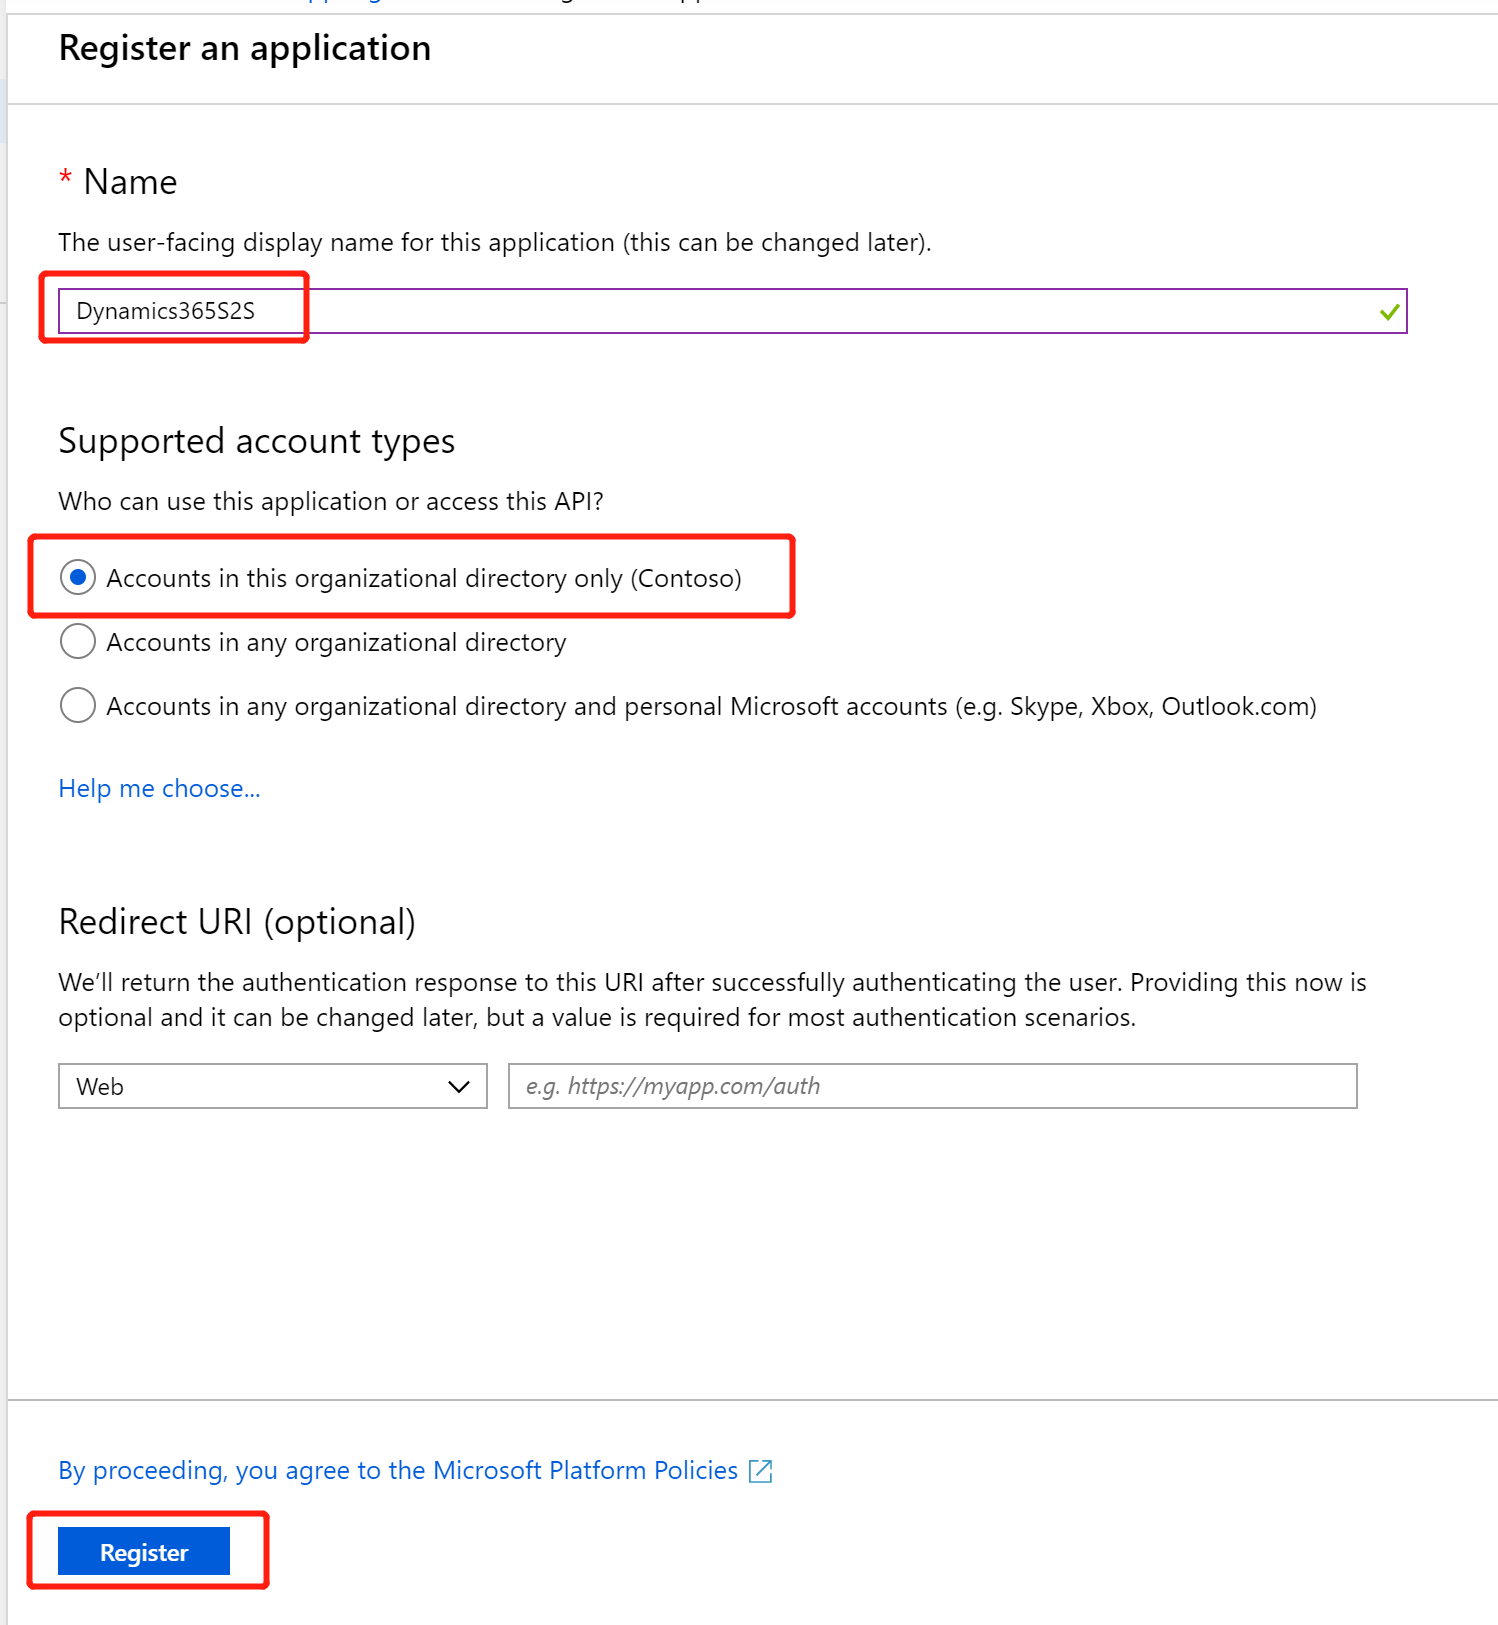
输入一个合适的名称,Supported account types保持默认的 Accounts in this organizational directory only (Orgname) 不变,点击【Register】按钮。因为Redirect URI用不上所以不输入。
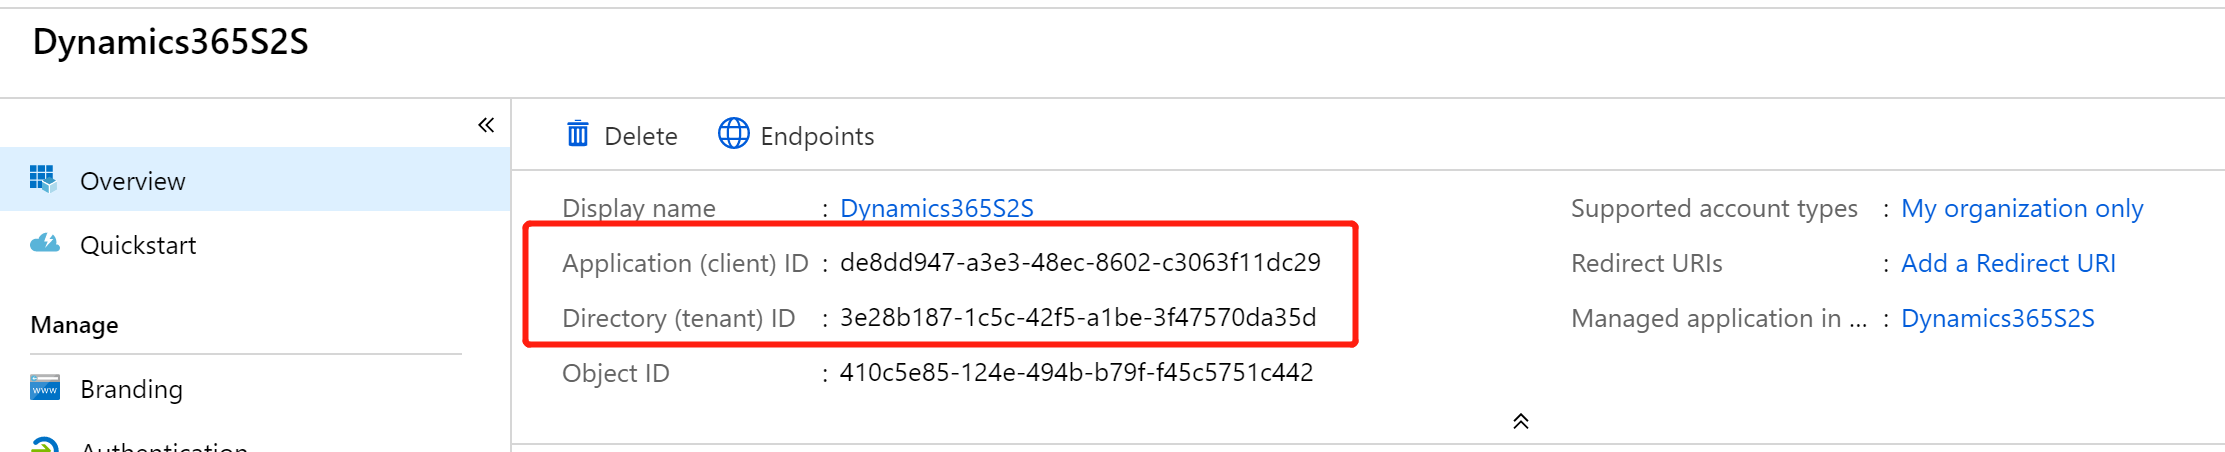
注册成功后会产生 Application (client) ID,记录下来备用,同时也记录下 Directory (tenant) ID。
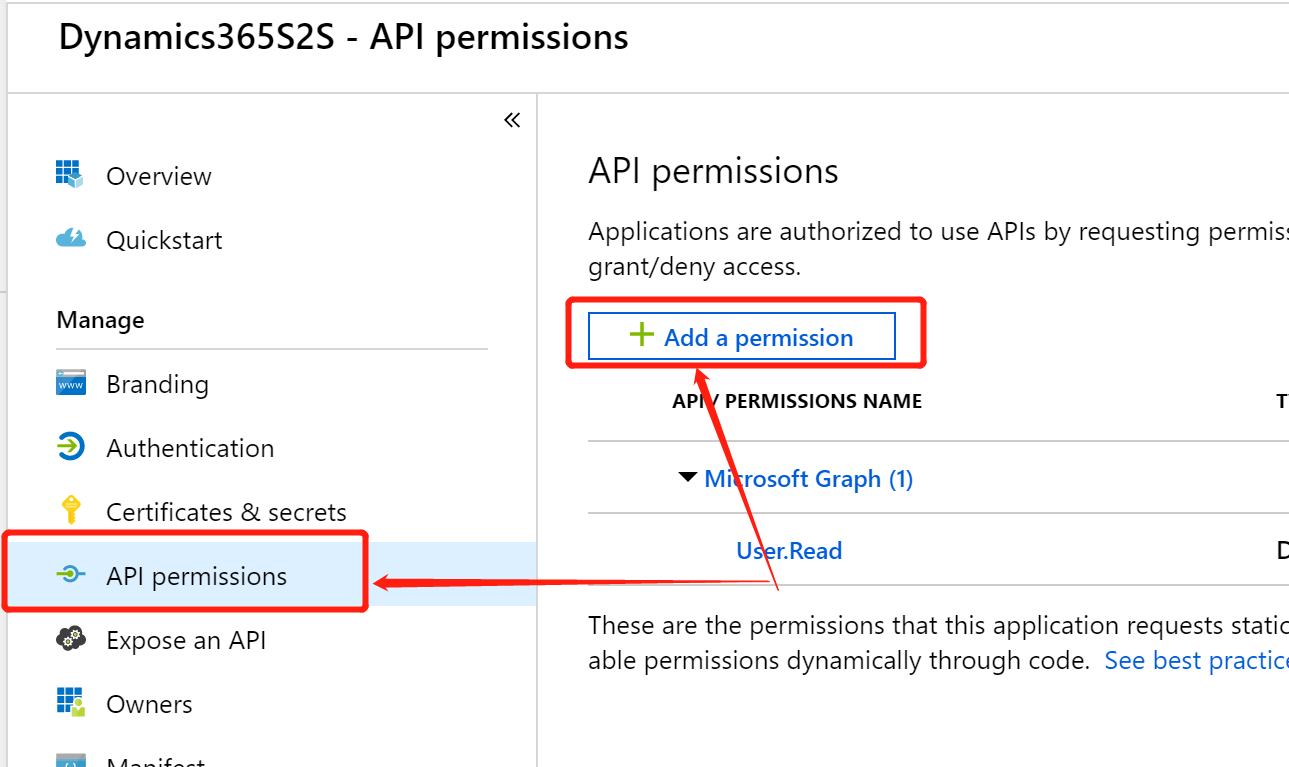
再点击左边的【API Permissions】,再点击右边的 【+ Add a permission】按钮。
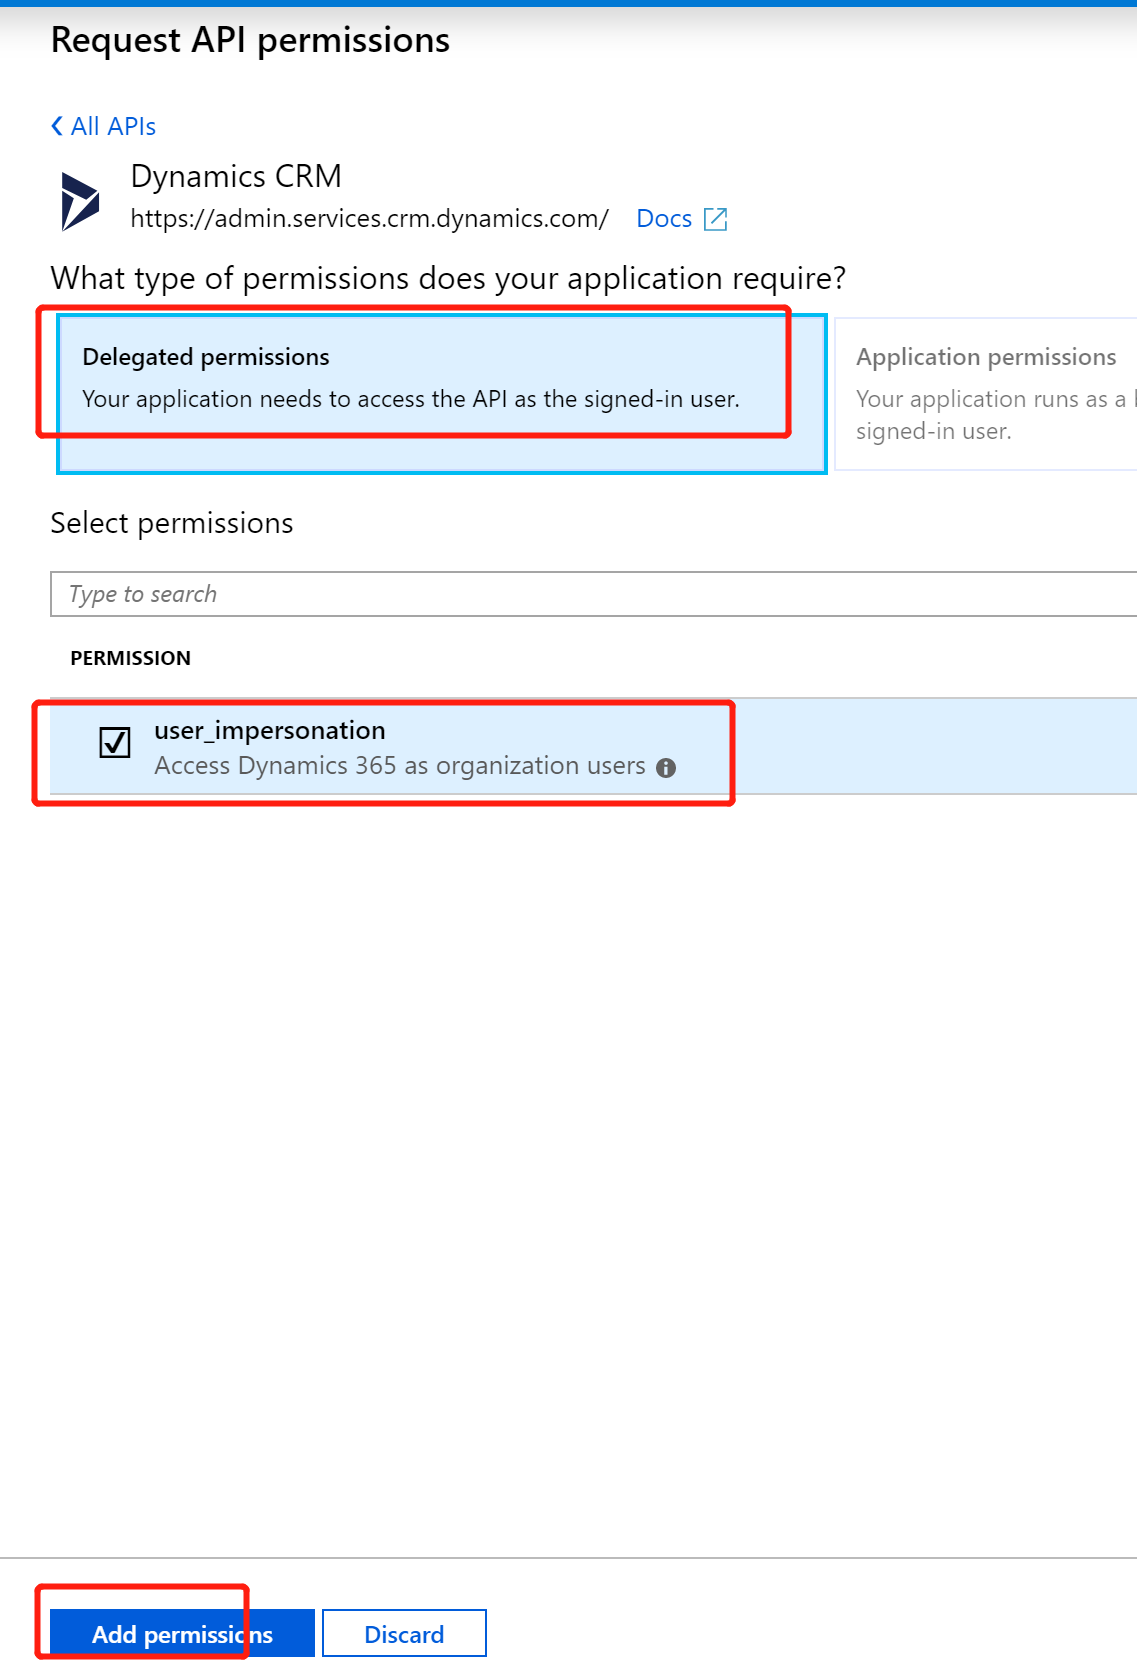
选择 【Dynamics CRM】 (也可以选择使用 PowerApps Runtime Serive 这个权限),

选择 【Delegated permissions】 > 【user_impersonation】后点击【Add permissions】按钮。
然后点击【Grant admin consent for Orgname】,
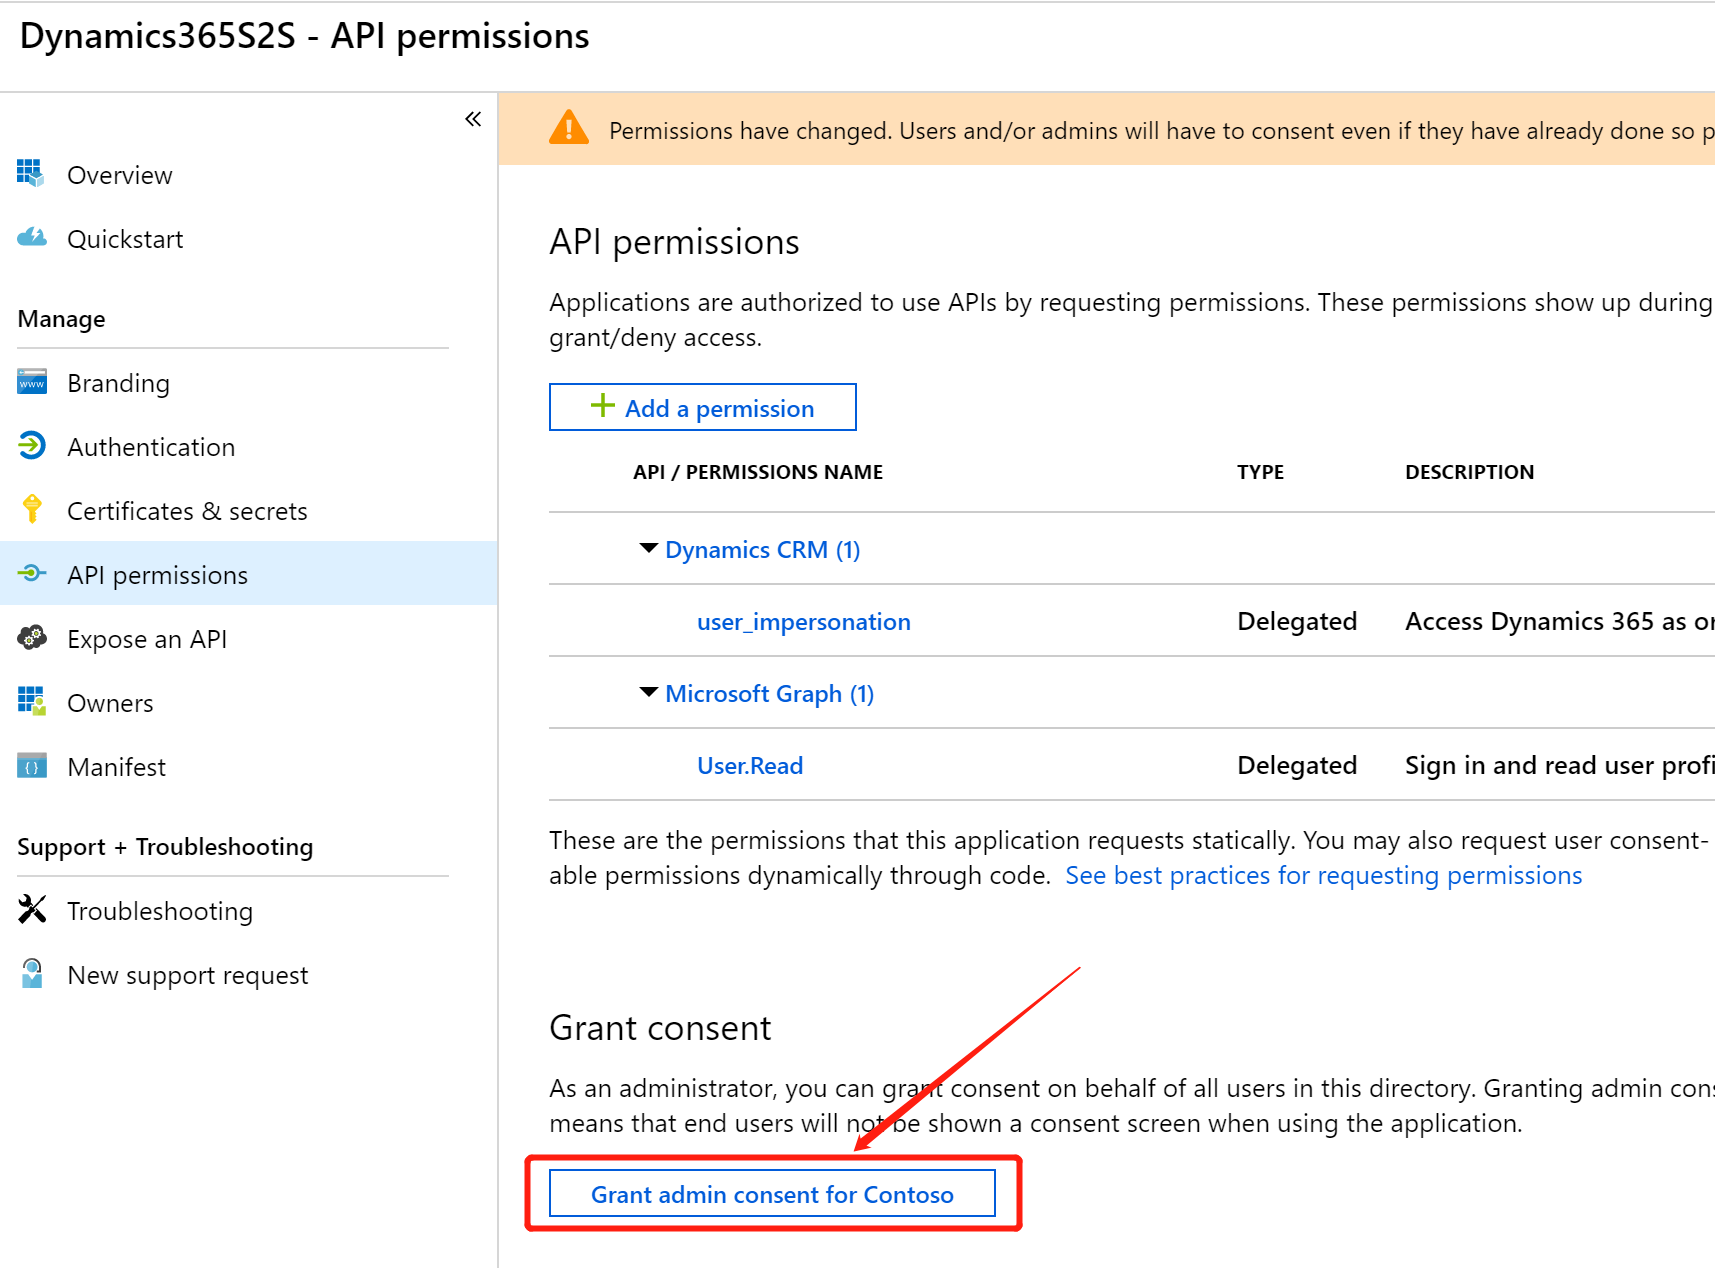
在弹出的提示中选择【Yes】。

然后点击【Certificates & secrets】 > 【+ New client secret】,输入合适的Description,在点击【Add】按钮。
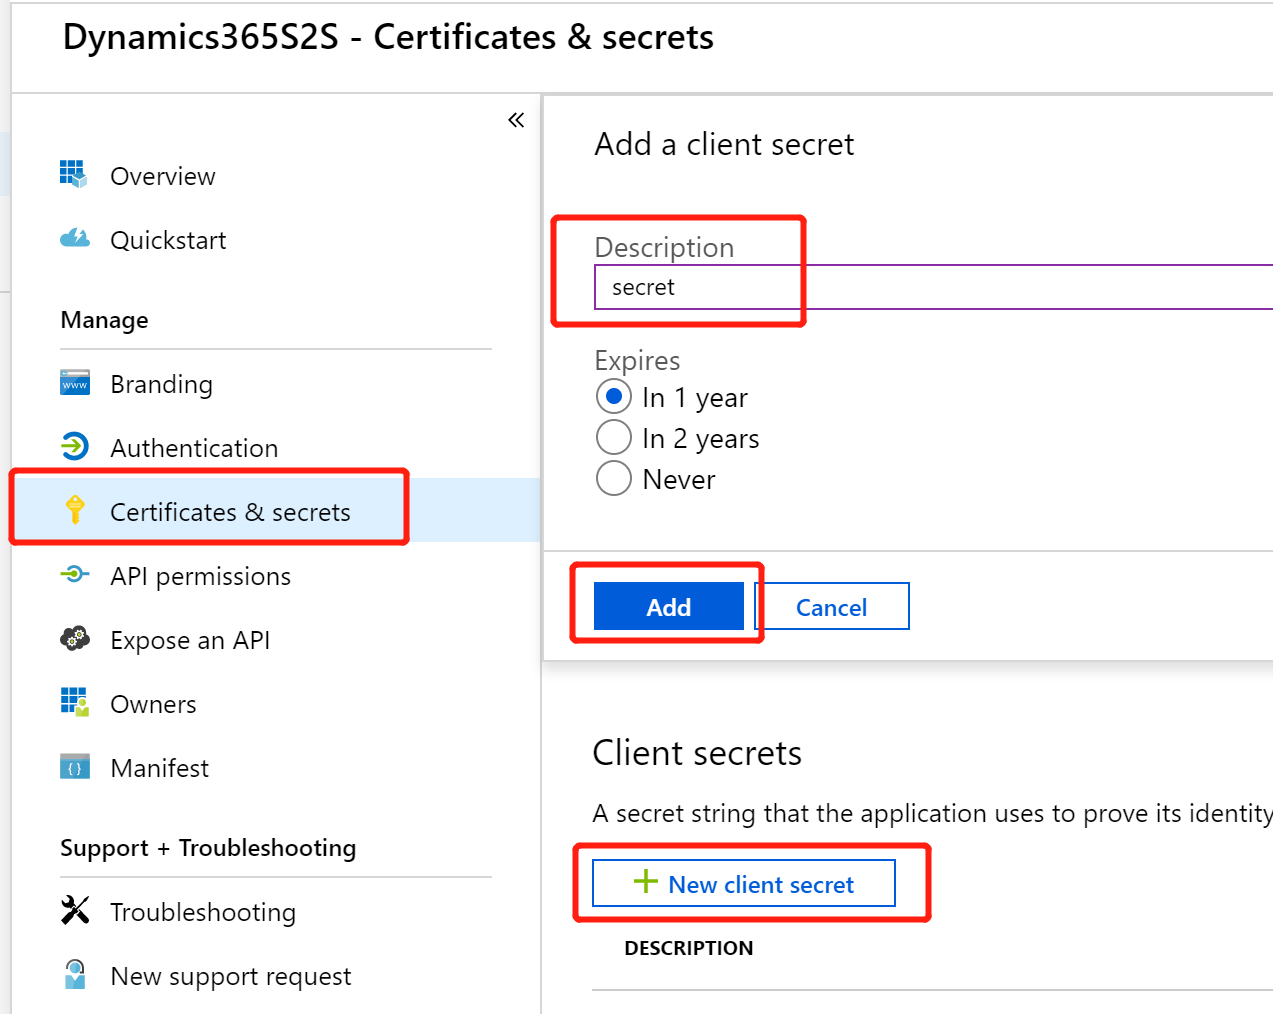
会自动生成Client secrets,这里需要点击生成的secret旁边的【copy to clipboard】图标将其复制下来,记得在这个步骤复制下来,因为离开这个页面后就看不到这个secret了。

然后需要创建 一个Azure AD 用户,点击左侧的【Azure Active Directory】> 【Users】。

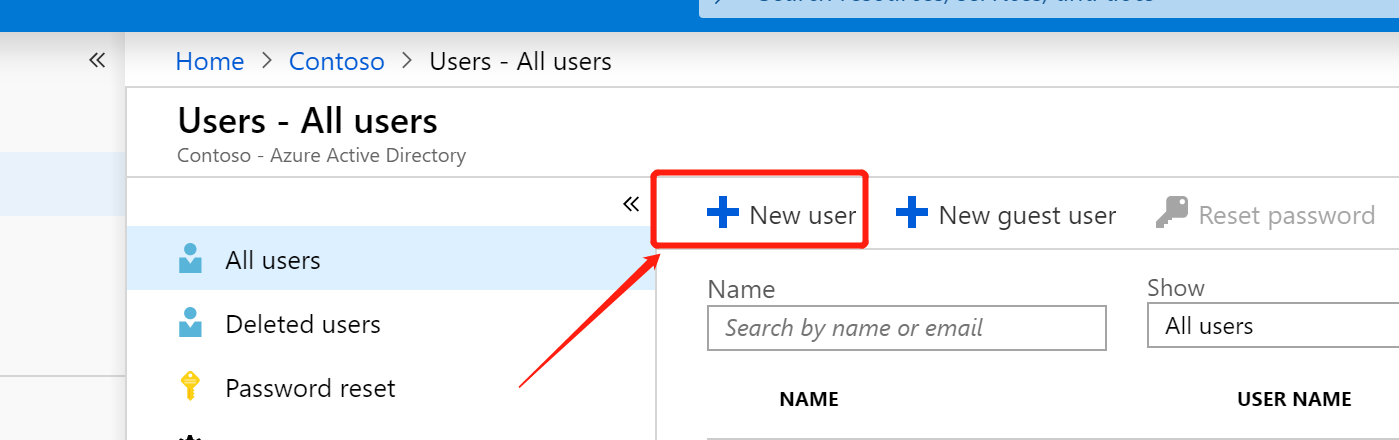
然后点击【New user】。
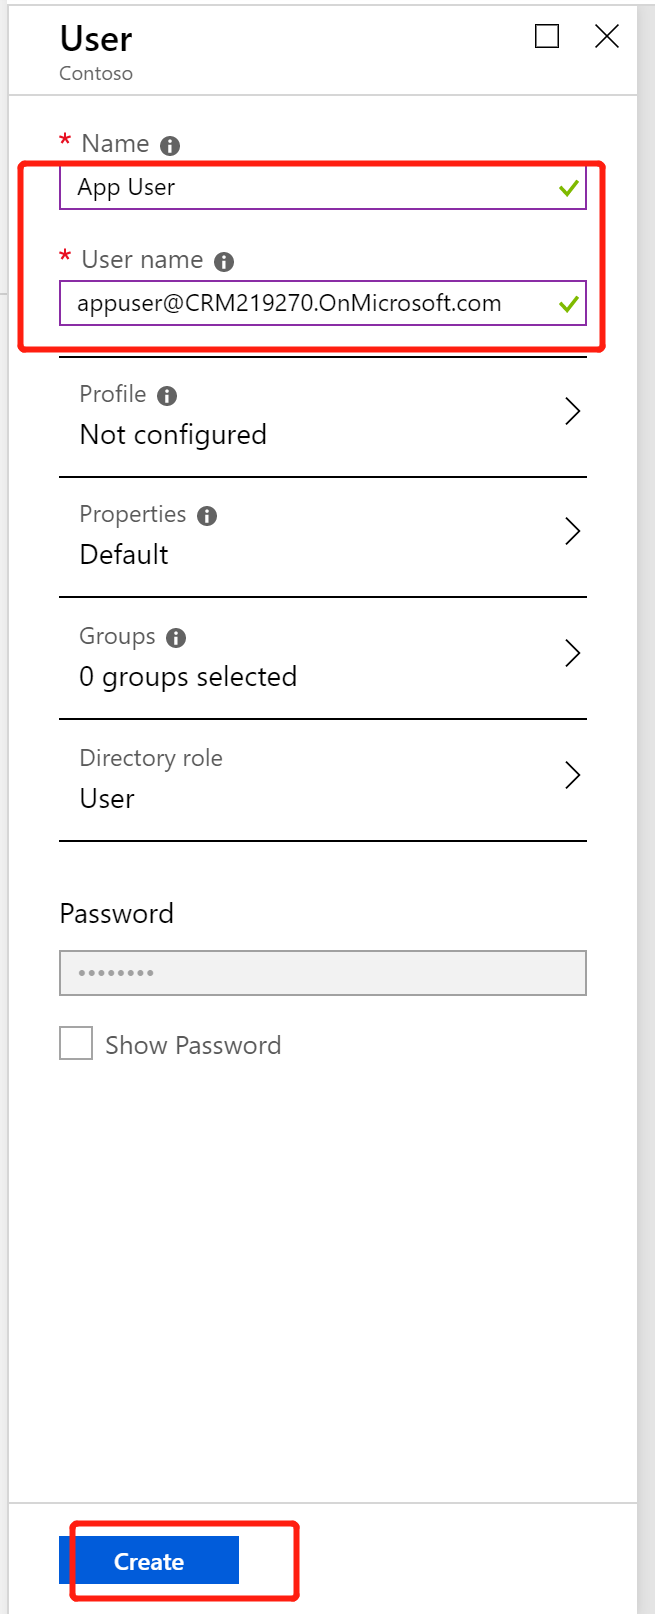
为用户输入Name,User Name,然后点击【Create】按钮。
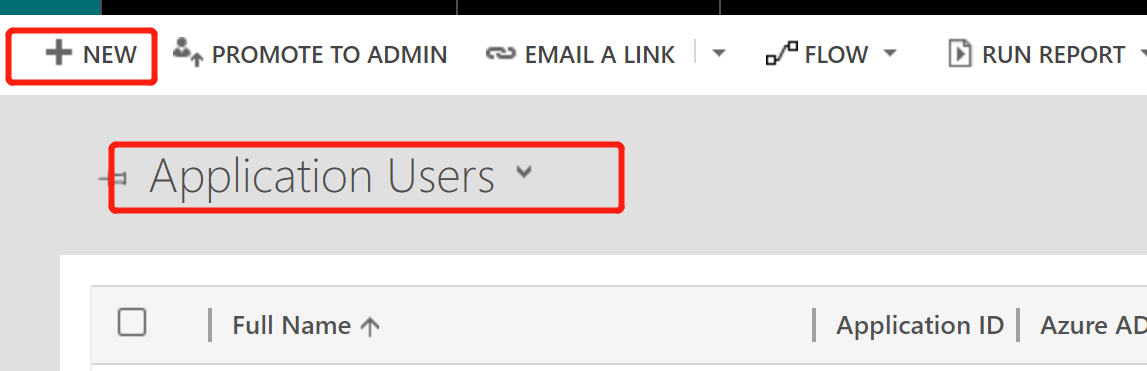
最后还需要到Dynamics 365 Customer Engagement中创建一个Application User。导航到 Settings > Security > Users,切换到【Application Users】,点击命令栏的【NEW】按钮。
记得要切换到 APPLICATION USER这个窗体,输入的内容如下,Application ID就是前面步骤记录的Application (client) ID,其余的就是前面步骤创建的Azure AD user信息。

保存后会自动填充 Application ID URI 和 Azure AD Object ID 字段的值。

当然还需要给这个用户授予至少一个角色才行,官方建议不要授予系统标准角色,我这里复制了一个标准角色授予给他。
如果用Postman来获取access token的话,如下图:

下面就是用代码如何做了,不多说,看代码:
using Newtonsoft.Json;
using System;
using System.Collections.Generic;
using System.Net.Http;
using System.Net.Http.Headers;
using System.Threading.Tasks;

namespace UsingWebAPI
{
    public class AuthenticationResponse
    {
        public string access_token { get; set; }
        public int expires_in { get; set; }
        public int expires_on { get; set; }
        public int ext_expires_in { get; set; }
        public int not_before { get; set; }
        public string resource { get; set; }
        public string token_type { get; set; }
    }
    class Program
    {

        static string resourceUrl = "https://crm219270.crm5.dynamics.com/";
        static string clientId = "de8dd947-a3e3-48ec-8602-c3063f11dc29";
        static string clientSecret = "5FsXh2*oNyLRm]Go1a9hD.[]=k54GNOZ";
        static string tenantId = "3e28b187-1c5c-42f5-a1be-3f47570da35d";
static void Main(string[] args)
        {
            GetAuthenticationResponse();
            Console.ReadKey();
        }

        private static async void GetAuthenticationResponse()
        {
            List<KeyValuePair<string, string>> vals = new List<KeyValuePair<string, string>>();

            vals.Add(new KeyValuePair<string, string>("client_id", clientId));
            vals.Add(new KeyValuePair<string, string>("resource", resourceUrl));
            vals.Add(new KeyValuePair<string, string>("grant_type", "client_credentials"));
            vals.Add(new KeyValuePair<string, string>("client_secret", clientSecret));
            string tokenUrl = string.Format("https://login.windows.net/{0}/oauth2/token", tenantId);

            using (HttpClient httpClient = new HttpClient())
            {
                httpClient.DefaultRequestHeaders.Add("Cache-Control", "no-cache");
                HttpContent content = new FormUrlEncodedContent(vals);
                HttpResponseMessage hrm = httpClient.PostAsync(tokenUrl, content).Result;
                AuthenticationResponse authenticationResponse = null;
                if (hrm.IsSuccessStatusCode)
                {
                    string data = await hrm.Content.ReadAsStringAsync();
                    authenticationResponse = JsonConvert.DeserializeObject<AuthenticationResponse>(data);
                    await DataOperations(authenticationResponse);
                }
                else
                {
                    Console.WriteLine("Error." + hrm.ReasonPhrase);
                }
            }
        }

        private static async Task DataOperations(AuthenticationResponse authResult)
        {
            using (HttpClient httpClient = new HttpClient())
            {
                httpClient.BaseAddress = new Uri(resourceUrl);
                httpClient.Timeout = new TimeSpan(0, 2, 0); //2 minutes
                httpClient.DefaultRequestHeaders.Add("OData-MaxVersion", "4.0");
                httpClient.DefaultRequestHeaders.Add("OData-Version", "4.0");
                httpClient.DefaultRequestHeaders.Accept.Add(new MediaTypeWithQualityHeaderValue("application/json"));
                httpClient.DefaultRequestHeaders.Authorization = new AuthenticationHeaderValue("Bearer", authResult.access_token);
                string content = JsonConvert.SerializeObject(new { name = "A Account", telephone1 = "123456789"});
                HttpRequestMessage request = new HttpRequestMessage(HttpMethod.Post, "api/data/v9.1/accounts");
                request.Content = new StringContent(content);
                request.Content.Headers.ContentType = MediaTypeHeaderValue.Parse("application/json");
                HttpResponseMessage response = await httpClient.SendAsync(request);
                if (response.IsSuccessStatusCode)
                {
                    Console.WriteLine("Account created.");
                }
                else
                {
                    Console.WriteLine(String.Format("Failed to create account, reason is '{0}'.", response.ReasonPhrase));
                }
            }
        }
    }
}
当然,如果使用ADAL的话,代码会更加简单点:
using Microsoft.IdentityModel.Clients.ActiveDirectory;
using Newtonsoft.Json;
using System;
using System.Net.Http;
using System.Net.Http.Headers;

namespace UsingWebAPI
{
    class Program
    {

        static string resourceUrl = "https://crm219270.crm5.dynamics.com/";
        static string clientId = "de8dd947-a3e3-48ec-8602-c3063f11dc29";
        static string clientSecret = "5FsXh2*oNyLRm]Go1a9hD.[]=k54GNOZ";
        static string tenantId = "3e28b187-1c5c-42f5-a1be-3f47570da35d";

        static void Main(string[] args)
        {
            AuthAndInvoke();
            Console.ReadKey();
        }

        private static async void AuthAndInvoke()
        {
            var credentials = new ClientCredential(clientId, clientSecret);
            var authContext = new AuthenticationContext("https://login.microsoftonline.com/" + tenantId);
            var result = await authContext.AcquireTokenAsync(resourceUrl, credentials);
            using (HttpClient httpClient = new HttpClient())
            {
                httpClient.BaseAddress = new Uri(resourceUrl);
                httpClient.Timeout = new TimeSpan(0, 2, 0); //2 minutes
                httpClient.DefaultRequestHeaders.Add("OData-MaxVersion", "4.0");
                httpClient.DefaultRequestHeaders.Add("OData-Version", "4.0");
                httpClient.DefaultRequestHeaders.Accept.Add(new MediaTypeWithQualityHeaderValue("application/json"));
                httpClient.DefaultRequestHeaders.Authorization = new AuthenticationHeaderValue("Bearer", result.AccessToken);
                string content = JsonConvert.SerializeObject(new { name = "A Account", telephone1 = "123456789" });
                HttpRequestMessage request = new HttpRequestMessage(HttpMethod.Post, "api/data/v9.1/accounts");
                request.Content = new StringContent(content);
                request.Content.Headers.ContentType = MediaTypeHeaderValue.Parse("application/json");
                HttpResponseMessage response = await httpClient.SendAsync(request);
                if (response.IsSuccessStatusCode)
                {
                    Console.WriteLine("Account created.");
                }
                else
                {
                    Console.WriteLine(String.Format("Failed to create account, reason is '{0}'.", response.ReasonPhrase));
                }
            }
        }
    }
}
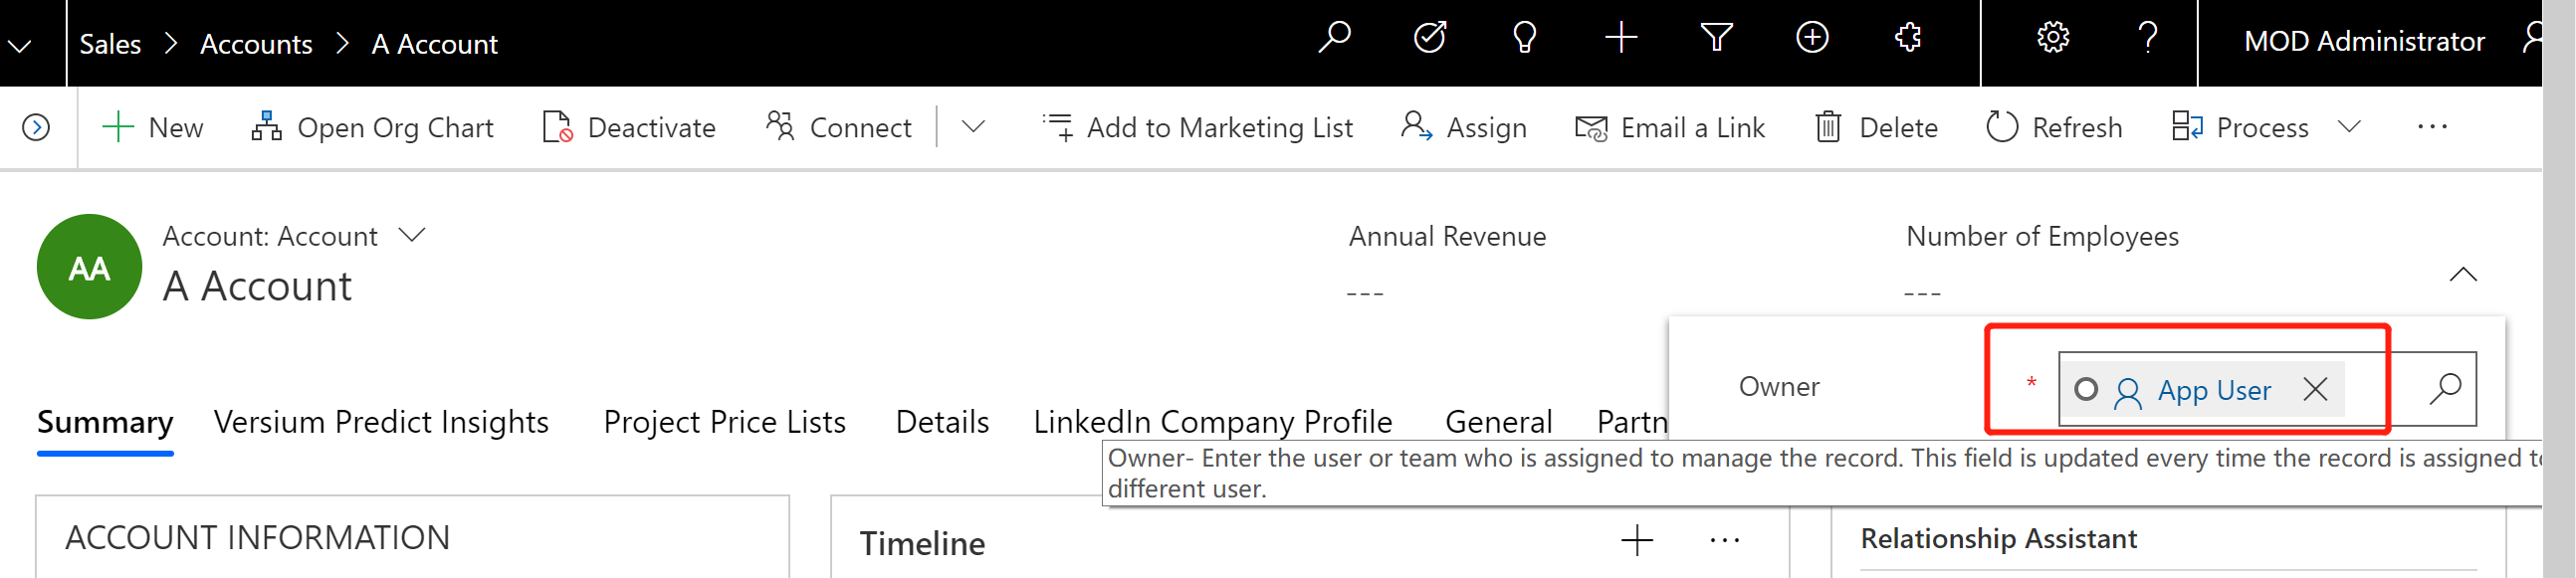
可以看到代码创建的account的owner是我们前面步骤的Application User,是以该用户身份在运行的。