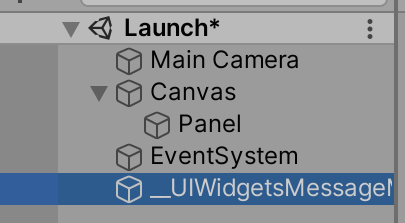
安装参照github的README。UIWidgets相当于Flutter的一个Unity实现(后面表示UIWidgets和UGUI区别时直接称"Flutter"),是把承载的所有UI组件绘制成一张RawImage,从而大大减少DrawCall和耗电量,甚至达到原生应用的效果。
无AndroidFlutter基础, 不看原理先看用法
展示一个文字
using Unity.UIWidgets.engine;
using Unity.UIWidgets.painting;
using Unity.UIWidgets.widgets;
using UnityEngine;

public class TestPanel : UIWidgetsPanel
{
    protected override Widget createWidget()
    {
        Text text = new Text(
            data: "Hello world",
            style: new TextStyle(
                color: Unity.UIWidgets.ui.Color.white,
                fontSize: 20,
                fontStyle: Unity.UIWidgets.ui.FontStyle.italic
                )
            );

        return text;
    }
}

给刚才的文字添加响应
    protected override Widget createWidget()
    {
        // Text text = ...

        GestureDetector gestureDetector = new GestureDetector(
            child: text,
            onTap: () =>
                {
                    Debug.Log("Rua!");
                }
            );

        return gestureDetector;
    }
运行时会在当前Scene下面自动挂载一个节点来处理响应

Flutter中的点击事件叫做Tap, 和UGUI习惯的Click不同; 因为采用代码生成控件的模式, 与UGUI的XXX.onClick += () => {}方式也不同
为控件添加状态State
刚刚创建的一个"Hello world"的文本控件是无状态的, 即不能修改(UnityEngine.UI.Text.text = "XXX";), 如果需要修改, 在Flutter中需要声明这个控件是有状态的
public class TestPanel : UIWidgetsPanel
{
    protected override Widget createWidget() => new Counter();

    class Counter : StatefulWidget
    {
        public override State createState() => new CounterState();
    }

    class CounterState : State<Counter>
    {
        //目前这里使用Field或Property都可以
        private int m_ClickCount = 0;

        public override Widget build(BuildContext context)
        {
            Text text = new Text(
                data: "Hello world " + m_ClickCount.ToString(),
                style: new TextStyle(
                    color: Unity.UIWidgets.ui.Color.white,
                    fontSize: 20,
                    fontStyle: Unity.UIWidgets.ui.FontStyle.italic
                    )
                );

            GestureDetector gestureDetector = new GestureDetector(
                child: text,
                onTap: () =>
                {
                    Debug.Log("Rua!");
                    //方法1: 直接修改值后手动通知UI刷新
                    //m_ClickCount++;
                    //(context as StatefulElement).markNeedsBuild();
                    //方法2: 使用封装过的函数传值
                    setState(
                        () =>
                        {
                            m_ClickCount++;
                        }
                        );
                }
                );

            return gestureDetector;
        }
    }
}
参照上面StatefulWidget的写法, 无状态可以写成这样
public class TestPanel : UIWidgetsPanel
{
    protected override Widget createWidget() => new Counter1();

    class Counter1 : StatelessWidget
    {
        public override Widget build(BuildContext context)
        {
            Text text = new Text(
                data: "Hello world",
                style: new TextStyle(
                    color: Unity.UIWidgets.ui.Color.white,
                    fontSize: 20,
                    fontStyle: Unity.UIWidgets.ui.FontStyle.italic
                    )
                );

            GestureDetector gestureDetector = new GestureDetector(
                child: text,
                onTap: () =>
                {
                    Debug.Log("Rua!");
                }
                );

            return gestureDetector;
        }
    }
}