问题描述
在使用Java的启动Azure VM的过程中,遇见了com.azure.core.management.exception.ManagementException: Status code 404错误,纠起原因就是订阅无法发现。详细的错误为:
|
Selected subscription: xxxxxxxx-xxxx-xxxx-xxxx-xxxxxxxxxxxx com.azure.core.management.exception.ManagementException: Status code 404, "{"error":{"code":"SubscriptionNotFound","message":"The subscription 'xxxxxxxx-xxxx-xxxx-xxxx-xxxxxxxxxxxx' could not be found."}}": The subscription 'xxxxxxxx-xxxx-xxxx-xxxx-xxxxxxxxxxxx' could not be found. sun.reflect.NativeConstructorAccessorImpl.newInstance(NativeConstructorAccessorImpl.java:62) |
以上问题主要时在使用Java代码访问Azure资源的时候出现的权限问题有关。所以解决的办法是需要先让应用程序有权限访问到Azure VM资源,这里使用的是AAD认证。在代码中使用ApplicationTokenCredentials方式认证。
AzureTokenCredentials credentials = new ApplicationTokenCredentials("clientid", "tenantid", "clientsecret", AzureEnvironment.AZURE_CHINA);
Azure azure = Azure.authenticate(credentials).withSubscription("subid");
VirtualMachine testvm = azure.virtualMachines().getById("/subscriptions/<your subscription id>/resourceGroups/<group name>/providers/Microsoft.Compute/virtualMachines/<vm name>");
- 通过AAD中注册应用的client id, tenantid,secret获取token认证
- 输入订阅号登录到Azure
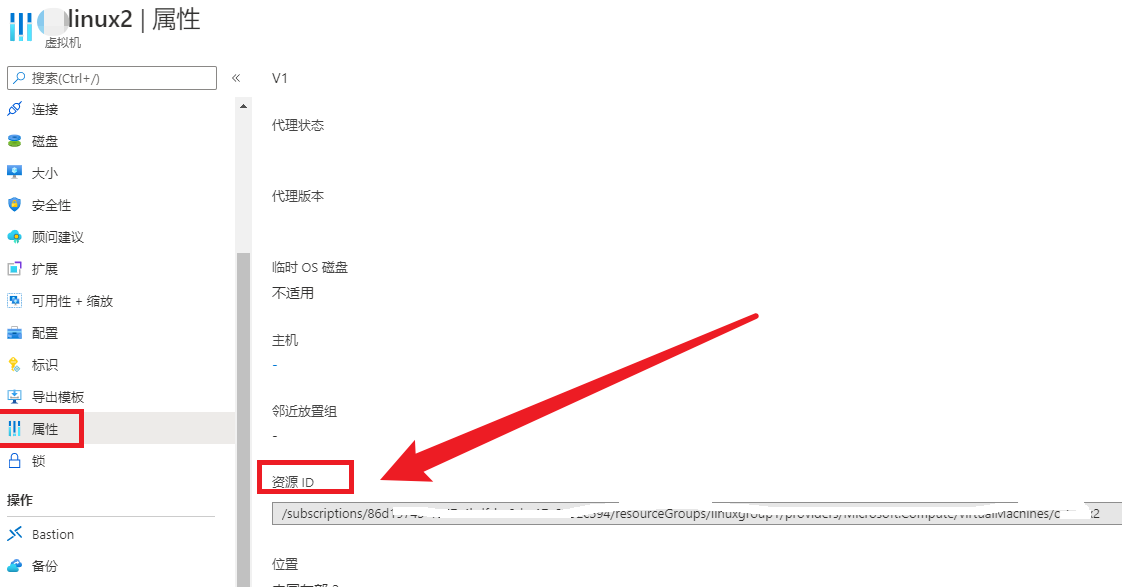
- 在Azure VM门户中获取到该VM的属性ID
(获取以上值的方式见附录一)
完整的代码内容
package org.example;

import com.microsoft.azure.AzureEnvironment;
import com.microsoft.azure.credentials.ApplicationTokenCredentials;
import com.microsoft.azure.credentials.AzureTokenCredentials;
import com.microsoft.azure.management.Azure;
import com.microsoft.azure.management.compute.*;


/**s
* Hello world!
*
*/
public class App
{
    public static void main( String[] args )

    {
        AzureTokenCredentials credentials = new ApplicationTokenCredentials("clientid", "tenantid", "clientsecret", AzureEnvironment.AZURE_CHINA);
        Azure azure=null;

        azure=Azure.authenticate(credentials).withSubscription("subid");

        VirtualMachine testvm = azure.virtualMachines().getById("vmresourceid");
        testvm.start();

        System.out.println( "Hello World!" );
    }
}
POM.XML文件内容(使用的依赖包:com.microsoft.azure):
<?xml version="1.0" encoding="UTF-8"?>

<project xmlns="http://maven.apache.org/POM/4.0.0" xmlns:xsi="http://www.w3.org/2001/XMLSchema-instance"
  xsi:schemaLocation="http://maven.apache.org/POM/4.0.0 http://maven.apache.org/xsd/maven-4.0.0.xsd">
  <modelVersion>4.0.0</modelVersion>

  <groupId>org.example</groupId>
  <artifactId>getvm</artifactId>
  <version>1.0-SNAPSHOT</version>

  <name>getvm</name>
  <!-- FIXME change it to the project's website -->
  <url>http://www.example.com</url>

  <properties>
    <project.build.sourceEncoding>UTF-8</project.build.sourceEncoding>
    <maven.compiler.source>1.7</maven.compiler.source>
    <maven.compiler.target>1.7</maven.compiler.target>
  </properties>

  <dependencies>
    <dependency>
      <groupId>junit</groupId>
      <artifactId>junit</artifactId>
      <version>4.11</version>
      <scope>test</scope>
    </dependency>
    <dependency>
      <groupId>com.microsoft.azure</groupId>
      <artifactId>azure</artifactId>
      <version>1.37.1</version>
    </dependency>
  </dependencies>

  <build>
    <pluginManagement><!-- lock down plugins versions to avoid using Maven defaults (may be moved to parent pom) -->
      <plugins>
        <!-- clean lifecycle, see https://maven.apache.org/ref/current/maven-core/lifecycles.html#clean_Lifecycle -->
        <plugin>
          <artifactId>maven-clean-plugin</artifactId>
          <version>3.1.0</version>
        </plugin>
        <!-- default lifecycle, jar packaging: see https://maven.apache.org/ref/current/maven-core/default-bindings.html#Plugin_bindings_for_jar_packaging -->
        <plugin>
          <artifactId>maven-resources-plugin</artifactId>
          <version>3.0.2</version>
        </plugin>
        <plugin>
          <artifactId>maven-compiler-plugin</artifactId>
          <version>3.8.0</version>
        </plugin>
        <plugin>
          <artifactId>maven-surefire-plugin</artifactId>
          <version>2.22.1</version>
        </plugin>
        <plugin>
          <artifactId>maven-jar-plugin</artifactId>
          <version>3.0.2</version>
        </plugin>
        <plugin>
          <artifactId>maven-install-plugin</artifactId>
          <version>2.5.2</version>
        </plugin>
        <plugin>
          <artifactId>maven-deploy-plugin</artifactId>
          <version>2.8.2</version>
        </plugin>
        <!-- site lifecycle, see https://maven.apache.org/ref/current/maven-core/lifecycles.html#site_Lifecycle -->
        <plugin>
          <artifactId>maven-site-plugin</artifactId>
          <version>3.7.1</version>
        </plugin>
        <plugin>
          <artifactId>maven-project-info-reports-plugin</artifactId>
          <version>3.0.0</version>
        </plugin>
      </plugins>
    </pluginManagement>
  </build>
</project>
附录一:如何获取代码中需要的配置值:
一:获取 AAD中应用的Client ID, Tenant ID
- 登录Azure 门户,进入AAD页面(https://portal.azure.cn/#blade/Microsoft_AAD_IAM/ActiveDirectoryMenuBlade/Overview)
- 选择“App registrations”,如已经有App,则直接选中即可进入下一步。否则点击“Add Application”按钮,注册一个新应用,名称唯一即可。如mykeyvaultapp01,,
- 创建完成后,进入应用Overview页面,复制保存(Client ID, Tenant ID, Object ID)值,以备后续使用。

二:获取AAD中应用的Secret
- 在AAD应用页面,进入“证书和密码”页面,点击“新客户端密码”按钮,添加新的Secret(因密码值只能在最开始创建时可见,所以必须在离开页面前复制它)

三:获取Azure VM的Resource ID

参考文档
使用 Java 创建和管理 Azure 中的 Windows VM: https://docs.azure.cn/zh-cn/virtual-machines/windows/java