UICollectionView的布局是可以自己定义的,在这篇博客中先在上篇博客的基础上进行扩充,我们先使用UICollectionViewFlowLayout,然后好好的介绍一下UICollectionView的一些回调方法,主要包括UICollectionViewDataSource,UICollectionViewDelegateFlowLayout,UICollectionViewDelegate相关回调方法,并通过实例来介绍每个回调的用法。并且给每个Section添加定制的Header和Footer,好废话少说进入今天的正题。
一、Demo总览
下图是本篇博客中Demo的最终运行效果,下面是我们要做的事情:
-
1. 给每个Section添加自定义的重用Header和Footer
-
2.调整第一个Section的上左下右的边距(UIEdgeInsets)
-
3.给UICollectioinView设置多选
-
4.处理Cell的高亮事件
-
5.处理Cell的选中事件
-
6.调整Cell的上下左右边距
-
7.对Cell进行编辑
二、UICollectionViewDataSource介绍
1、在UICollectionViewDataSource回调方法中有一个返回Section数量的方法,如下所示,该方法和UITableView中的用法一致。在这儿我们返回5个Section,如下所示:
1 #pragma mark <UICollectionViewDataSource>
2
3 /**
4  * 返回Section的个数
5  */
6 - (NSInteger)numberOfSectionsInCollectionView: (UICollectionView *)collectionView {
7     return 5;
8 }
2、在UICollectionViewDataSource的回调方法中,还有一个是返回每个Section中Cell的数量的方法,在这我们返回30个Cell, 如下代码所示:
1 /**
2  * 返回每个Section中Cell的个数
3  */
4 - (NSInteger)collectionView: (UICollectionView *)collectionView
5      numberOfItemsInSection: (NSInteger)section {
6
7     return 30;
8 }
3、在UICollectionViewDataSource还有一个必须实现的方法, 就是选择我们CollectionView中所使用的Cell, 在这里我们所使用的Cell是在Storyboard上实现的,所以不需要在我们的代码中注册Cell, 之间使用重用标示符就可以获取Cell的对象,如下所示:
 1 /**
 2  * 返回Cell种类
 3  */
 4 - (UICollectionViewCell *)collectionView: (UICollectionView *)collectionView
 5                   cellForItemAtIndexPath: (NSIndexPath *)indexPath {
 6
 7     //通过Cell重用标示符来获取Cell
 8     CollectionViewCell *cell = [collectionView dequeueReusableCellWithReuseIdentifier: reuseIdentifier
 9                                                                          forIndexPath: indexPath];
10
11     return cell;
12 }
4、在UICollectionViewDataSource方法中有一个可选的方法就是为我们的Section添加Supplementary View(追加视图),下面是添Supplementary View(追加视图)的步骤。在UICollectionView中的Section中我们可以为其增加Header View和Footer View, 也就是官方文档上提到的Supplementary View(追加视图)。追加视图是可以重用的,也就是UICollectionReusableView。我们可以创建两个UICollectionReusableView的子类,一个是Header View, 另一个是Footer View。
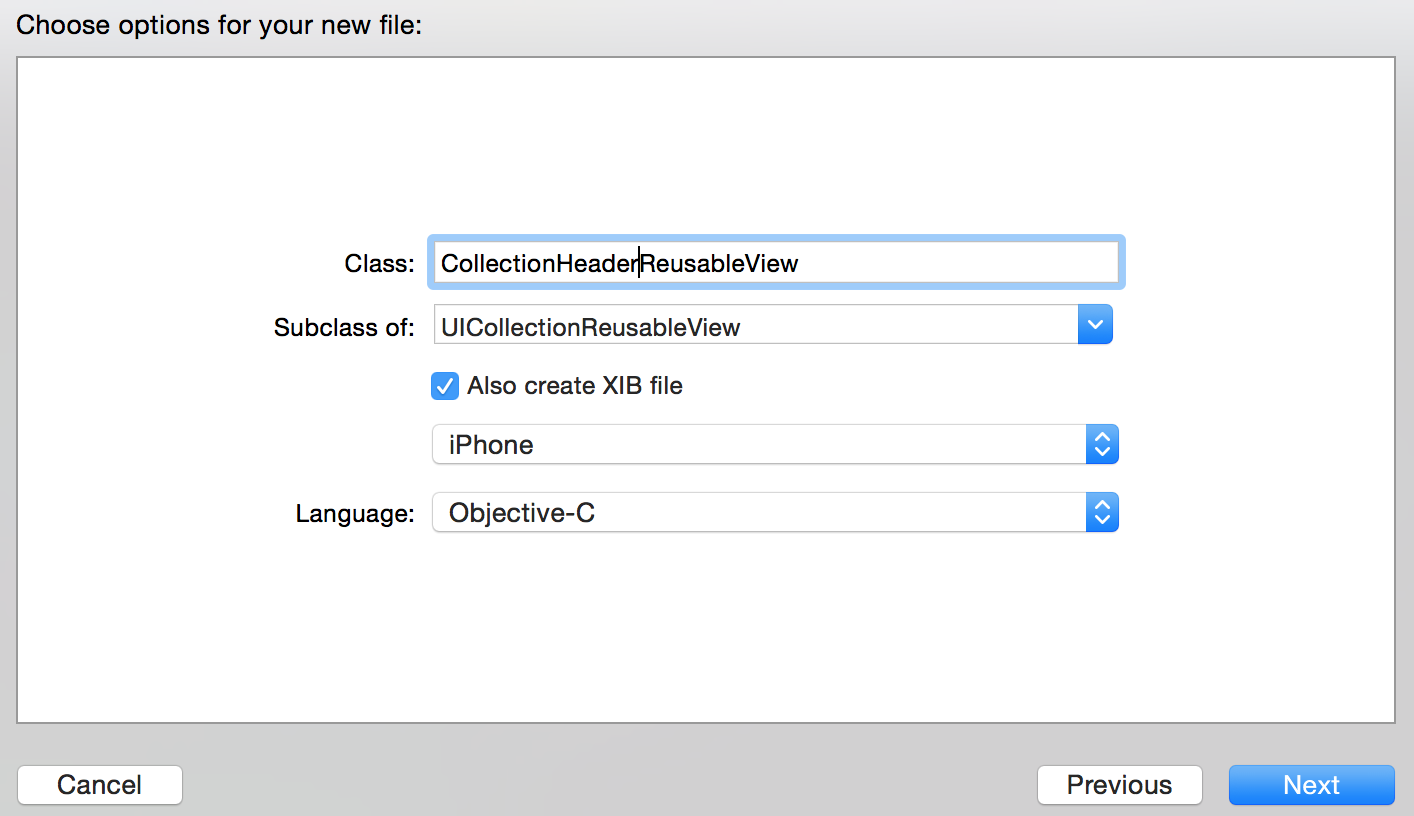
(1)创建UICollectionReusableView
追加视图可以在Storyboard上添加,然后设置重用标示符,在代码中使用即可。这里我们是从xib文件来加载的Supplementary View, 先创建两个UICollectionReusableView子类,在创建该子类的同时创建相应的xib文件,如下所示:
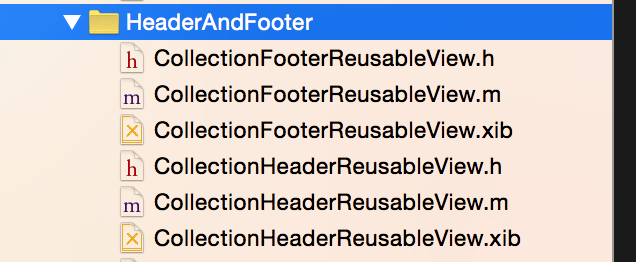
创建Header View和Footer View的UICollectionReusableView,创建后的文件目录如下:
(2) 因为我们是从xib文件中加载的UICollectionReusableView,所以需要在相应的UICollectionView上进行注册。如果你是使用的Storyboard, 只需要在Storyboard中指定重用标示符即可。下面的代码就是在ViewDidLoad中调用注册UICollectionReusableView的方法。
 1 /**
 2  * 注册Header和FooterView
 3  * 便于在UICollectionViewDataSource中使用
 4  */
 5 - (void) registerHeaderAndFooterView {
 6     //注册headerView
 7     //获取含有UICollectionReusableView的Nib文件。
 8     UINib *headerNib = [UINib nibWithNibName: @"CollectionHeaderReusableView"
 9                                       bundle: [NSBundle mainBundle]];
10
11     //注册重用View
12     [self.collectionView registerNib: headerNib
13           forSupplementaryViewOfKind: UICollectionElementKindSectionHeader
14                  withReuseIdentifier: @"CollectionHeaderReusableView"];
15
16
17     //注册FooterView
18     UINib *footerNib = [UINib nibWithNibName: @"CollectionFooterReusableView"
19                                       bundle:[ NSBundle mainBundle]];
20
21     [self.collectionView registerNib: footerNib
22           forSupplementaryViewOfKind: UICollectionElementKindSectionFooter
23                  withReuseIdentifier: @"CollectionFooterReusableView"];
24
25 }
(3)在UICollectionViewDataSource中的设置Supplementary View的方法中通过Header View和Footer View的重用标示符来为我们的Section设置Supplementary View,具体代码如下所示:
 1 /**
 2  * 设置Setion的Header和Footer(Supplementary View)
 3  */
 4 - (UICollectionReusableView *)collectionView: (UICollectionView *)collectionView
 5            viewForSupplementaryElementOfKind: (NSString *)kind
 6                                  atIndexPath: (NSIndexPath *)indexPath{
 7
 8     //设置SectionHeader
 9     if ([kind isEqualToString: UICollectionElementKindSectionHeader]) {
10
11         UICollectionReusableView *view = [collectionView dequeueReusableSupplementaryViewOfKind:UICollectionElementKindSectionHeader withReuseIdentifier:@"CollectionHeaderReusableView" forIndexPath:indexPath];
12
13         return view;
14     }
15
16     //设置SectionFooter
17     UICollectionReusableView *view = [collectionView dequeueReusableSupplementaryViewOfKind:UICollectionElementKindSectionFooter withReuseIdentifier:@"CollectionFooterReusableView" forIndexPath:indexPath];
18     return view;
19
20 }
UICollectionViewDataSource中的四个方法在上面都进行了实现,UICollectionViewDataSource主要是负责加载数据源的,包括Section的个数,每个Section中Cell的个数,每个Section中Supplementary View的种类。
三.UICollectionViewDelegateFlowLayout回调实现
UICollectionViewDelegateFlowLayout主要是负责显示的,比如Secion的大小、边距,Cell的大小边距,headerView的大小已经FooterView的大小,都是在UICollectionViewDelegateFlowLayout的相应协议的方法来实现的。接下来详细的介绍一下UICollectionViewDelegateFlowLayout协议中的方法。
1.同一个Section中同一种Cell(通过同一个Cell重用标示符获取的对象)可以有不同的尺寸,下面的代码是给Cell定制尺寸。代码的具体意思是第一个Section中的所有Cell的尺寸是(50,50)。 其余的时(60,60)。
 1 #pragma mark <UICollectionViewDelegateFlowLayout>
 2 /**
 3  * 改变Cell的尺寸
 4  */
 5 - (CGSize)collectionView: (UICollectionView *)collectionView
 6                   layout: (UICollectionViewLayout*)collectionViewLayout
 7   sizeForItemAtIndexPath: (NSIndexPath *)indexPath{
 8
 9     if (indexPath.section == 0) {
10         return CGSizeMake(50, 50);
11     }
12
13     return CGSizeMake(60, 60);
14 }
2.改变Section的上下左右边距--UIEdgeInsetsMake(上, 左, 下, 右),逆时针旋转。第一个Section的上左下右的边距都是50, 其余的Section上左下右的边距是0。具体实现看如下代码:
 1 /**
 2  * Section的上下左右边距--UIEdgeInsetsMake(上, 左, 下, 右);逆时针
 3  */
 4 - (UIEdgeInsets)collectionView: (UICollectionView *)collectionView
 5                         layout: (UICollectionViewLayout*)collectionViewLayout
 6         insetForSectionAtIndex: (NSInteger)section{
 7
 8     if (section == 0) {
 9         return UIEdgeInsetsMake(50, 50, 50, 50);
10     }
11     return UIEdgeInsetsMake(0, 0, 0, 0);
12 }
3.设置每个Cell的上下边距的回调如下所示,第一个Section的Cell上下边距是5.0f, 其余的为20.0f。
 1 /**
 2  * Section中每个Cell的上下边距
 3  */
 4 - (CGFloat)collectionView: (UICollectionView *)collectionView
 5                    layout: (UICollectionViewLayout*)collectionViewLayout
 6 minimumLineSpacingForSectionAtIndex: (NSInteger)section{
 7     if (section == 0) {
 8         return 5.0f;
 9     }
10     return 20.0f;
11 }
4.设置Cell的左右边距,第一个Section的Cell左右边距是5.0f, 其余的为20.0f。
 1 /**
 2  * Section中每个Cell的左右边距
 3  */
 4 - (CGFloat)collectionView: (UICollectionView *)collectionView
 5                    layout: (UICollectionViewLayout*)collectionViewLayout
 6 minimumInteritemSpacingForSectionAtIndex: (NSInteger)section{
 7     if (section == 0) {
 8         return 5.0f;
 9     }
10     return 20.0f;
11 }
5.设置Header View和Footer View的大小的回调如下。
 1 /**
 2  * headerView的大小
 3  */
 4 - (CGSize)collectionView: (UICollectionView *)collectionView
 5                   layout: (UICollectionViewLayout*)collectionViewLayout
 6 referenceSizeForHeaderInSection: (NSInteger)section{
 7     return CGSizeMake(200, 50);
 8 }
 9
10 /**
11  * footerView的大小
12  */
13 - (CGSize)collectionView: (UICollectionView *)collectionView
14                   layout: (UICollectionViewLayout*)collectionViewLayout
15 referenceSizeForFooterInSection: (NSInteger)section{
16     return CGSizeMake(200, 50);
17 }
上面的方法就是UICollectionViewDelegateFlowLayout中所有的方法了,负责布局显示的。
四、UICollectionViewDelegate回调实现
UICollectionViewDelegate中的代理方法主要是负责Cell的交互的,比如是否高亮,是否选,是否可编辑等,接下来要为大家详细的介绍UICollectionViewDelegate中的代理方法。
1.为了这部分的效果展示,我们需要对Cell添加一些控件,并且设置其Highlight和Selected的一些状态。为Cell添加上ImageView, Cell的高亮状态和非高亮状态对应的ImageView上的图片是不同的。再添加一个Button, 并为Button设置Selected和Default状态下的图片,Button的选中和默认状态由Cell的选中状态来定。Cell中改变ImageView的图片的代码如下所示,函数传入的参数是当前Cell的高亮状态,根据高亮状态来设置ImageView上的Image。(有的小伙伴会问为什么给ImageView在Default状态和Highlight下设置不同的图片,然后直接改变ImageView的高亮状态即可。你可以试一下,达不到预期的效果)
 1 - (void) changeHighLightWithBool: (BOOL) highlight{
 2
 3     NSString *imageName = @"003.jpg";
 4
 5     if (highlight) {
 6         imageName = @"002.jpg";
 7     }
 8
 9     [_highlightImage setImage: [UIImage imageNamed:imageName]];
10 }
2.设置Cell可以高亮, 返回YES代表Cell可以高亮,返回NO代表Cell不可高亮。高亮就是触摸Cell时该Cell变为高亮状态,在代码中的反应就是Cell的Highligth属性变为YES。而触摸结束时,Cell的Highligth属性就变为NO。
 1 #pragma mark <UICollectionViewDelegate>
 2
 3 /**
 4  * Cell是否可以高亮
 5  */
 6 - (BOOL)collectionView: (UICollectionView *)collectionView
 7 shouldHighlightItemAtIndexPath: (NSIndexPath *)indexPath{
 8
 9     return YES;
10
11 }
3.下面这个方法是自己写的,用来在界面上反应Cell的高亮状态。 ImageView在当前Cell高亮状态下和非高亮状态下所加载的图片不同,所以可以看出Cell高亮和非高亮。
 1 /**
 2  * 根据高亮状态修改背景图片
 3  */
 4 - (void) changeHighlightCellWithIndexPaht: (NSIndexPath *) indexPath{
 5     //获取当前变化的Cell
 6     CollectionViewCell *currentHighlightCell = (CollectionViewCell *)[self.collectionView cellForItemAtIndexPath:indexPath];
 7
 8     [currentHighlightCell changeHighLightWithBool:currentHighlightCell.highlighted];
 9
10     if (currentHighlightCell.highlighted == YES){
11
12         NSLog(@"第%ld个Section上第%ld个Cell变为高亮",indexPath.section ,indexPath.row);
13         return;
14     }
15
16     if (currentHighlightCell.highlighted == NO){
17         NSLog(@"第%ld个Section上第%ld个Cell变为非高亮",indexPath.section ,indexPath.row);
18     }
19
20
21 }
4.Cell从非高亮变为高亮状态时回调用下面的方法,为了反映Cell的高亮状态,我们去改变一下Cell上ImageView的图片。
 1 /**
 2  * 如果Cell可以高亮,Cell变为高亮后调用该方法
 3  */
 4 - (void)collectionView: (UICollectionView *)collectionView
 5 didHighlightItemAtIndexPath: (NSIndexPath *)indexPath{
 6
 7     [self changeHighlightCellWithIndexPath:indexPath];
 8 }
 9
10
11 /**
12  * 如果Cell可以高亮,Cell从高亮变为非高亮调用该方法
13  */
14 - (void)collectionView: (UICollectionView *)collectionView
15 didUnhighlightItemAtIndexPath: (NSIndexPath *)indexPath{
16
17     [self changeHighlightCellWithIndexPath:indexPath];
18
19 }
5.设定Cell是否可选的回调如下所示,Cell被选中时该Cell的Selected为YES, 取消选中Selected为NO;
1 /**
2  * Cell是否可以选中
3  */
4 - (BOOL)collectionView:(UICollectionView *)collectionView shouldSelectItemAtIndexPath:(NSIndexPath *)indexPath{
5     return YES;
6 }
6. 如果想让你的Cell支持多选,就需要设定一下CollectionView的allowsMultipleSelection属性,下面的代码是在ViewDidLoad中添加的,如下所示:
1     //设置Cell多选
2     self.collectionView.allowsMultipleSelection = YES;
7.如果在多选状态下需要支持取消Cell的多选,那么就去执行下面的方法,并返回YES。就是支持在多选状态下取消选中状态。
1 /**
2  * Cell多选时是否支持取消功能
3  */
4 - (BOOL)collectionView:(UICollectionView *)collectionView shouldDeselectItemAtIndexPath:(NSIndexPath *)indexPath{
5     return YES;
6 }
8.下面这个方法是自己封装的,用来根据Cell的选中状态来改变Cell上Button的选中状态,具体代码实现如下:
 1 /**
 2  * Cell根据Cell选中状态来改变Cell上Button按钮的状态
 3  */
 4 - (void) changeSelectStateWithIndexPath: (NSIndexPath *) indexPath{
 5     //获取当前变化的Cell
 6     CollectionViewCell *currentSelecteCell = (CollectionViewCell *)[self.collectionView cellForItemAtIndexPath:indexPath];
 7
 8     currentSelecteCell.selectButton.selected = currentSelecteCell.selected;
 9
10     if (currentSelecteCell.selected == YES){
11         NSLog(@"第%ld个Section上第%ld个Cell被选中了",indexPath.section ,indexPath.row);
12         return;
13     }
14
15     if (currentSelecteCell.selected == NO){
16         //NSLog(@"第%ld个Section上第%ld个Cell取消选中",indexPath.section ,indexPath.row);
17     }
18
19 }
9.在Cell选中和取消选中时都会调用上面的方法来改变Button的选中状态,下面是Cell在选中时以及取消选中时所调用的方法:
 1 /**
 2  * Cell选中调用该方法
 3  */
 4 - (void)collectionView: (UICollectionView *)collectionView
 5 didSelectItemAtIndexPath: (NSIndexPath *)indexPath{
 6
 7     [self changeSelectStateWithIndexPath:indexPath];
 8 }
 9
10 /**
11  * Cell取消选中调用该方法
12  */
13 - (void)collectionView: (UICollectionView *)collectionView didDeselectItemAtIndexPath: (NSIndexPath *)indexPath{
14
15     [self changeSelectStateWithIndexPath:indexPath];
16 }
10.下方四个方法是Cell将要出现,Cell出现后,Supplementary View将要出现以及Supplementary View已经出现所调用的方法,具体信息请看下方代码实现:
 1 /**
 2  * Cell将要出现的时候调用该方法
 3  */
 4 - (void)collectionView:(UICollectionView *)collectionView willDisplayCell:(UICollectionViewCell *)cell forItemAtIndexPath:(NSIndexPath *)indexPath NS_AVAILABLE_IOS(8_0){
 5     NSLog(@"第%ld个Section上第%ld个Cell将要出现",indexPath.section ,indexPath.row);
 6 }
 7
 8 /**
 9  * Cell出现后调用该方法
10  */
11 - (void)collectionView:(UICollectionView *)collectionView didEndDisplayingCell:(UICollectionViewCell *)cell forItemAtIndexPath:(NSIndexPath *)indexPath{
12     NSLog(@"第%ld个Section上第%ld个Cell已经出现",indexPath.section ,indexPath.row);
13 }
14
15
16 /**
17  * headerView或者footerView将要出现的时候调用该方法
18  */
19 - (void)collectionView:(UICollectionView *)collectionView willDisplaySupplementaryView:(UICollectionReusableView *)view forElementKind:(NSString *)elementKind atIndexPath:(NSIndexPath *)indexPath NS_AVAILABLE_IOS(8_0){
20
21     NSLog(@"第%ld个Section上第%ld个扩展View将要出现",indexPath.section ,indexPath.row);
22
23 }
24
25 /**
26  * headerView或者footerView出现后调用该方法
27  */
28 - (void)collectionView:(UICollectionView *)collectionView didEndDisplayingSupplementaryView:(UICollectionReusableView *)view forElementOfKind:(NSString *)elementKind atIndexPath:(NSIndexPath *)indexPath{
29
30     NSLog(@"第%ld个Section上第%ld个扩展View已经出现",indexPath.section ,indexPath.row);
31
32 }
在UICollectionViewDelegate回调方法中还有三个回调方法是关于Cell编辑的,比如copy, past, cut等操作,具体代码就不在此赘述了。在Demo中给出了实现方式,主要涉及到UIPasteboard的操作,本篇博客的整体的Demo回分享到Github上,下方是Github上的分享链接,感兴趣的小伙伴可以进行Clone。
Github分享链接:https://github.com/lizelu/CollectionViewControllerDemo