1.SpringBoot概述
Spring 框架对于很多 Java 开发人员来说都不陌生。自从 2002 年发布以来,Spring 框架已经成为企业应用开发领域非常流行的基础框架。有大量的企业应用基于 Spring 框架来开发。Spring 框架包含几十个不同的子项目,涵盖应用开发的不同方面。如此多的子项目和组件,一方面方便了开发人员的使用,另外一个方面也带来了使用方面的问题。每个子项目都有一定的学习曲线。开发人员需要了解这些子项目和组件的具体细节,才能知道如何把这些子项目整合起来形成一个完整的解决方案。在如何使用这些组件上,并没有相关的最佳实践提供指导。对于新接触 Spring 框架的开发人员来说,并不知道如何更好的使用这些组件。Spring 框架的另外一个常见问题是要快速创建一个可以运行的应用比较麻烦。Spring Boot 是 Spring 框架的一个新的子项目,用于创建 Spring 4.0 项目。它的开发始于 2013 年。2014 年 4 月发布 1.0.0 版本。它可以自动配置 Spring 的各种组件,并不依赖代码生成和 XML 配置文件。Spring Boot 也提供了对于常见场景的推荐组件配置。Spring Boot 可以大大提升使用 Spring 框架时的开发效率
1.1简介:
- 使用Spring boot ,可以轻松的创建独立运行的程序,非常容易构建独立的服务组件,
- 是实现分布式架构、微服务架构利器。
- Spring boot简化了第三方包的引用,通过提供的starter,简化了依赖包的配置
1.2 Spring boot的优点
- 轻松创建独立的Spring应用程序。
- 内嵌Tomcat、jetty等web容器,不需要部署WAR文件。
- 提供一系列的“starter” 来简化的Maven配置,不需要添加很多依赖。
- 开箱即用,尽可能自动配置Spring。
1.3内置Servlet容器
| Name | Servlet Version | Java Version |
| Tomcat8 | 3.1 | Java7+ |
| Tomcat7 | 3.0 | Java6+ |
| Jetty9.3 | 3.1 | Java8+ |
| Jetty9.2 | 3.1 | Java7+ |
| Jetty8 | 3.0 | Java6+ |
2.SpringBoot入门案例
Step01:
解压一个maven3.5到本地
Step02:
修改maven的confsetting的本地仓库存储路径
Step03:
修改maven的confsetting 中远程仓库为阿里云的
Step04:
把Eclipse中的本地和全局的仓库文件都改成confsetting
Step05:
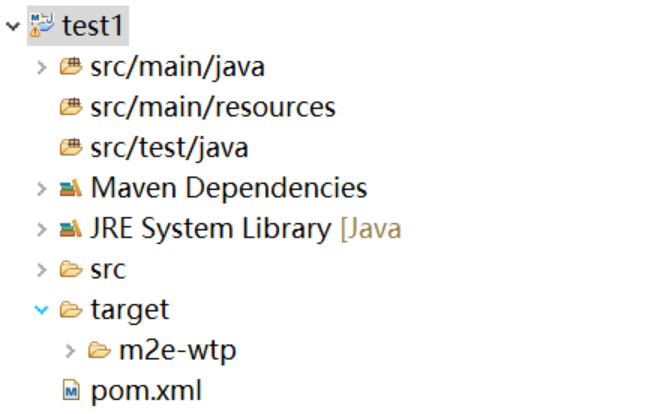
使用neon版本的eclipse创建一个 maven war项目(test1)
使用neon版本的eclipse创建一个 maven jar项目(test2)
这两种都可以,但一般都使用jar,因为spring是用于服务,不建议与jsp使用
Step06:
在pom.xml添加spring-boot-starter-web依赖,如图
<parent>
		<groupId>org.springframework.boot</groupId>
		<artifactId>spring-boot-starter-parent</artifactId>
		<version>1.5.9.RELEASE</version>
	</parent>
	<dependencies>
		<dependency>
			<groupId>org.springframework.boot</groupId>
			<artifactId>spring-boot-starter-web</artifactId>
		</dependency>
	</dependencies>
|
|
spring-boot-starter-parent作用 在pom.xml中引入spring-boot-start-parent,它可以提供dependency management,也就是说依赖管理,引入以后在申明其它dependency的时候就不需要version了,后面可以看到。 spring-boot-starter-web作用 springweb 核心组件 |
Step07:
写一个控制器如下,然后写一个main方法,把程序跑起来:
|
package com.gyf.web.controller; import org.springframework.boot.SpringApplication; import org.springframework.boot.autoconfigure.EnableAutoConfiguration; import org.springframework.web.bind.annotation.RequestMapping; import org.springframework.web.bind.annotation.ResponseBody; import org.springframework.web.bind.annotation.RestController; @RestController//相当于声明Controller - 提共restful 风格 @EnableAutoConfiguration//自动配置,不需要写spring的配置文件 class HelloController { @RequestMapping("/hello")//映射路径 @ResponseBody//响应体 public String hello() { return "Hello World"; } public static void main(String[] args) { //启动程序 SpringApplication.run(HelloController.class, args); } } |
Step08:
在浏览器中访问http://localhost:8080/hello
注:Maven项目上总有一个小红叉
解决决思路:
1、查看problems选项卡,里面有对问题的描述
2、工程右键->maven->update project(勾选Force Update)
3 SpringBoot的启动方式
第一种:
在控制器配置EnableAutoConfiguration并使用SpringApplication启动程序
第二种【常用】
创建一个App类,在App类中配置EnableAutoConfiguration和组件扫描ComponentScan,
然后使用SpringApplication启动程序,这样就可以访问多个Controller了.
|
创建一个User控制器 |
|
创建App类 |
4 Spring Boot依赖介绍
|
spring-boot-starter |
核心 POM,包含自动配置支持、日志库和对 YAML 配置文件的支持。 |
|
spring-boot-starter-amqp |
通过 spring-rabbit 支持 AMQP |
|
spring-boot-starter-aop |
包含 spring-aop 和 AspectJ 来支持面向切面编程(AOP)。 |
|
spring-boot-starter-batch |
支持 Spring Batch,包含 HSQLDB。 |
|
spring-boot-starter-data-jpa |
包含 spring-data-jpa、spring-orm 和 Hibernate 来支持 JPA。 |
|
spring-boot-starter-data-mongodb |
包含 spring-data-mongodb 来支持 MongoDB。 |
|
spring-boot-starter-data-rest |
通过 spring-data-rest-webmvc 支持以 REST 方式暴露 Spring Data 仓库。 |
|
spring-boot-starter-jdbc |
支持使用 JDBC 访问数据库 |
|
spring-boot-starter-security |
包含 spring-security。 |
|
spring-boot-starter-test |
包含常用的测试所需的依赖,如 JUnit、Hamcrest、Mockito 和 spring-test 等。 |
|
spring-boot-starter-velocity |
支持使用 Velocity 作为模板引擎。 |
|
spring-boot-starter-web |
支持 Web 应用开发,包含 Tomcat 和 spring-mvc。 |
|
spring-boot-starter-websocket |
支持使用 Tomcat 开发 WebSocket 应用。 |
|
spring-boot-starter-ws |
支持 Spring Web Services |
|
spring-boot-starter-actuator |
添加适用于生产环境的功能,如性能指标和监测等功能。 |
|
spring-boot-starter-remote-shell |
添加远程 SSH 支持 |
|
spring-boot-starter-jetty |
使用 Jetty 而不是默认的 Tomcat 作为应用服务器。 |
|
spring-boot-starter-log4j |
添加 Log4j 的支持 |
|
spring-boot-starter-logging |
使用 Spring Boot 默认的日志框架 Logback |
|
spring-boot-starter-tomcat |
使用 Spring Boot 默认的 Tomcat 作为应用服务器。 |
spring-boot-starter-web
- POM 文件中可以看到,应用所声明的依赖很少
- 只有一个“org.springframework.boot:spring-boot-starter-web”
- 而不是像其他 Spring 项目一样需要声明很多的依赖。
- 当使用 Maven 命令“mvn dependency:tree”来查看项目实际的依赖时
- 发现其中包含SpringMVC框架、SLF4J、Jackson、Hibernate Validator 和 Tomcat 等依赖。
- 这实际上 Spring 推荐的 Web 应用中使用的开源库的组合。
- EnableAutoConfiguration”注解的作用在于让 Spring Boot 根据应用所声明的依赖来对 Spring 框架进行自动配置,这就减少了开发人员的工作量。
- Spring Boot 推荐采用基于 Java 注解的配置方式,而不是传统的 XML。只需要在主配置 Java 类上添加“@EnableAutoConfiguration”注解就可以启用自动配置。
- 注解“@RestController”和”@RequestMapping”由 Spring MVC 提供,用来创建 REST 服务。这两个注解和 Spring Boot 本身并没有关系。
EnableAutoConfiguration
5 web开发
5.1静态资源的访问
在我们开发Web应用的时候,需要引用大量的js、css、图片等静态资源。
Spring Boot默认提供静态资源目录位置需置于classpath下,目录名需符合如下规则:
/static
/public
/resources
/META-INF/resources
举例:我们可以在src/main/resources/目录下创建static,在该位置放置一个图片文件。启动程序后,尝试访问http://localhost:8080/imgs/d.jpg。如能显示图片,配置成功。
5.2 自动返回json格式数据
5.3 全局捕获异常
@ExceptionHandler 表示拦截异常
@ControllerAdvice
controller 的一个辅助类,最常用的就是作为全局异常处理的切面类
可以指定扫描范围
约定了几种可行的返回值,如果是直接返回 model 类的话,需要使用
@ResponseBody 进行 json 转换
案例:
|
在com.gyf.web.exception包中定义一个全局异常类 |
|
@ControllerAdvice//切面 public class GlobalExceptionHandler { @ExceptionHandler(RuntimeException.class)//捕获运行时异常 @ResponseBody public Map<String,Object> exceptionHander(){ Map<String, Object> map = new HashMap<String, Object>(); map.put("errorCode", "101"); map.put("errorMsg", "系統错误!"); return map; } } |
|
在启动spring中,配置扫描包为com.gyf.web |
|
在某个映射的方法中添加个int i = 10/0的算术异常 |
|
|
|
访问上的个路径结果为 |
5.4 渲染Web页面
模板引擎
在动态HTML实现上Spring Boot依然可以完美胜任,并且提供了多种模板引擎的默认配置支持,所以在推荐的模板引擎下,我们可以很快的上手开发动态网站。
Spring Boot提供了默认配置的模板引擎主要有以下几种:
² Thymeleaf
² FreeMarker
² Velocity
² Groovy
² Mustache
Springboot+freemarker
Spring Boot建议使用这些模板引擎,避免使用JSP,若一定要使用JSP将无法实现Spring Boot的多种特性,具体可见后文:支持JSP的配置
当你使用上述模板引擎中的任何一个,它们默认的模板配置路径为:src/main/resources/templates。当然也可以修改这个路径,具体如何修改,可在后续各模板引擎的配置属性中查询并修改。
5.5 Freemarker的使用
第一步:
|
<!-- 引入freeMarker的依赖包. --> <dependency> <groupId>org.springframework.boot</groupId> <artifactId>spring-boot-starter-freemarker</artifactId> </dependency> |
第二步:
写个控制器,并返回些数据
第三步:创建.ftl模板文件
- 在src/main/resources/创建一个templates文件夹,后缀为*.ftl
- 掌握如何取值和判断
|
<!DOCTYPE html> <html> <head lang="en"> <meta charset="UTF-8" /> <title></title> </head> <body> 欢迎${loginname} <#if age <= 17>小哥 <#elseif age <= 30>先生 <#else>大叔 </#if>登录 <table border="1"> <tr> <td>ID</td> <td>名字</td> <td>性别</td> </tr> <#list stuList?sort_by("id")?reverse as stu> <tr> <td> ${stu.id}</td> <td> ${stu.name}</td> <td> ${stu.gender}</td> </tr> </#list> </table> </body> </html> |
5.6 SpringBoot 使用jsp
Step1:创建war maven工程
Step2:pom文件引入以下依赖
|
<parent> <groupId>org.springframework.boot</groupId> <artifactId>spring-boot-starter-parent</artifactId> <version>1.3.3.RELEASE</version> </parent> <dependencies> <!-- SpringBoot 核心组件 --> <dependency> <groupId>org.springframework.boot</groupId> <artifactId>spring-boot-starter-web</artifactId> </dependency> <dependency> <groupId>org.springframework.boot</groupId> <artifactId>spring-boot-starter-tomcat</artifactId> </dependency> <dependency> <groupId>org.apache.tomcat.embed</groupId> <artifactId>tomcat-embed-jasper</artifactId> </dependency> </dependencies> |
Step4:application.properties创建以下配置
|
spring.mvc.view.prefix=/WEB-INF/view/ spring.mvc.view.suffix=.jsp |
Step5:控制器代码
|
|
Step5:jsp
|
|
6 数据库访问
6.1 SpringBoot使用JDBC
Step1:添加依赖
|
<!-- JDBC --> <dependency> <groupId>org.springframework.boot</groupId> <artifactId>spring-boot-starter-jdbc</artifactId> </dependency> <!-- 数据库驱动 --> <dependency> <groupId>mysql</groupId> <artifactId>mysql-connector-java</artifactId> </dependency> <dependency> <groupId>org.springframework.boot</groupId> <artifactId>spring-boot-starter-test</artifactId> <scope>test</scope> </dependency> |
Step2:application.properties新增配置
|
#视图配置 spring.mvc.view.prefix=/WEB-INF/view/ spring.mvc.view.suffix=.jsp #数据库配置 spring.datasource.url=jdbc:mysql://localhost:3306/day12 spring.datasource.username=root spring.datasource.password=123456 spring.datasource.driver-class-name=com.mysql.jdbc.Driver |
Step3:Service
Step4:Controller
Step5:App
6.2 使用Mybatis
Ø 创建一个maven-jar新项目来讲解
Ø pom导入
|
<parent> <groupId>org.springframework.boot</groupId> <artifactId>spring-boot-starter-parent</artifactId> <version>1.3.2.RELEASE</version> <relativePath /> <!-- lookup parent from repository --> </parent> <dependencies> <dependency> <groupId>org.springframework.boot</groupId> <artifactId>spring-boot-starter</artifactId> </dependency> <!-- 单元测试 --> <dependency> <groupId>org.springframework.boot</groupId> <artifactId>spring-boot-starter-test</artifactId> <scope>test</scope> </dependency> <!-- mybaties --> <dependency> <groupId>org.mybatis.spring.boot</groupId> <artifactId>mybatis-spring-boot-starter</artifactId> <version>1.1.1</version> </dependency> <!-- mysql驱动 --> <dependency> <groupId>mysql</groupId> <artifactId>mysql-connector-java</artifactId> </dependency> <dependency> <groupId>org.springframework.boot</groupId> <artifactId>spring-boot-starter-web</artifactId> </dependency> </dependencies> |
Ø 数据库配置文件
Ø Mapper
|
|
|
换成xml形式,将这个放入Maper包中 |
|
<?xml version="1.0" encoding="UTF-8" ?>
|
|
注意这里需要在pom中添加下面代码 <build> |
Ø Controller
|
package com.gyf.controller; import org.springframework.beans.factory.annotation.Autowired; import org.springframework.stereotype.Controller; import org.springframework.web.bind.annotation.RequestMapping; import org.springframework.web.bind.annotation.ResponseBody; import com.gyf.mapper.UserMapper; import com.gyf.model.User; @Controller @RequestMapping("/user") public class UserController { @Autowired private UserMapper userMapper; @RequestMapping("/find") @ResponseBody public User find(String name){ return userMapper.findByName(name); } @ResponseBody @RequestMapping("/add") public int add(String name){ return userMapper.insert(name,"e10adc3949ba59abbe56e057f20f883e"); } } |
Ø App
|
package com.gyf.app; import org.mybatis.spring.annotation.MapperScan; import org.springframework.boot.SpringApplication; import org.springframework.boot.autoconfigure.EnableAutoConfiguration; import org.springframework.context.annotation.ComponentScan; @ComponentScan(basePackages={"com.gyf.controller"}) @MapperScan(basePackages={"com.gyf.mapper"})//扫描Mapper @EnableAutoConfiguration public class App { public static void main(String[] args) { SpringApplication.run(App.class, args); } } |
6.3 spring中使用的事务
只需要加个Transactional注解即可
6.4 配置多数据源
以前是在applicationContext.xml中配置数据源
通过注解来配置数据源
Ø 配置文件中新增两个数据源
|
spring.datasource.test1.driverClassName=com.mysql.jdbc.Driver spring.datasource.test1.url=jdbc:mysql://localhost:3306/test1?useUnicode=true&characterEncoding=utf-8 spring.datasource.test1.username=root spring.datasource.test1.password=123456 spring.datasource.test2.driverClassName=com.mysql.jdbc.Driver spring.datasource.test2.url=jdbc:mysql://localhost:3306/test2?useUnicode=true&characterEncoding=utf-8 spring.datasource.test2.username=root spring.datasource.test2.password=123456 |
|
use test1; CREATE table user( id int PRIMARY KEY AUTO_INCREMENT, username VARCHAR(50), password VARCHAR(50), email VARCHAR(50), birthday TIMESTAMP ); use test2; CREATE table customer( id int PRIMARY KEY AUTO_INCREMENT, name VARCHAR(50), tel VARCHAR(50) ); |
Ø 写两个数据源配置
|
package com.gyf.datasource; @Configuration//注解到springboot容器中 @MapperScan(basePackages="com.gyf.test1.mapper",sqlSessionFactoryRef="test1SqlSessionFactory") public class DataSource01 { /** * @return 返回test1数据库的数据源 */ @Bean(name="test1DataSource") @Primary//主数据源 @ConfigurationProperties(prefix="spring.datasource.test1") public DataSource dateSource(){ return DataSourceBuilder.create().build(); } /** * @return 返回test1数据库的会话工厂 */ @Bean(name = "test1SqlSessionFactory") public SqlSessionFactory sqlSessionFactory(@Qualifier("test1DataSource") DataSource ds) throws Exception{ SqlSessionFactoryBean bean = new SqlSessionFactoryBean(); bean.setDataSource(ds); return bean.getObject(); } /** * @return 返回test1数据库的事务 */ @Bean(name = "test1TransactionManager") @Primary public DataSourceTransactionManager transactionManager(@Qualifier("test1DataSource") DataSource dataSource) { return new DataSourceTransactionManager(dataSource); } /** * @return 返回test1数据库的会话模版 */ @Bean(name = "test1SqlSessionTemplate") public SqlSessionTemplate sqlSessionTemplate( @Qualifier("test1SqlSessionFactory") SqlSessionFactory sqlSessionFactory) throws Exception { return new SqlSessionTemplate(sqlSessionFactory); } } |
|
package com.gyf.datasource; @Configuration//注解到springboot容器中 @MapperScan(basePackages="com.gyf.test2.mapper",sqlSessionFactoryRef="test2SqlSessionFactory") public class DataSource02 { /** * @return 返回test2数据库的数据源 */ @Bean(name="test2DataSource") @ConfigurationProperties(prefix="spring.datasource.test2") public DataSource dateSource(){ return DataSourceBuilder.create().build(); } /** * @return 返回test2数据库的会话工厂 */ @Bean(name = "test2SqlSessionFactory") public SqlSessionFactory sqlSessionFactory(@Qualifier("test2DataSource") DataSource ds) throws Exception{ SqlSessionFactoryBean bean = new SqlSessionFactoryBean(); bean.setDataSource(ds); return bean.getObject(); } /** * @return 返回test2数据库的事务 */ @Bean(name = "test2TransactionManager") public DataSourceTransactionManager transactionManager(@Qualifier("test2DataSource") DataSource dataSource) { return new DataSourceTransactionManager(dataSource); } /** * @return 返回test2数据库的会话模版 */ @Bean(name = "test2SqlSessionTemplate") public SqlSessionTemplate sqlSessionTemplate( @Qualifier("test2SqlSessionFactory") SqlSessionFactory sqlSessionFactory) throws Exception { return new SqlSessionTemplate(sqlSessionFactory); } } |
Ø test1 Mapper&service
Ø test2 mapper & service
Ø Controller
Ø App
6.5 多数据源问题
|
最后一个可以插入一条数据 原是是Transactoinal的事务只针对userMapper有效 |
6.6 springboot中的多事务管理
- 使用springboot+jta+atomikos 分布式事物管理解决方案
Ø 添加jta事务依赖
|
<dependency> <groupId>org.springframework.boot</groupId> <artifactId>spring-boot-starter-jta-atomikos</artifactId> </dependency> |
Ø 修改数据库连接配置数据
|
# Mysql 1 mysql.datasource.test1.url = jdbc:mysql://localhost:3306/test1?useUnicode=true&characterEncoding=utf-8 mysql.datasource.test1.username = root mysql.datasource.test1.password = 123456 mysql.datasource.test1.minPoolSize = 3 mysql.datasource.test1.maxPoolSize = 25 mysql.datasource.test1.maxLifetime = 20000 mysql.datasource.test1.borrowConnectionTimeout = 30 mysql.datasource.test1.loginTimeout = 30 mysql.datasource.test1.maintenanceInterval = 60 mysql.datasource.test1.maxIdleTime = 60 mysql.datasource.test1.testQuery = select 1 # Mysql 2 mysql.datasource.test2.url =jdbc:mysql://localhost:3306/test2?useUnicode=true&characterEncoding=utf-8 mysql.datasource.test2.username =root mysql.datasource.test2.password =123456 mysql.datasource.test2.minPoolSize = 3 mysql.datasource.test2.maxPoolSize = 25 mysql.datasource.test2.maxLifetime = 20000 mysql.datasource.test2.borrowConnectionTimeout = 30 mysql.datasource.test2.loginTimeout = 30 mysql.datasource.test2.maintenanceInterval = 60 mysql.datasource.test2.maxIdleTime = 60 mysql.datasource.test2.testQuery = select 1 |
Ø 添加2个配置模型
- 模型放在com.gyf.dbconfig包
|
@ConfigurationProperties("mysql.datasource.test1") public class DBConfig1 { private String url; private String username; private String password; private int minPoolSize; private int maxPoolSize; private int maxLifetime; private int borrowConnectionTimeout; private int loginTimeout; private int maintenanceInterval; private int maxIdleTime; private String testQuery; |
|
@ConfigurationProperties("mysql.datasource.test2") public class DBConfig2 { private String url; private String username; private String password; private int minPoolSize; private int maxPoolSize; private int maxLifetime; private int borrowConnectionTimeout; private int loginTimeout; private int maintenanceInterval; private int maxIdleTime; private String testQuery; |
Ø 重定两个数据源配置
|
package com.gyf.datasource; import java.sql.SQLException; import javax.sql.DataSource; import org.apache.ibatis.session.SqlSessionFactory; import org.mybatis.spring.SqlSessionFactoryBean; import org.mybatis.spring.SqlSessionTemplate; import org.mybatis.spring.annotation.MapperScan; import org.springframework.beans.factory.annotation.Qualifier; import org.springframework.boot.autoconfigure.jdbc.DataSourceBuilder; import org.springframework.boot.context.properties.ConfigurationProperties; import org.springframework.context.annotation.Bean; import org.springframework.context.annotation.Configuration; import org.springframework.context.annotation.Primary; import org.springframework.jdbc.datasource.DataSourceTransactionManager; import com.atomikos.jdbc.AtomikosDataSourceBean; import com.gyf.dbconfig.DBConfig1; import com.mysql.jdbc.jdbc2.optional.MysqlXADataSource; @Configuration//注解到springboot容器中 @MapperScan(basePackages="com.gyf.test1.mapper",sqlSessionFactoryRef="test1SqlSessionFactory") public class DataSource01 { // 配置数据源 @Primary @Bean(name = "test1DataSource") public DataSource testDataSource(DBConfig1 testConfig) throws SQLException { MysqlXADataSource mysqlXaDataSource = new MysqlXADataSource(); mysqlXaDataSource.setUrl(testConfig.getUrl()); mysqlXaDataSource.setPinGlobalTxToPhysicalConnection(true); mysqlXaDataSource.setPassword(testConfig.getPassword()); mysqlXaDataSource.setUser(testConfig.getUsername()); mysqlXaDataSource.setPinGlobalTxToPhysicalConnection(true); AtomikosDataSourceBean xaDataSource = new AtomikosDataSourceBean(); xaDataSource.setXaDataSource(mysqlXaDataSource); xaDataSource.setUniqueResourceName("test1DataSource"); xaDataSource.setMinPoolSize(testConfig.getMinPoolSize()); xaDataSource.setMaxPoolSize(testConfig.getMaxPoolSize()); xaDataSource.setMaxLifetime(testConfig.getMaxLifetime()); xaDataSource.setBorrowConnectionTimeout(testConfig.getBorrowConnectionTimeout()); xaDataSource.setLoginTimeout(testConfig.getLoginTimeout()); xaDataSource.setMaintenanceInterval(testConfig.getMaintenanceInterval()); xaDataSource.setMaxIdleTime(testConfig.getMaxIdleTime()); xaDataSource.setTestQuery(testConfig.getTestQuery()); return xaDataSource; } @Bean(name = "test1SqlSessionFactory") public SqlSessionFactory testSqlSessionFactory(@Qualifier("test1DataSource") DataSource dataSource) throws Exception { SqlSessionFactoryBean bean = new SqlSessionFactoryBean(); bean.setDataSource(dataSource); return bean.getObject(); } @Bean(name = "test1SqlSessionTemplate") public SqlSessionTemplate testSqlSessionTemplate( @Qualifier("test1SqlSessionFactory") SqlSessionFactory sqlSessionFactory) throws Exception { return new SqlSessionTemplate(sqlSessionFactory); } } |
|
package com.gyf.datasource; import java.sql.SQLException; import javax.sql.DataSource; import org.apache.ibatis.session.SqlSessionFactory; import org.mybatis.spring.SqlSessionFactoryBean; import org.mybatis.spring.SqlSessionTemplate; import org.mybatis.spring.annotation.MapperScan; import org.springframework.beans.factory.annotation.Qualifier; import org.springframework.context.annotation.Bean; import org.springframework.context.annotation.Configuration; import com.atomikos.jdbc.AtomikosDataSourceBean; import com.gyf.dbconfig.DBConfig2; import com.mysql.jdbc.jdbc2.optional.MysqlXADataSource; @Configuration//注解到springboot容器中 @MapperScan(basePackages="com.gyf.test2.mapper",sqlSessionFactoryRef="test2SqlSessionFactory") public class DataSource02 { // 配置数据源 @Bean(name = "test2DataSource") public DataSource testDataSource(DBConfig2 testConfig) throws SQLException { MysqlXADataSource mysqlXaDataSource = new MysqlXADataSource(); mysqlXaDataSource.setUrl(testConfig.getUrl()); mysqlXaDataSource.setPinGlobalTxToPhysicalConnection(true); mysqlXaDataSource.setPassword(testConfig.getPassword()); mysqlXaDataSource.setUser(testConfig.getUsername()); mysqlXaDataSource.setPinGlobalTxToPhysicalConnection(true); AtomikosDataSourceBean xaDataSource = new AtomikosDataSourceBean(); xaDataSource.setXaDataSource(mysqlXaDataSource); xaDataSource.setUniqueResourceName("test2DataSource"); xaDataSource.setMinPoolSize(testConfig.getMinPoolSize()); xaDataSource.setMaxPoolSize(testConfig.getMaxPoolSize()); xaDataSource.setMaxLifetime(testConfig.getMaxLifetime()); xaDataSource.setBorrowConnectionTimeout(testConfig.getBorrowConnectionTimeout()); xaDataSource.setLoginTimeout(testConfig.getLoginTimeout()); xaDataSource.setMaintenanceInterval(testConfig.getMaintenanceInterval()); xaDataSource.setMaxIdleTime(testConfig.getMaxIdleTime()); xaDataSource.setTestQuery(testConfig.getTestQuery()); return xaDataSource; } @Bean(name = "test2SqlSessionFactory") public SqlSessionFactory testSqlSessionFactory(@Qualifier("test2DataSource") DataSource dataSource) throws Exception { SqlSessionFactoryBean bean = new SqlSessionFactoryBean(); bean.setDataSource(dataSource); return bean.getObject(); } @Bean(name = "test2SqlSessionTemplate") public SqlSessionTemplate testSqlSessionTemplate( @Qualifier("test2SqlSessionFactory") SqlSessionFactory sqlSessionFactory) throws Exception { return new SqlSessionTemplate(sqlSessionFactory); } } |
Ø App
7 整合Log4j
7.1 导入Log4j属性文件
log4j.properties
注意,复制时要把每一行后面的空格去除
|
log4j.rootLogger=INFO,Console,File log4j.appender.Console=org.apache.log4j.ConsoleAppender log4j.appender.Console.Target=System.out log4j.appender.Console.layout = org.apache.log4j.PatternLayout log4j.appender.Console.layout.ConversionPattern=[%p] [%d{yyyy-MM-dd HH:mm:ss}][%c - %L]%m%n log4j.appender.File = org.apache.log4j.RollingFileAppender log4j.appender.File.File = C:/Users/10301/Desktop/test/logs/info/info.log log4j.appender.File.MaxFileSize = 10MB log4j.appender.File.Threshold = ALL log4j.appender.File.layout = org.apache.log4j.PatternLayout log4j.appender.File.layout.ConversionPattern =[%p] [%d{yyyy-MM-dd HH:mm:ss}][%c - %L]%m%n |
7.2 pom.xml
- 去除springboot的logging,添加log4j,因为自带的logging不启效果
- springboot下的Log4j的版本最新1.3.8,如果你的springboot的parent版本过高,那在在添加log4j自己版本
7.3 测试
8. 使用AOP统一处理Web请求日志
Step01
|
<!-- AOP --> <dependency> <groupId>org.springframework.boot</groupId> <artifactId>spring-boot-starter-aop</artifactId> </dependency> |
Step02:写个切面类
|
package com.gyf.aop; import java.util.Enumeration; import javax.servlet.http.HttpServletRequest; import org.apache.log4j.Logger; import org.aspectj.lang.JoinPoint; import org.aspectj.lang.annotation.AfterReturning; import org.aspectj.lang.annotation.Aspect; import org.aspectj.lang.annotation.Before; import org.aspectj.lang.annotation.Pointcut; import org.springframework.stereotype.Component; import org.springframework.web.context.request.RequestContextHolder; import org.springframework.web.context.request.ServletRequestAttributes; @Aspect @Component public class WebLogAspect { private Logger logger = Logger.getLogger(getClass()); @Pointcut("execution(public * com.gyf.controller..*.*(..))") public void webLog() { } @Before("webLog()") public void doBefore(JoinPoint joinPoint) throws Throwable { // 接收到请求,记录请求内容 ServletRequestAttributes attributes = (ServletRequestAttributes) RequestContextHolder.getRequestAttributes(); HttpServletRequest request = attributes.getRequest(); // 记录下请求内容 logger.info("---------------request----------------"); logger.info("URL : " + request.getRequestURL().toString()); logger.info("HTTP_METHOD : " + request.getMethod()); logger.info("IP : " + request.getRemoteAddr()); Enumeration<String> enu = request.getParameterNames(); while (enu.hasMoreElements()) { String name = (String) enu.nextElement(); logger.info("name:" + name + "value" + request.getParameter(name)); } } @AfterReturning(returning = "ret", pointcut = "webLog()") public void doAfterReturning(Object ret) throws Throwable { logger.info("---------------response----------------"); // 处理完请求,返回内容 logger.info("RESPONSE : " + ret); } } |
Step3:App配置注解
9. 修改端口号
在application.properties中
server.port=8888
server.context-path=/test
在application.yml中
注意冒号后的只能用空格,不能用tab
|
server: port: 8090 context-path: /test-yml |
Springboot 打包部署
- 先打成war包或者jar包
- 使用java -jar test3-0.0.1-SNAPSHOT.jar 运行即可
打包时添加下面依赖代码
|
<build> <plugins> <plugin> <groupId>org.apache.maven.plugins</groupId> <artifactId>maven-compiler-plugin</artifactId> <configuration> <source>1.8</source> <target>1.8</target> <encoding>utf-8</encoding> </configuration> </plugin> <plugin> <groupId>org.springframework.boot</groupId> <artifactId>spring-boot-maven-plugin</artifactId> <configuration> <mainClass>com.gyf.app.App</mainClass> </configuration> <executions> <execution> <goals> <goal>repackage</goal> </goals> </execution> </executions> </plugin> </plugins> </build> |
在终端要停止服务器时,使用Ctrl + C,直接点x,会端口没有关掉