(1)缓存介绍
1.代理服务器端缓存作用
减少后端压力,提高网站并发延时
2.缓存常见类型
服务器端缓存:代理缓存,获取服务器端内容进行缓存
浏览器端缓存
3.nginx代理缓存:proxy_cache
(2)代理缓存配置
1.缓存配置
#vim /usr/local/nginx/conf/nginx.conf
upstream node {
	server 192.9.191.31:8081;
	server 192.9.191.31:8082;
}
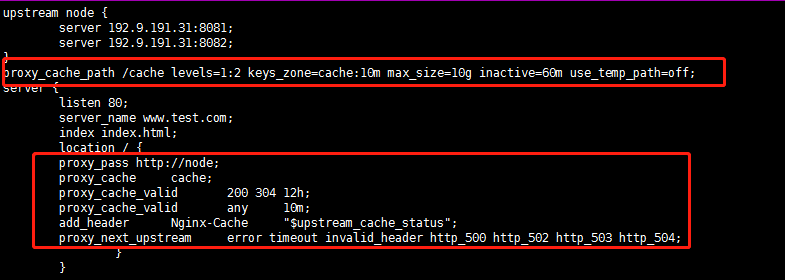
proxy_cache_path /cache levels=1:2 keys_zone=cache:10m max_size=10g inactive=60m use_temp_path=off;
server {
	listen 80;
	server_name www.test.com;
	index index.html;
	location / {
	proxy_pass http://node;
	proxy_cache	cache;
	proxy_cache_valid	200 304 12h;
	proxy_cache_valid	any	10m;
	add_header	Nginx-Cache	"$upstream_cache_status";
	proxy_next_upstream	error timeout invalid_header http_500 http_502 http_503 http_504;
		}
	}
2.参数详解
proxy_cache_path /soft/cache levels=1:2 keys_zone=cache:10m max_size=10g inactive=60m use_temp_path=off;
	#proxy_cache	//存放缓存临时文件
	#levels			//按照两层目录分级
	#keys_zone		//开辟空间名,10m:开辟空间大小,1m可存放8000key
	#max_size		//控制最大大小,超过后Nginx会启用淘汰规则
	#inactive		//60分钟没有被访问缓存会被清理
	#use_temp_path	//临时文件,会影响性能,建议关闭
proxy_cache	cache;
proxy_cache_valid	200 304 12h;
proxy_cache_valid	any	10m;
add_header	Nginx-Cache	"$upstream_cache_status";
proxy_next_upstream	error timeout invalid_header http_500 http_502 http_503 http_504;
	#proxy_cache			//开启缓存
	#proxy_cache_valid		//状态码200|304的过期为12h,其余状态码10分钟过期
	#proxy_cache_key		//缓存key
	#add_header				//增加头信息,观察客户端respoce是否命中
	#proxy_next_upstream 	//出现502-504或错误,会跳过此台服务器访问下一台服务器

3.创建缓存目录
mkdir /cache
nginx -t
nginx -s reload
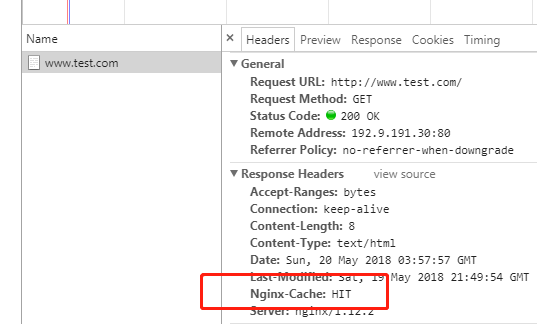
4.验证


(3)清除缓存
1.rm删除已缓存的数据
rm -rf /cache/*
2.通过ngx_cache_purge扩展模块清理,需要编译安装nginx
(4)部分页面不缓存
1.nginx配置
#vim /usr/local/nginx/conf/nginx.conf
upstream node {
        server 192.9.191.31:8081;
        server 192.9.191.31:8082;
}
proxy_cache_path /cache levels=1:2 keys_zone=cache:10m max_size=10g inactive=60m use_temp_path=off;
server {
        listen 80;
        server_name www.test.com;
        index index.html;
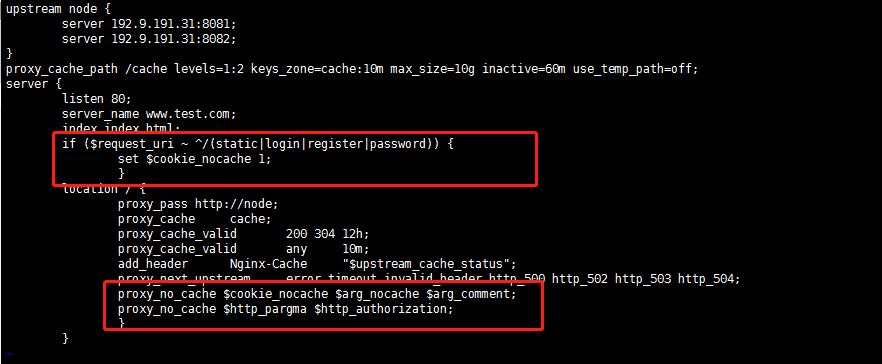
        if ($request_uri ~ ^/(static|login|register|password)) {
                set $cookie_nocache 1;
                }
        location / {
                proxy_pass http://node;
                proxy_cache     cache;
                proxy_cache_valid       200 304 12h;
                proxy_cache_valid       any     10m;
                add_header      Nginx-Cache     "$upstream_cache_status";
                proxy_next_upstream     error timeout invalid_header http_500 http_502 http_503 http_504;
                proxy_no_cache $cookie_nocache $arg_nocache $arg_comment;
                proxy_no_cache $http_pargma $http_authorization;
                }
        }

2.重启加验证
nginx -t
nginx -s reload
两次都没有命中

(4)统计日志命中率
1.日志格式:变量$upstream_cache_status"
#vim /usr/local/nginx/conf/nginx.conf
log_format  main  '$remote_addr - $remote_user [$time_local] "$request" '
                  '$status $body_bytes_sent "$http_referer" '
                  '"$http_user_agent" "$http_x_forwarded_for" "$upstream_cache_status"';
access_log logs/access.log main;
error_log logs/error.log;
2.查看日志

3.统计日志命中率加入到计划任务中这里省略
awk '{if($NF = "HIT"){count++;}} END{printf "%.2f%",count/NR*100}' /usr/local/nginx/logs/access.log