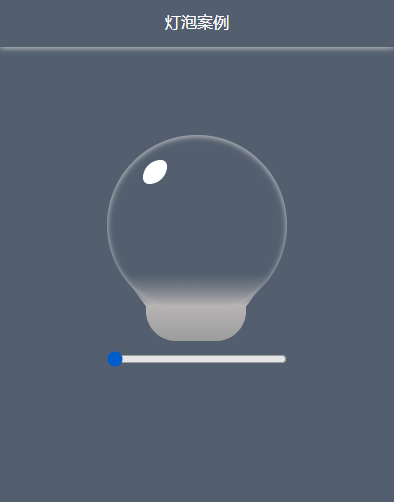
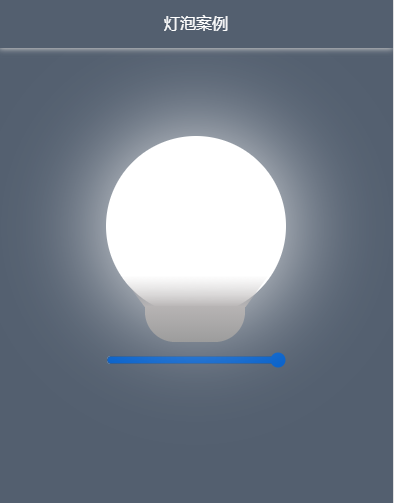
两个标签实现灯泡


关键思路
UI思路:将灯泡拆解成两部分,头部一个大圆形表示玻壳;底部矩形设置半边圆角表示金属壳;另外高光和过渡段可以用::before/::after绘制。
交互思路:关闭状态玻壳透明,阴影内置勾勒出轮廓;开启状态玻壳背景设置为白色,阴影外置形成白光扩散效果。当然可以设置亮度控制开关去控制白底透明度与阴影扩散度。
关键代码
HTML代码很简单,就是两个标签。外层再添加一个容器标签设置布局属性构成完整组件。
<div class="na-light-card">
    <div class="na-light-card-header"></div>
    <div class="na-light-card-bottom"></div>
    <input id="lightRange" type="range" style="100%; margin-top: 36px;">
</div>
玻壳绘制。此处添加了perspective属性,子元素矩形使用transform: rotateX(-45deg);转变成梯形必须设置它。
.na-light-card-header {
    position: relative;
     180px;
    height: 180px;
    background: rgba(255, 255, 255, 0);
    box-shadow: 0 1px 6px #ccc inset;
    border-radius: 50%;
    perspective: 150;
    -webkit-perspective: 150;
}
金属壳绘制。我这里背景设置成渐变色,期望金属壳与过渡层能有较平滑的过渡效果。
.na-light-card-bottom {
    height: 36px;
     100px;
    position: absolute;
    top: 170px;
    left: 39px;
    border-bottom-right-radius: 30px;
    border-bottom-left-radius: 30px;
    background: linear-gradient(#b7b4b4, #9c9c9c);
}
过渡层。利用头部的伪元素绘制成梯形放在玻壳与金属壳之间形成过渡。过渡层后续可设置合适的渐变背景优化出光影效果。
.na-light-card-header::before {
    content: '';
    position: absolute;
     120px;
    height: 80px;
    transform: rotateX(-45deg);
    -webkit-transform: rotateX(-45deg);
    top: 118px;
    left: 29px;
    background: linear-gradient(transparent, #b7b4b4);
}
高光。椭圆,矩形设置两对不同值的圆角即可。
.na-light-card-header::after {
    content: '';
    position: absolute;
     24px;
    height: 24px;
    background: #fff;
    border-top-left-radius: 36px;
    border-top-right-radius: 12px;
    border-bottom-right-radius: 36px;
    border-bottom-left-radius: 12px;
    top: 25px;
    left: 36px;
}
交互脚本。
$('#lightRange').on('touchmove', function() {
    //开启状态
    $('.na-light-card-header').css({
        'background': 'rgba(255, 255, 255, ' + $(this).val() + '%)',
	'box-shadow': '0 1px ' + $(this).val() +'px #fff'
    });
    // TODO 添加关闭状态
})
结束语
这个案例还有一些进步空间,比如过渡层与上下两部分衔接色有瑕疵、过渡层根据光源出现一些阴影变化、金属壳的螺纹等等。