1、技术:springboot、nginx;
练习springboot前后端分离,且用nginx代理部署,实现前后端分离。
控制层添加json数据,并返回json.
@RestController
@RequestMapping("/student")
public class StudentController {

    @RequestMapping("/studentById")
    public JSONObject selectStudentById(String id, HttpServletRequest request, HttpServletResponse response) {
        response.setHeader("Access-Control-Allow-Origin", "*");
        response.setHeader("Cache-Control", "no-cache");

        /*
        {
          "name":"smith".
          "age":30,
          "sex":"男"
           }
      */

        JSONObject jsonObject = new JSONObject();
        jsonObject.put("name","smith");
        jsonObject.put("age","30");
        jsonObject.put("sex","男");

        return jsonObject;
    }

}
2、安装nginx。(过程省略)
2.1 在D:xxxx ginx-1.18.0html 这个文件下添加一个页面 users.html
<!DOCTYPE html>
<html>
<head>
  <meta charset="utf-8">
  <meta name="viewport" content="width=device-width, user-scalable=no, initial-scale=1.0, maximum-scale=1.0, minimum-scale=1.0">
  <title>layui在线调试</title>
  <style>
    body{margin: 10px;}
    .demo-carousel{height: 200px; line-height: 200px; text-align: center;}
  </style>
  <script src="/js/jquery.js"></script>
</head>
<body>

<button id="btn" onclick="threeFn()">点我</button>
<h3 id="aaa"></h3>

<script>

    function threeFn(){
        alert("请求了!!!");
        //向服务端发送删除指令
        $.ajax({
            type: "get",
            url: "/oa/student/studentById",
            dataType:'json',
            success: function (data) {
                alert(data.name);
          //取json中的name,打印在页面中
          document.getElementById("aaa").innerHTML=data.name;
            }
        });
        }
</script>
</body>
</html>
2.2 nginx的配置文件nginx.conf配置
#配置文件读取根路径下的静态文件 root后面的html,意思是nginx下的html文件夹
location / {
            root   html;
            index  index.html index.htm;
        }
# 配置代理地址 注意:oa是代表下面的 IP+port,请求url如页面中所示 port则是springboot中设置的或者默认的

location /oa/ {
               proxy_pass http://127.0.0.1:8384/;  #注意:使用代理地址时末尾记得加上斜杠"/"。
        }
2.3 负载均衡配置
http {

       #服务器组名称
       #不同IP相同端口也可以,相同IP不同端口也可以。
       upstream mysvr {
          #weigth参数表示权值,权值越高被分配到的几率越大
          ip_hash;
          #server 192.168.84.130:8384 weight=1;
          server 127.0.0.1:8385 weight=5;
          server 127.0.0.1:8384 weight=1;
       }
       server {
            listen       80;
            server_name  localhost;

        location / {
            root   html;
            index  index.html index.htm;
        }

        location /oa/ {  #oa这个名字是需要在页面url配置的。
              #proxy_pass http://127.0.0.1:8384/;  #注意:使用代理地址时末尾记得加上斜杠"/"。
              # http://服务器组名称/; 切记 / 不能丢。
              proxy_pass http://mysvr/;
        }
    }
}
3、启动nginx,浏览器输入http://127.0.0.1/users.html,如图所示
点击按钮
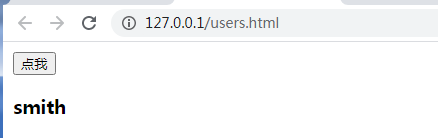
nginx代理成功。。。
一步步继续深入学习。